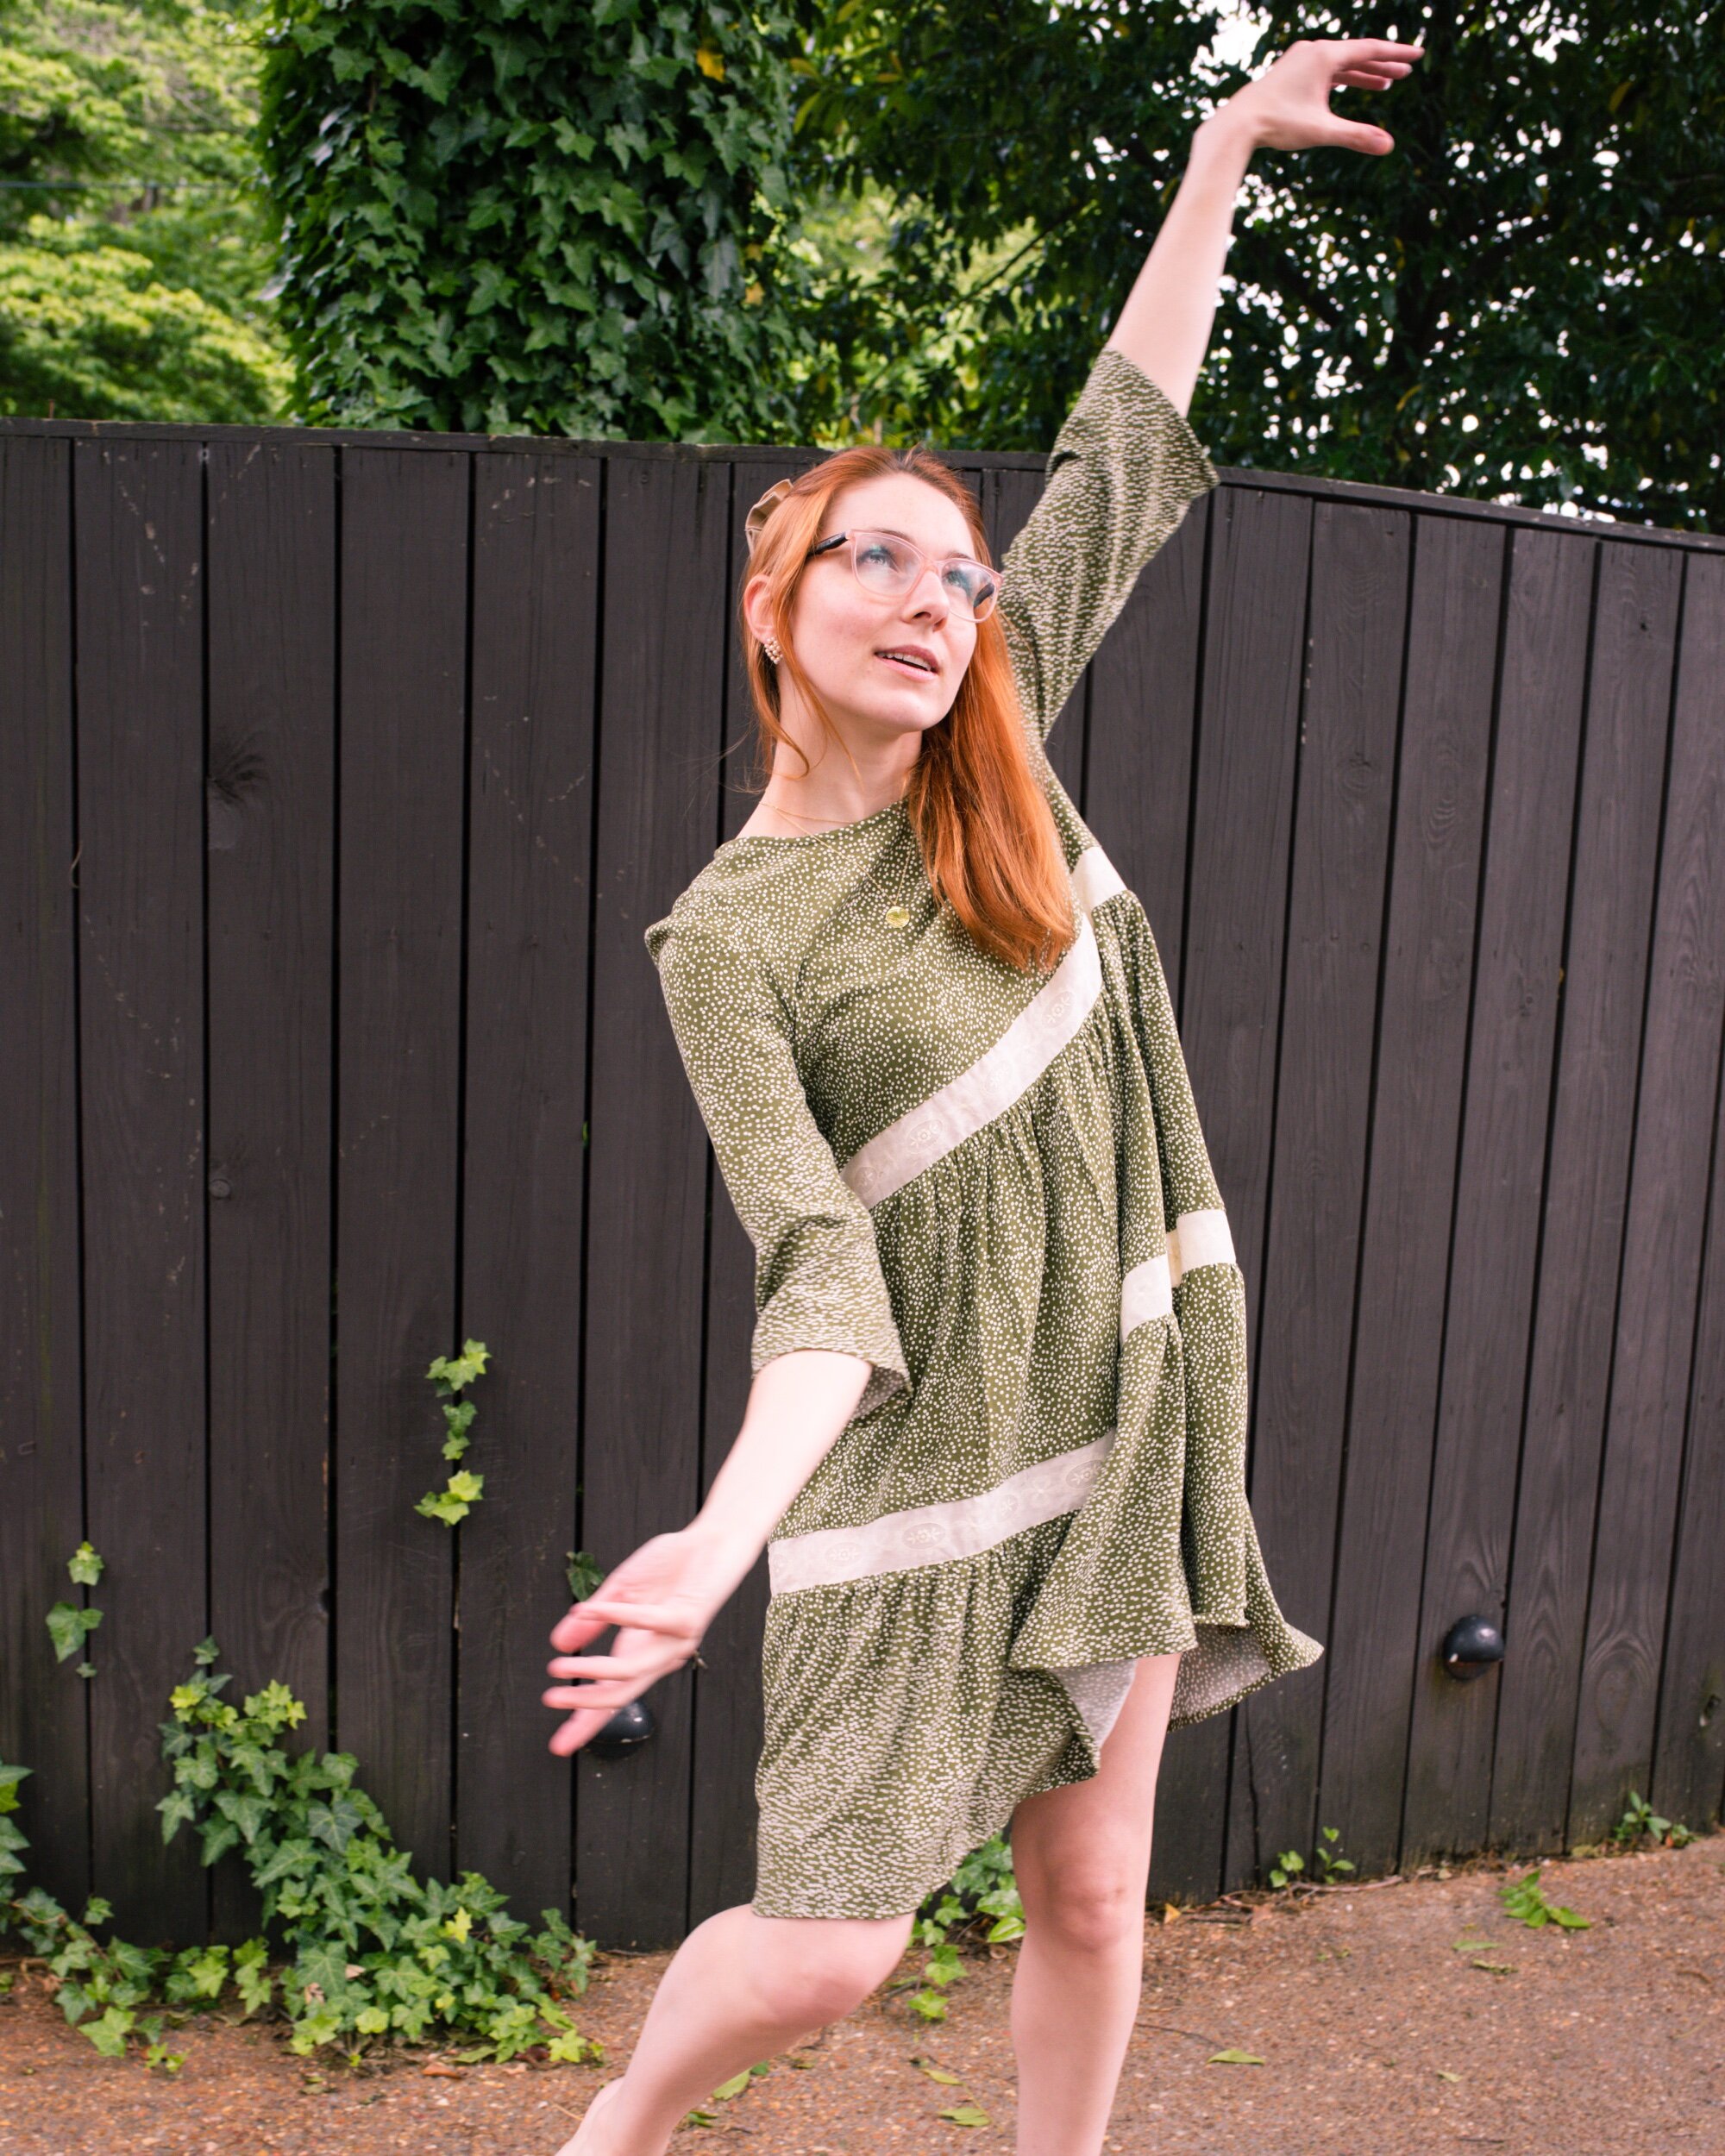
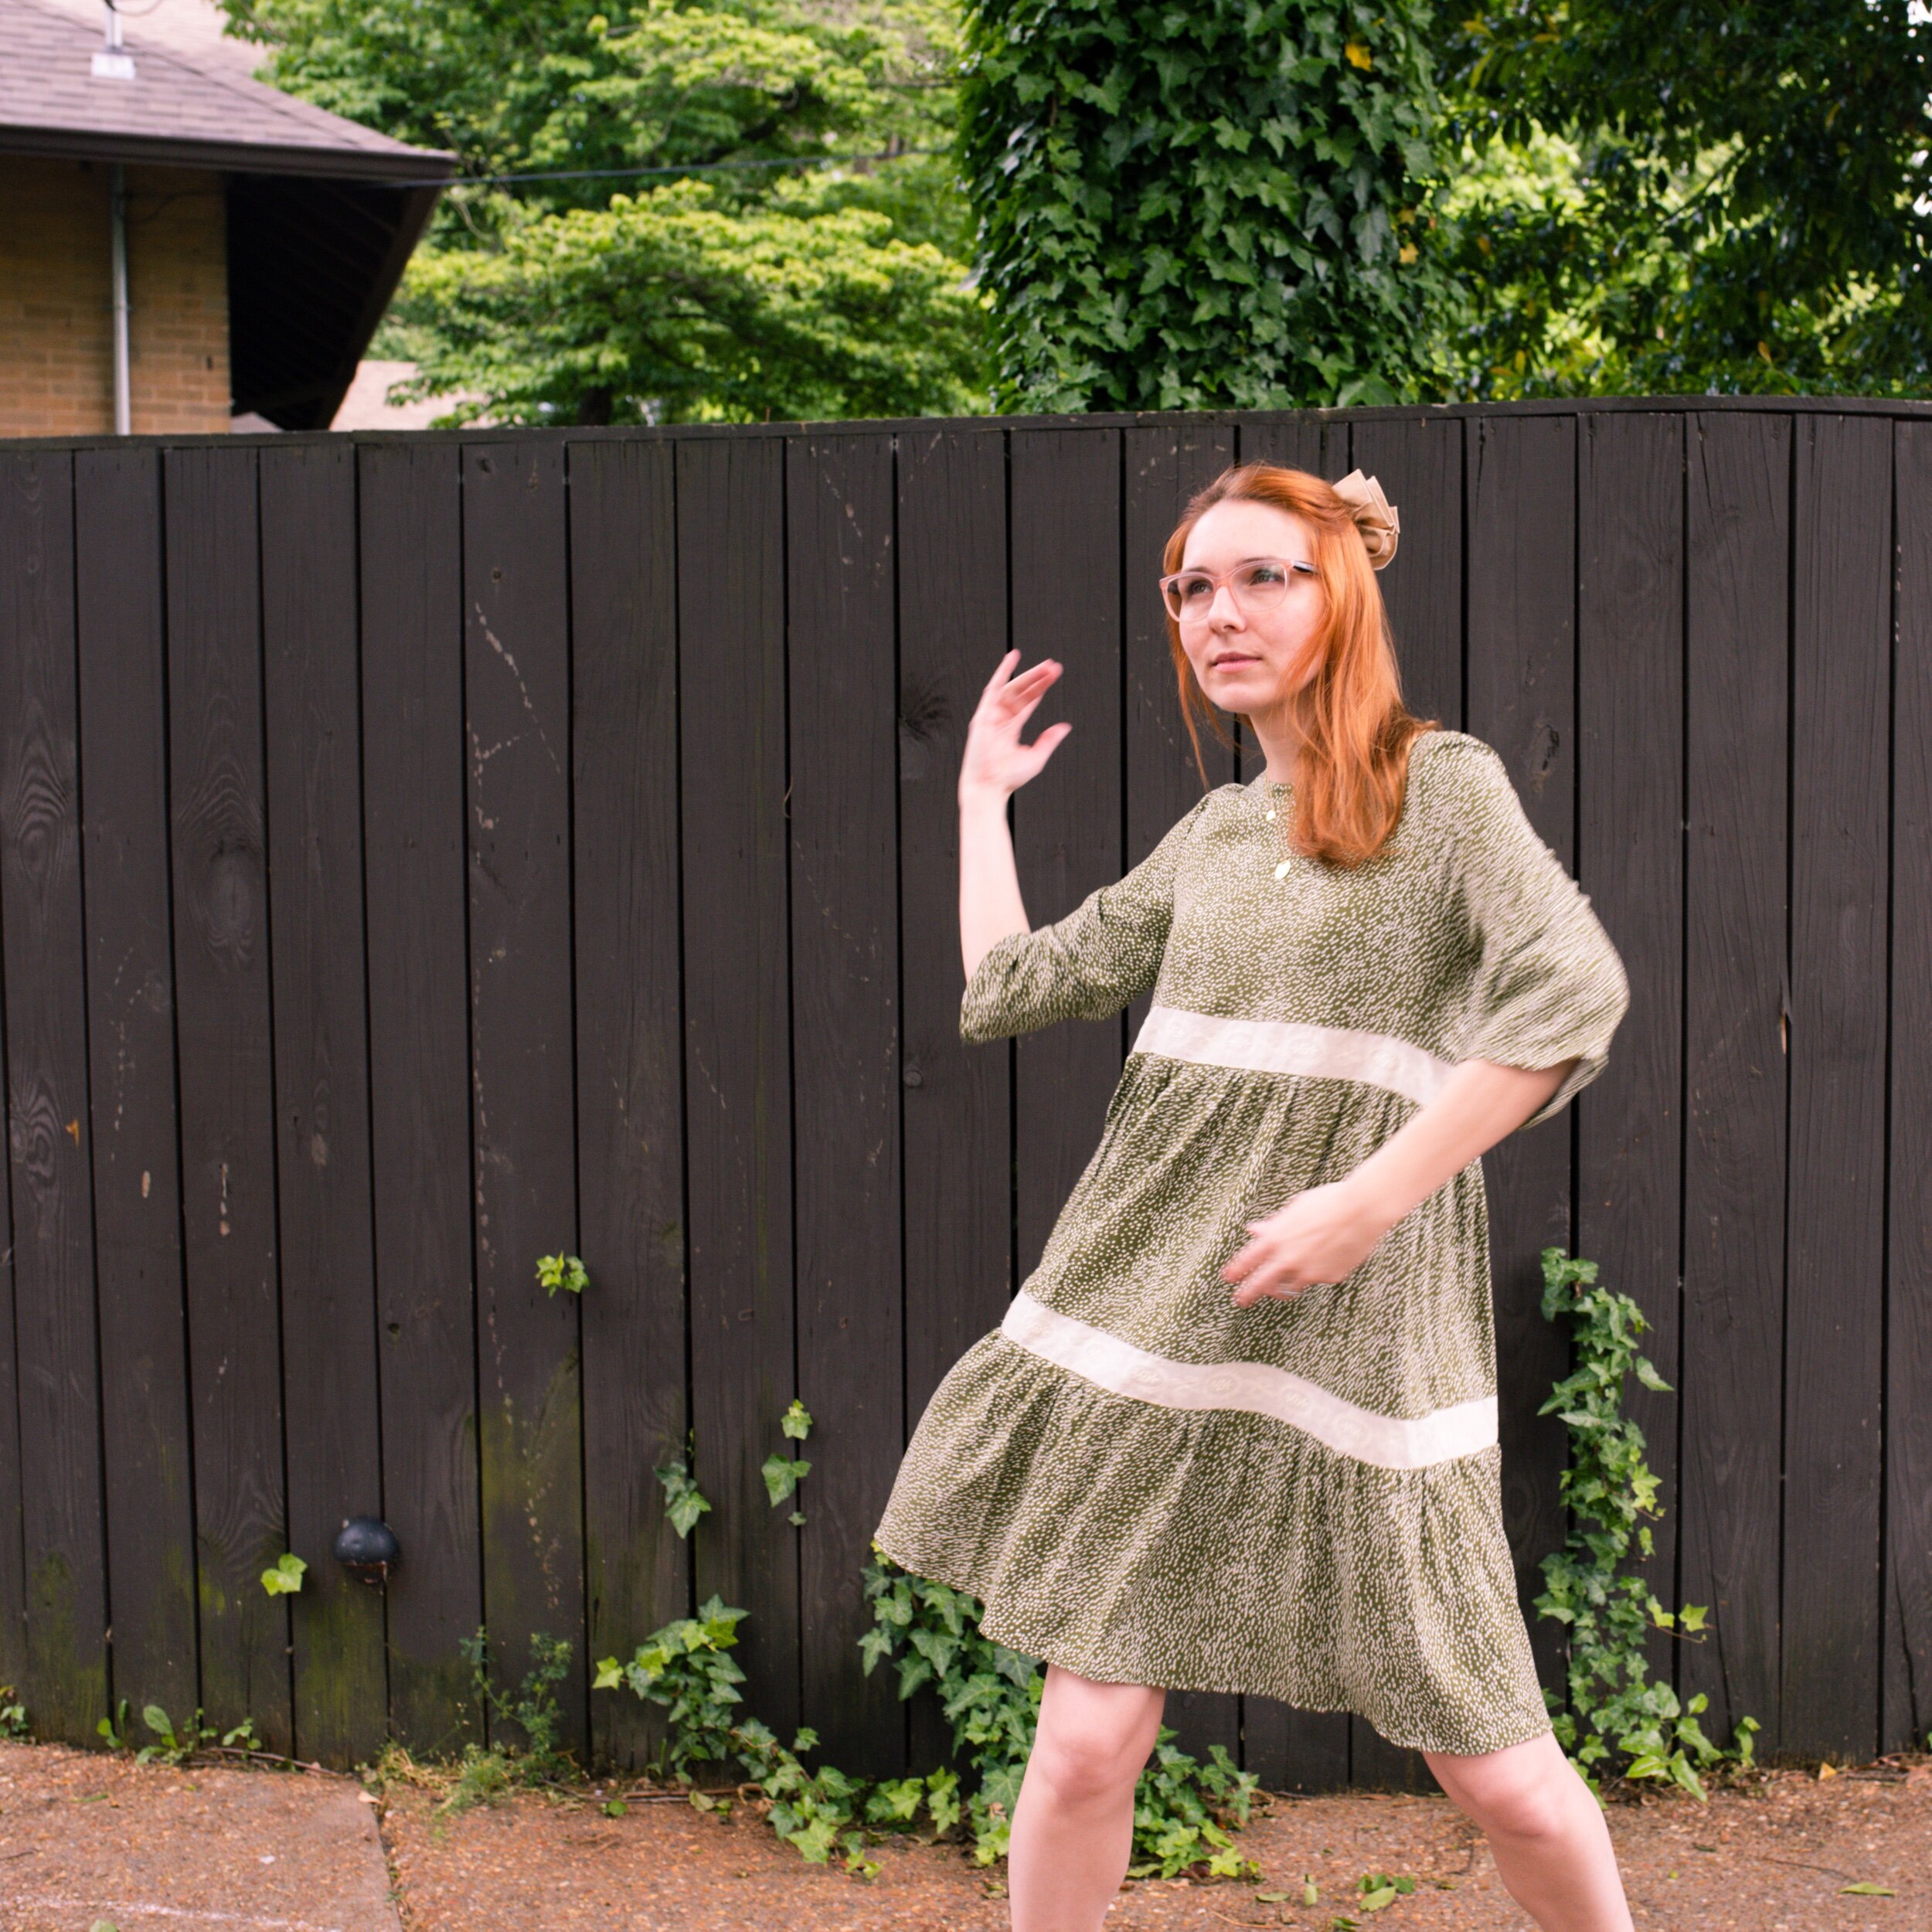
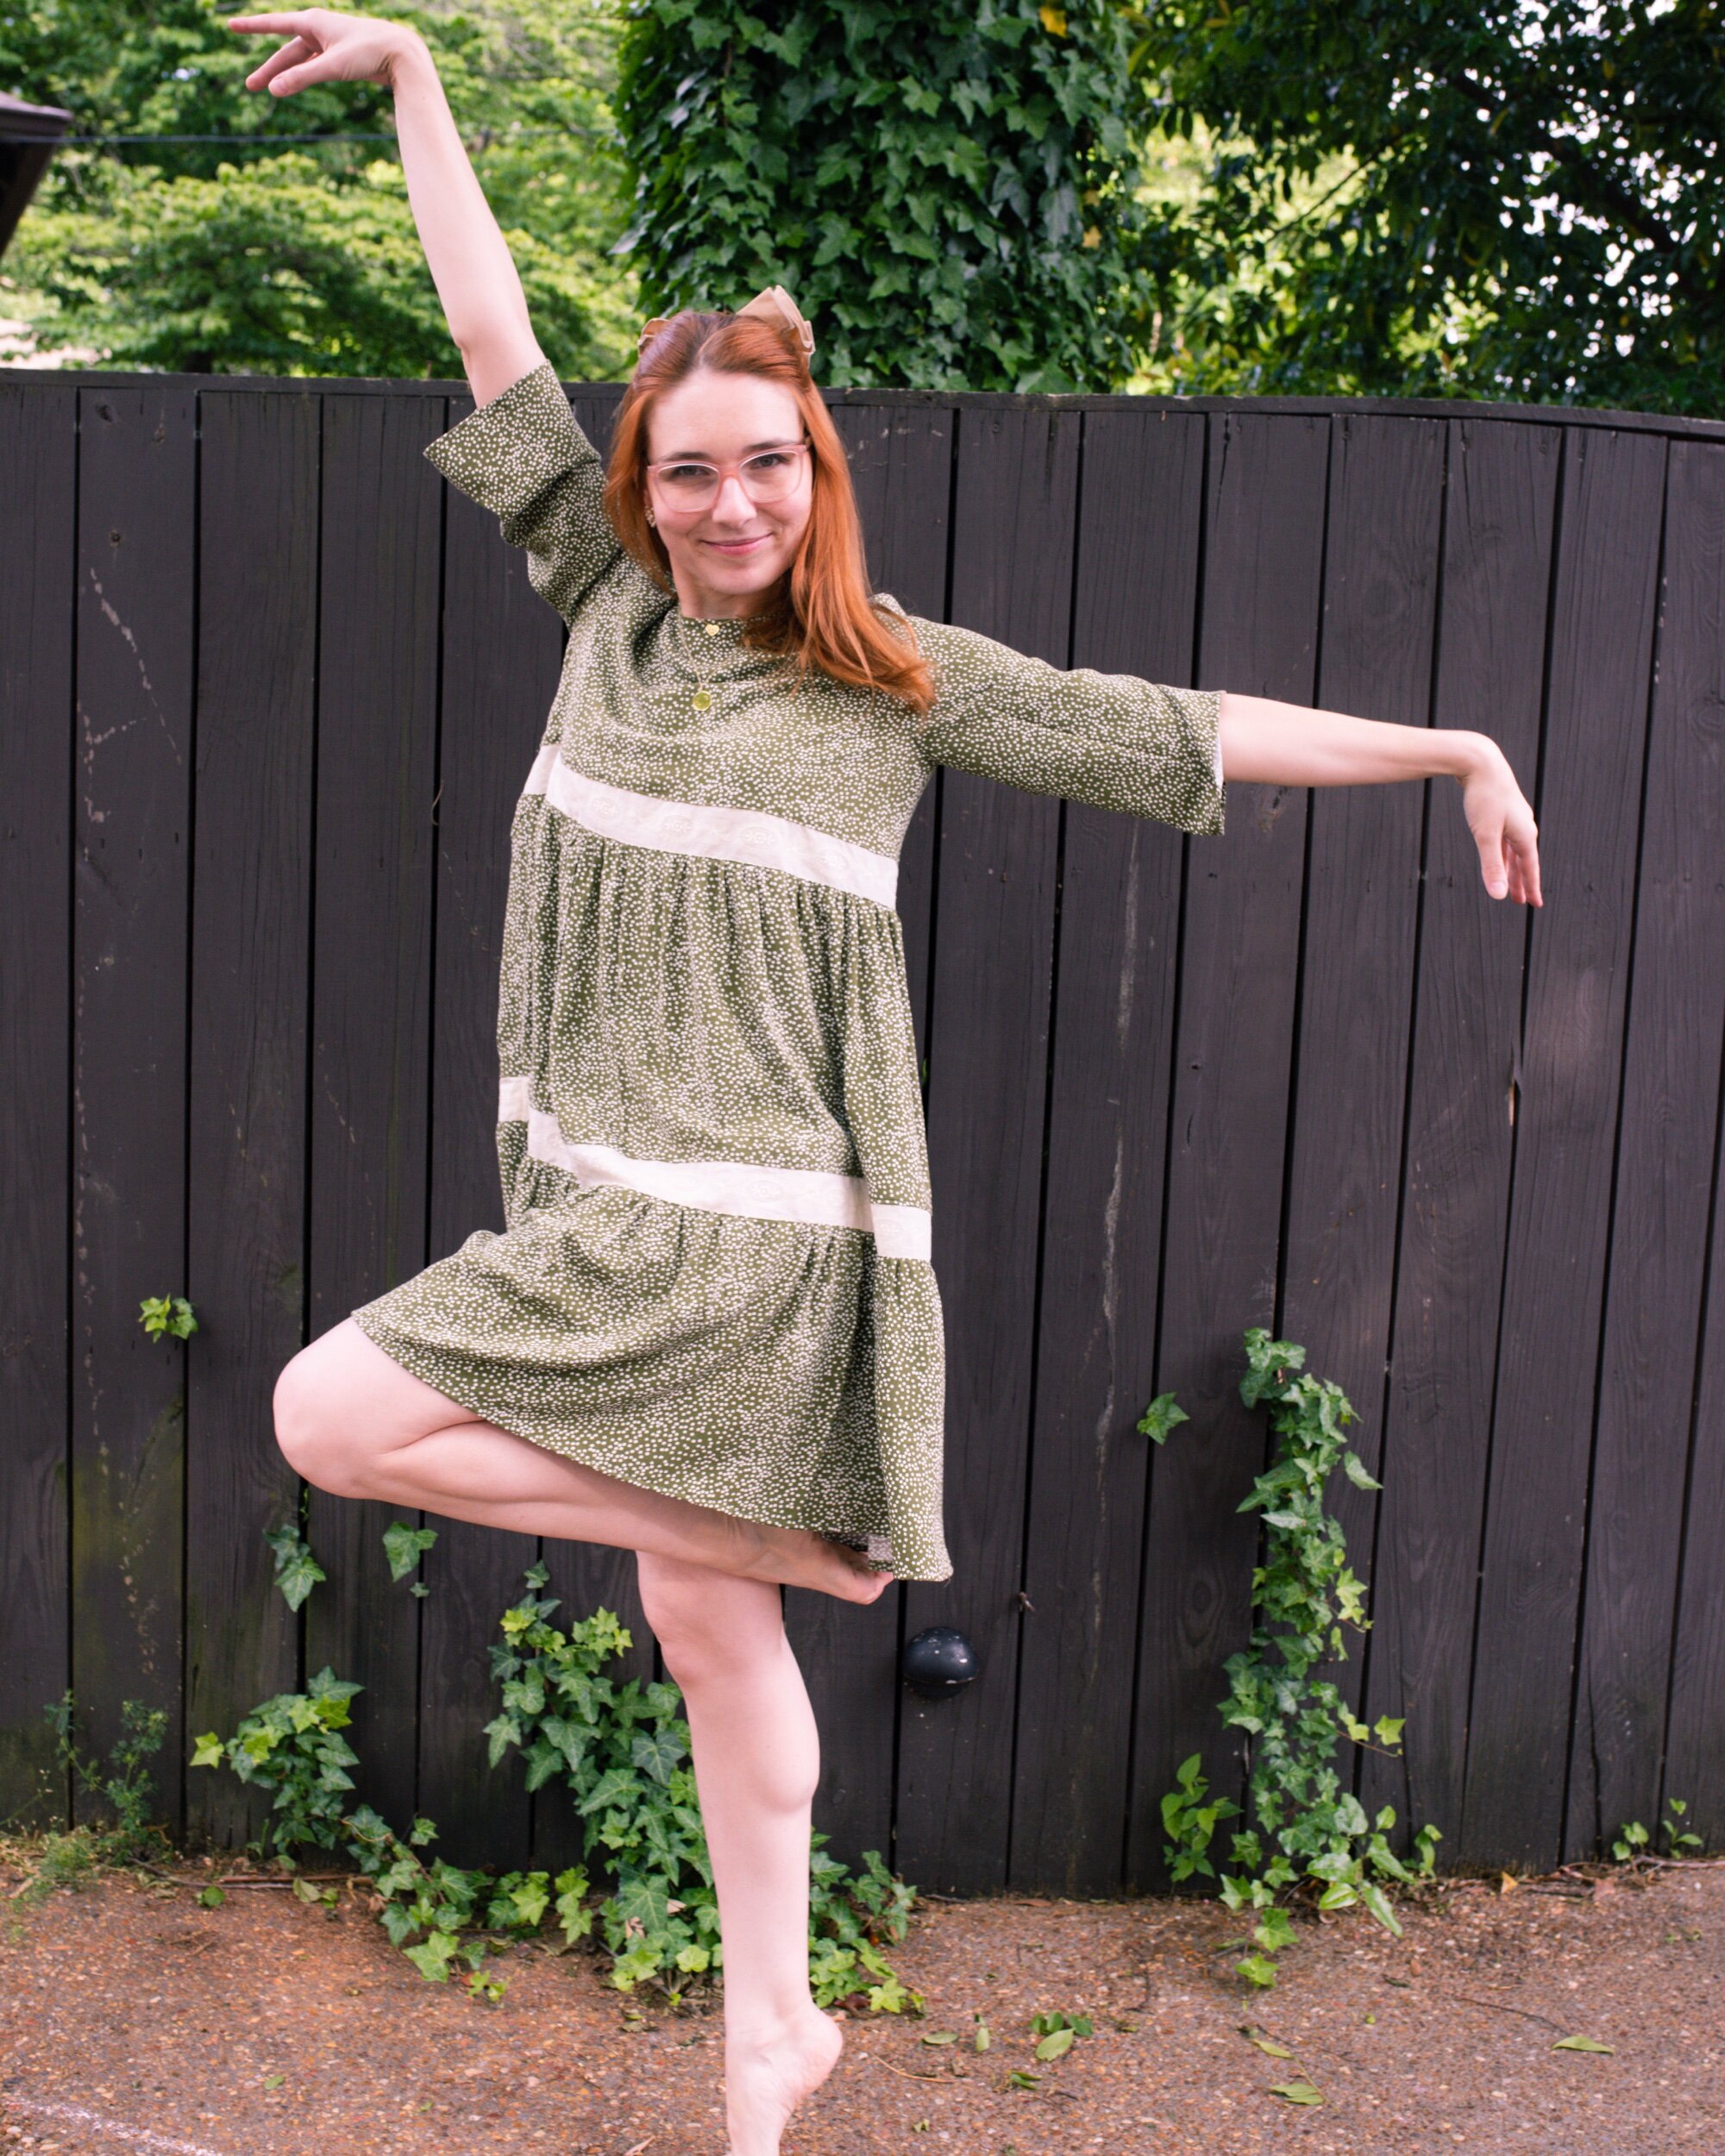
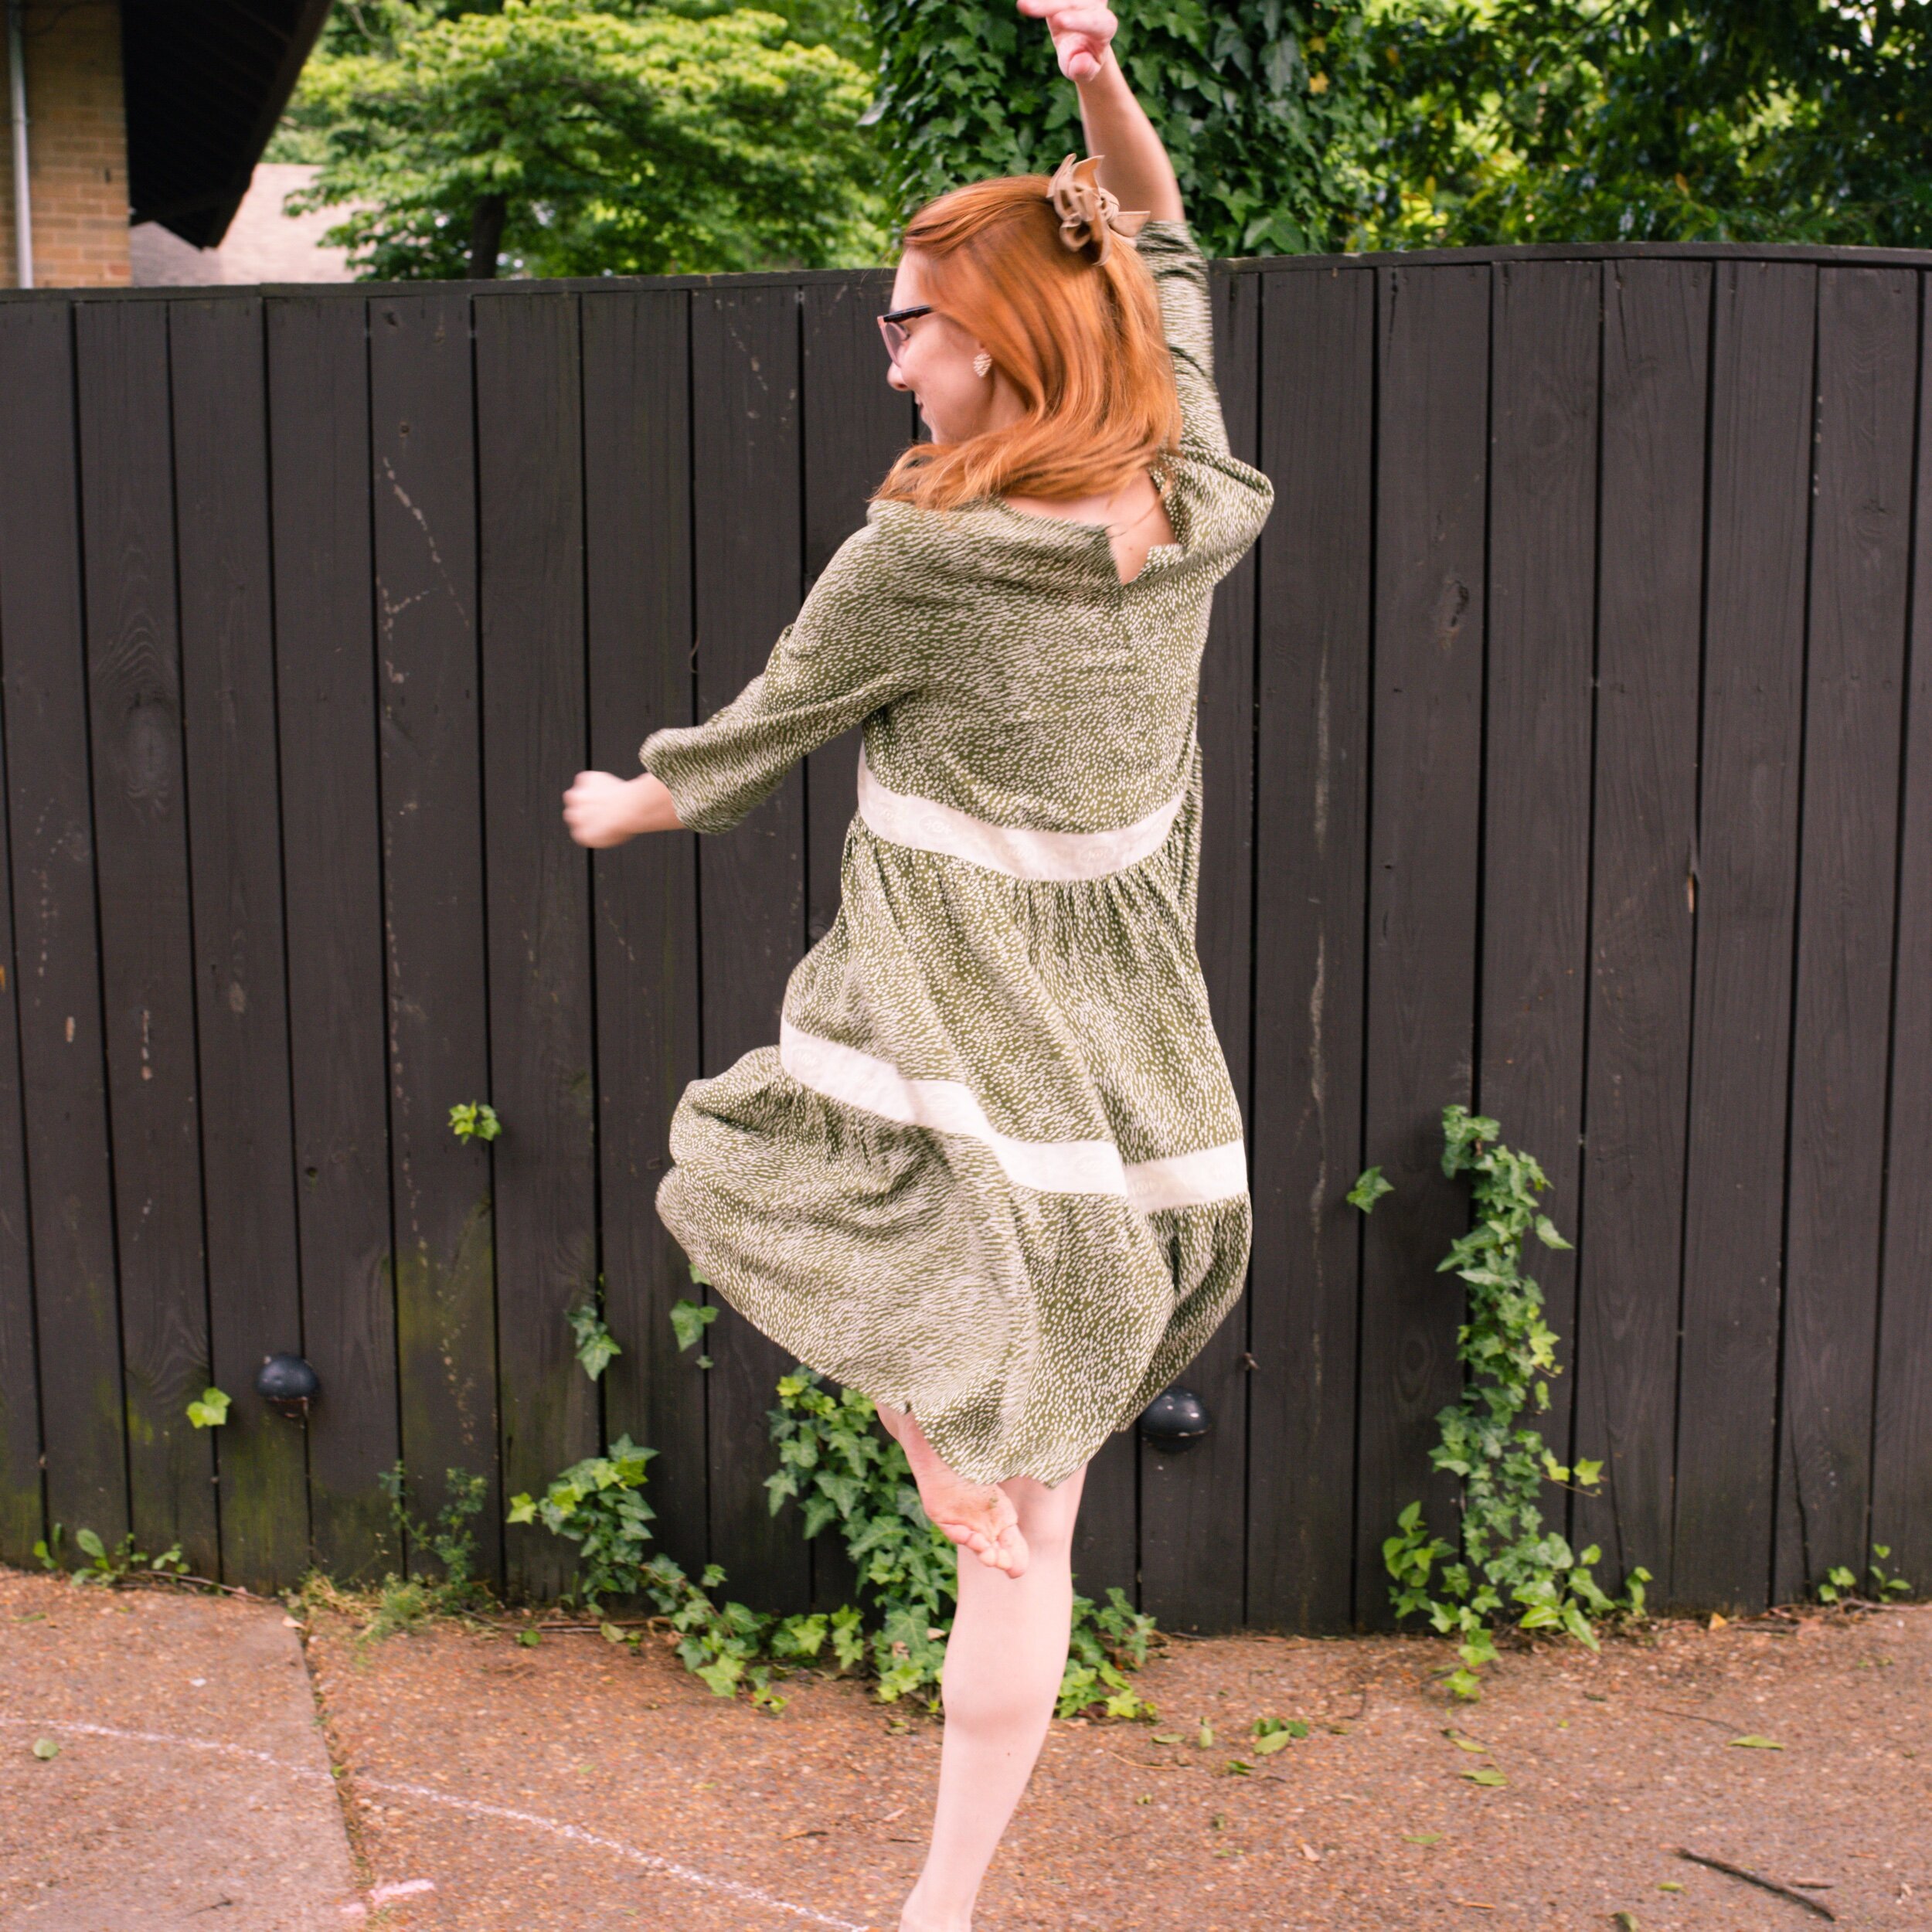
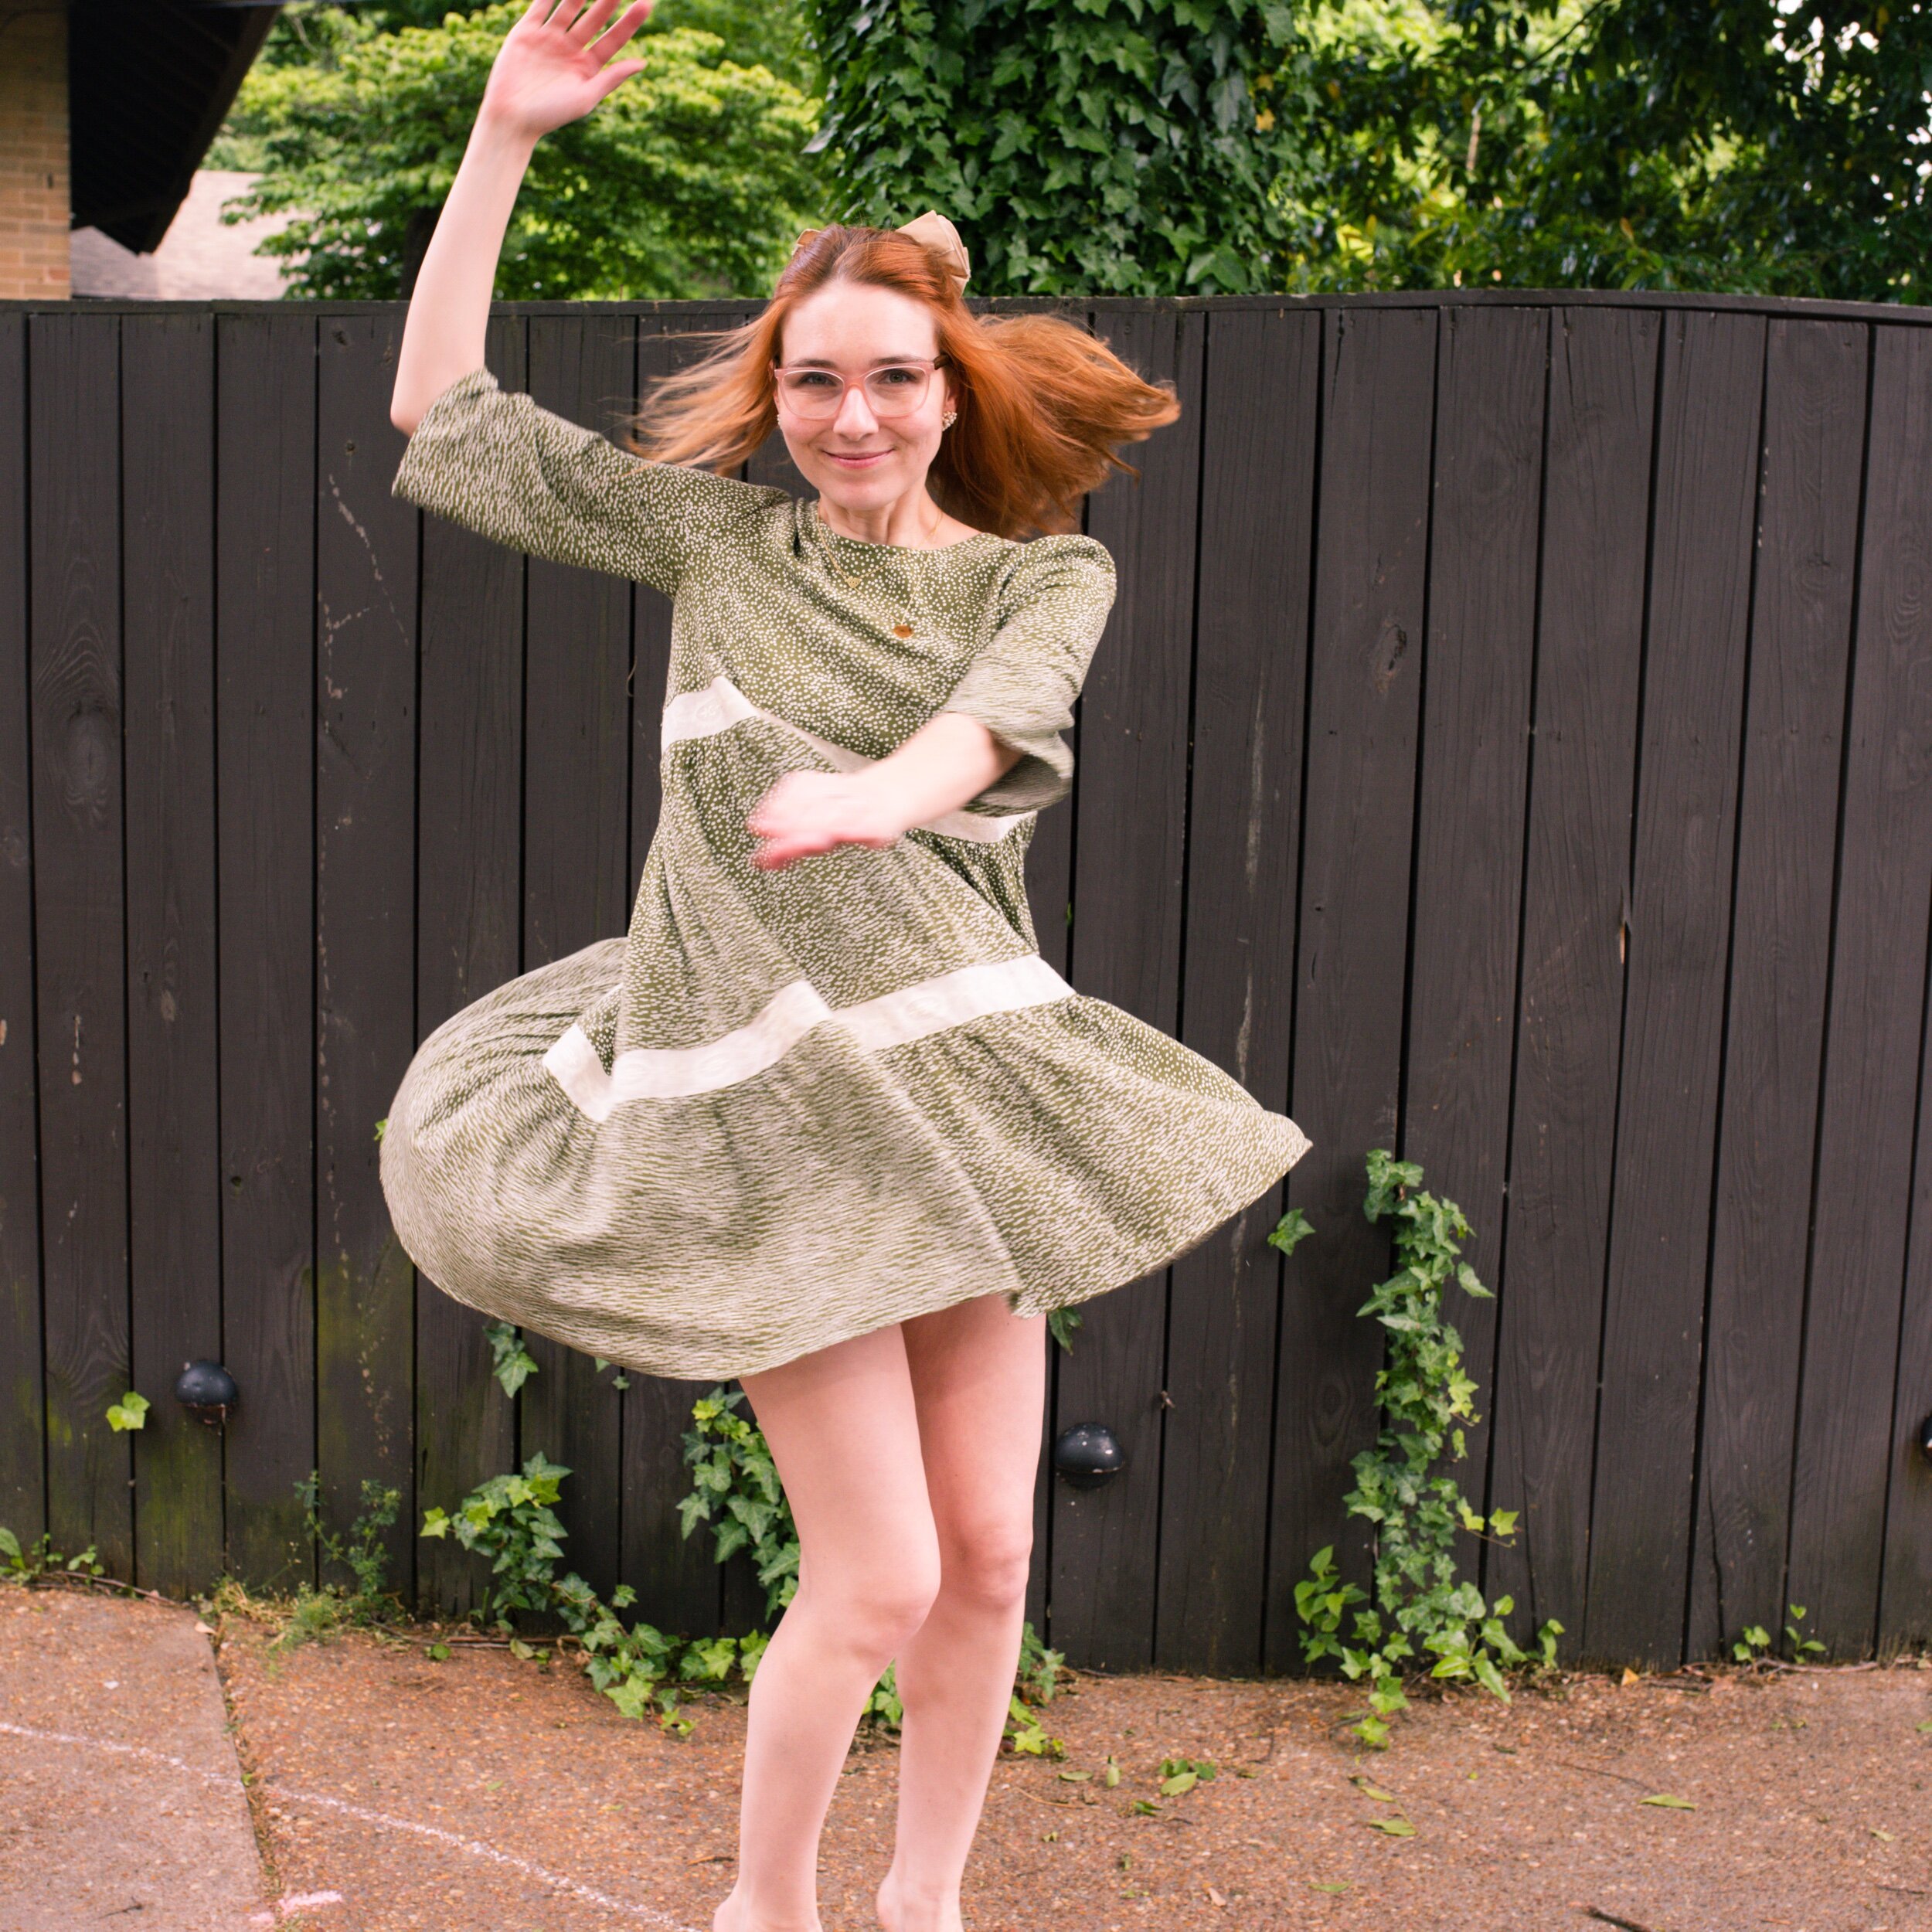
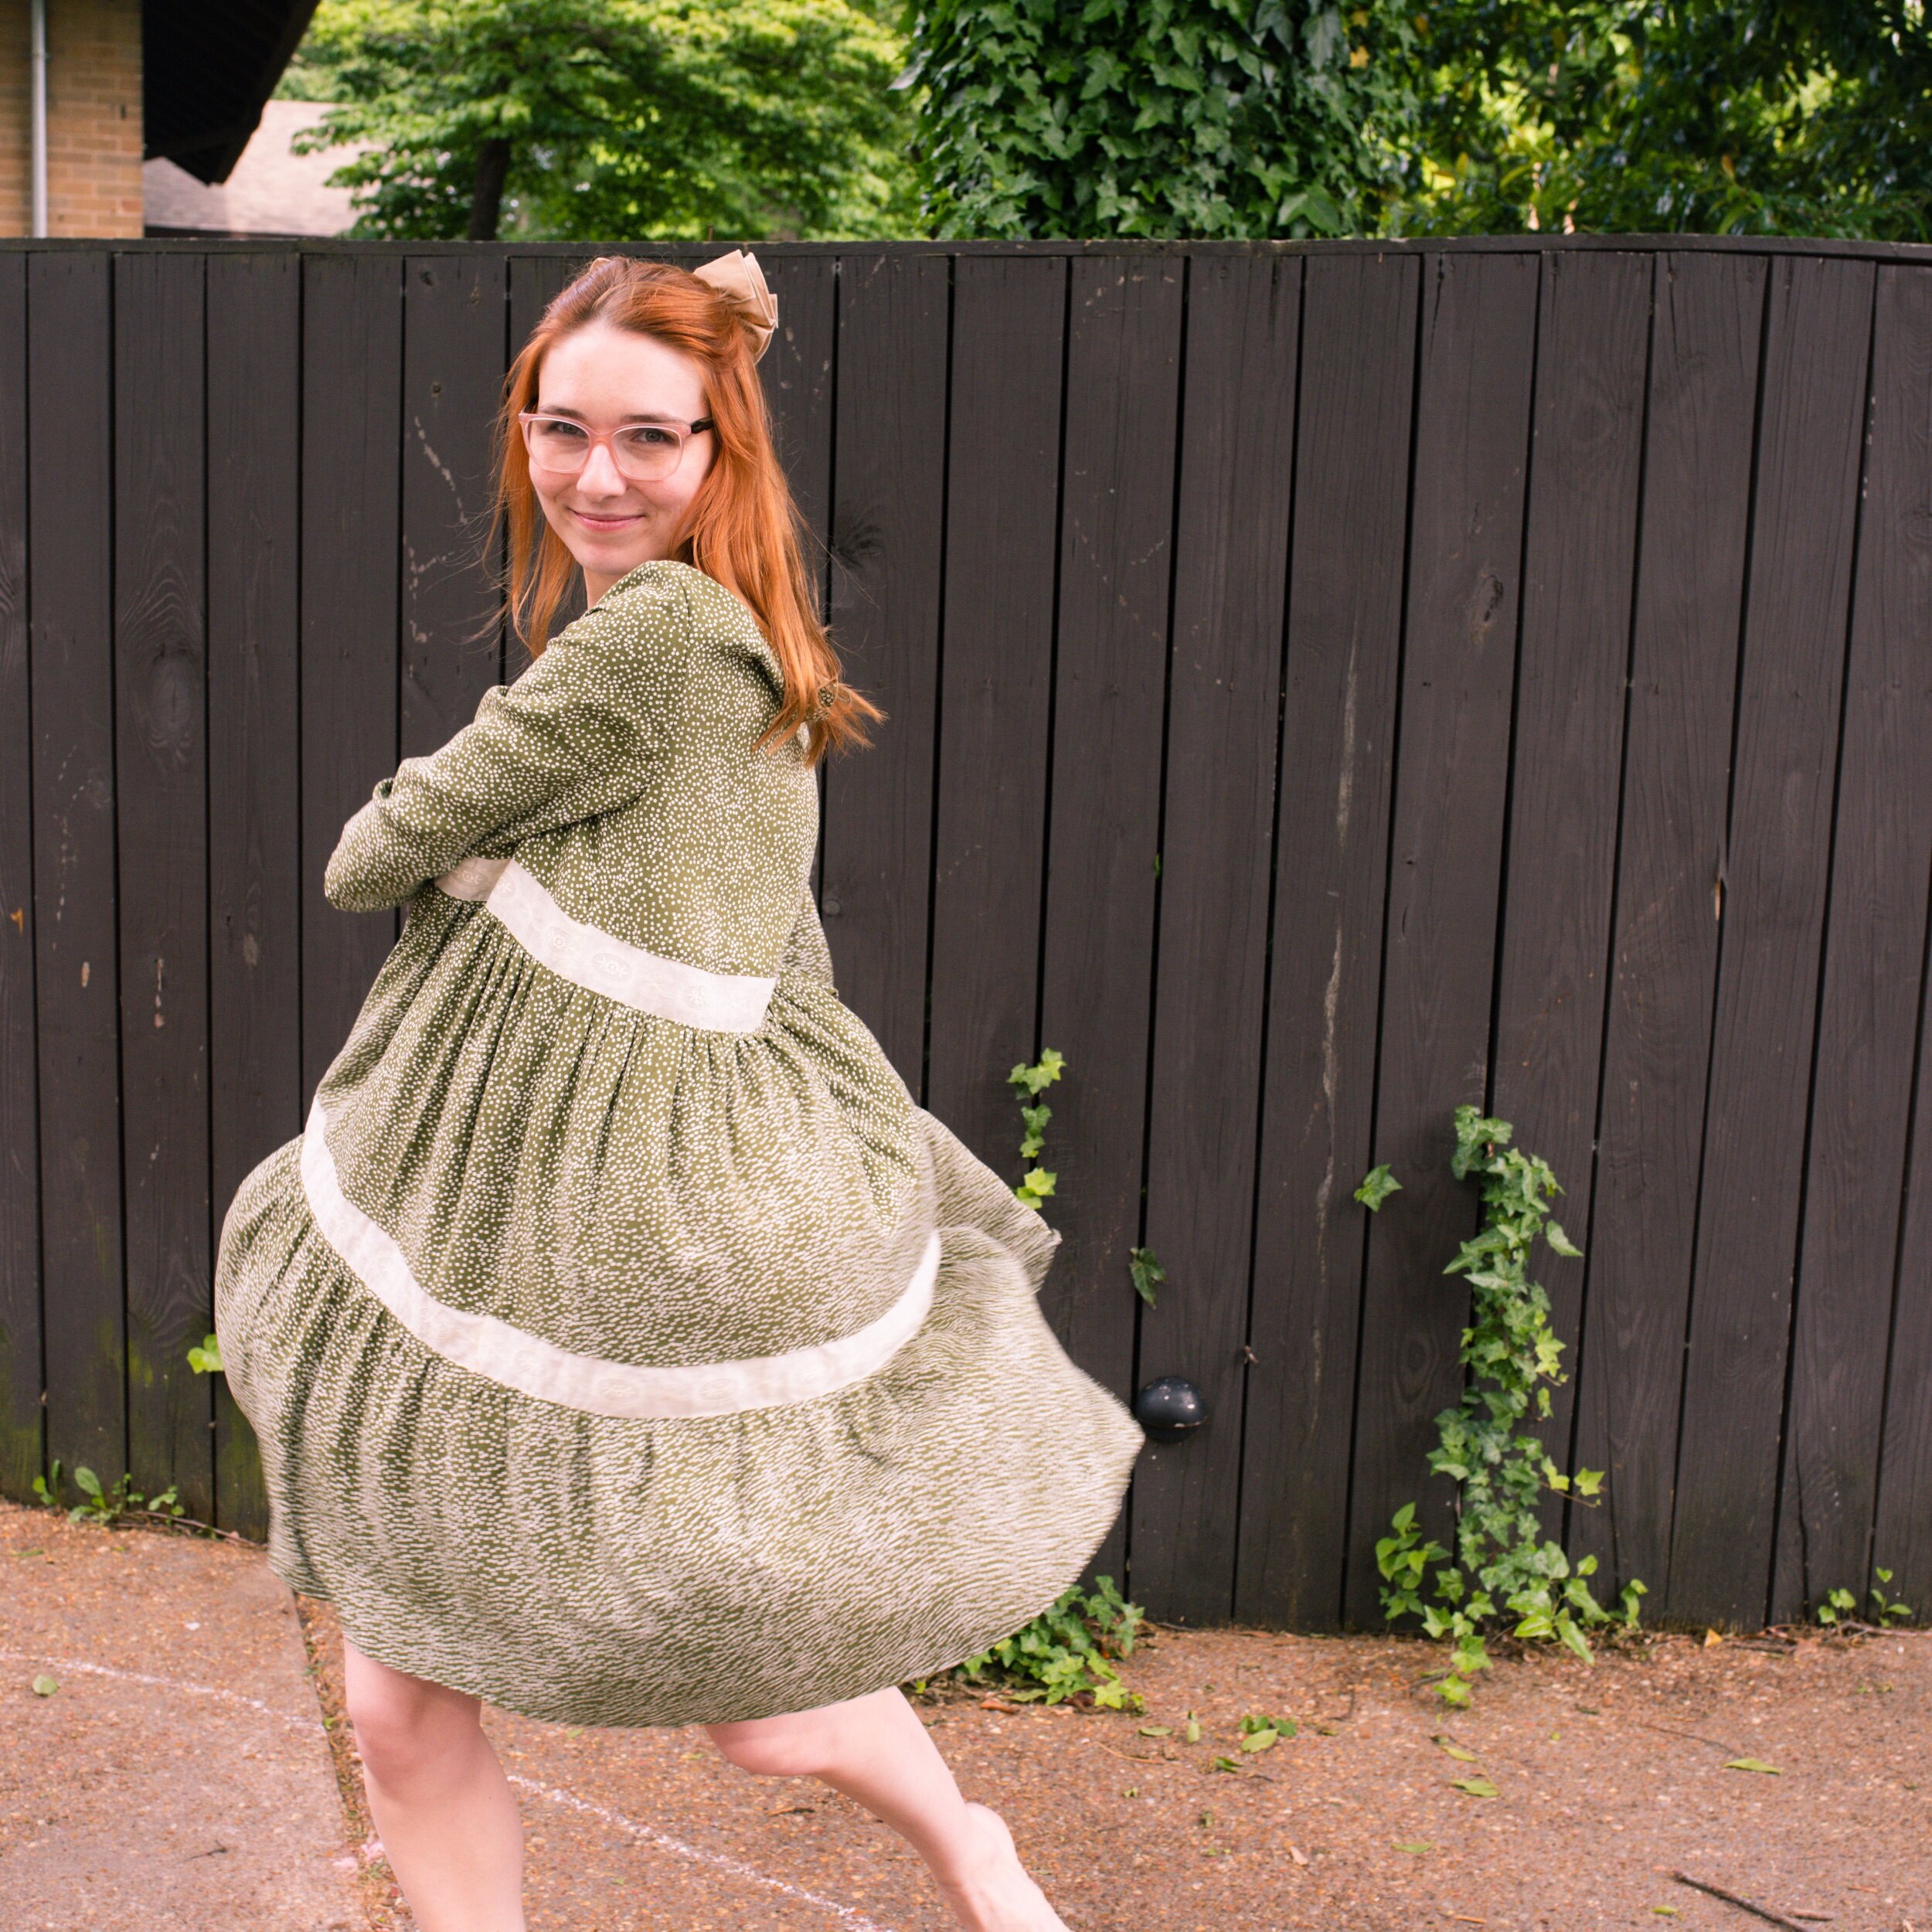
Fibre Mood Mira with Vintage Lace

Wow oh wow I am so excited to share this blog with you today. For two reasons! Number one, it is a make that I am really proud of! Number two, I was able to use some vintage lace and I didn’t ruin it!!! I am going to explain how I inserted this lace without trouble and how I want to do this with every garment now!! This is the Fibre Mood Mira Pattern and it is completely lovely! I made it in fabric from Blackbird Fabrics!

First of all the actual pattern is very very easy to put together and I had zero problems making this garment. The instructions are great to follow and the fit is very loose and forgiving. This pattern has so much potential for hacks and I just love it! I think I would love one with altered sleeves or maybe a long maxi version. Anyways, I digress! I will take you through the lace insertion so you can do this for yourself with any size lace! I could not find a good method of doing this online and I had to look at heirloom lace insertion. I thought it would be nice to add this blog to the sewing community for those of us that want to add it to garments for adults!

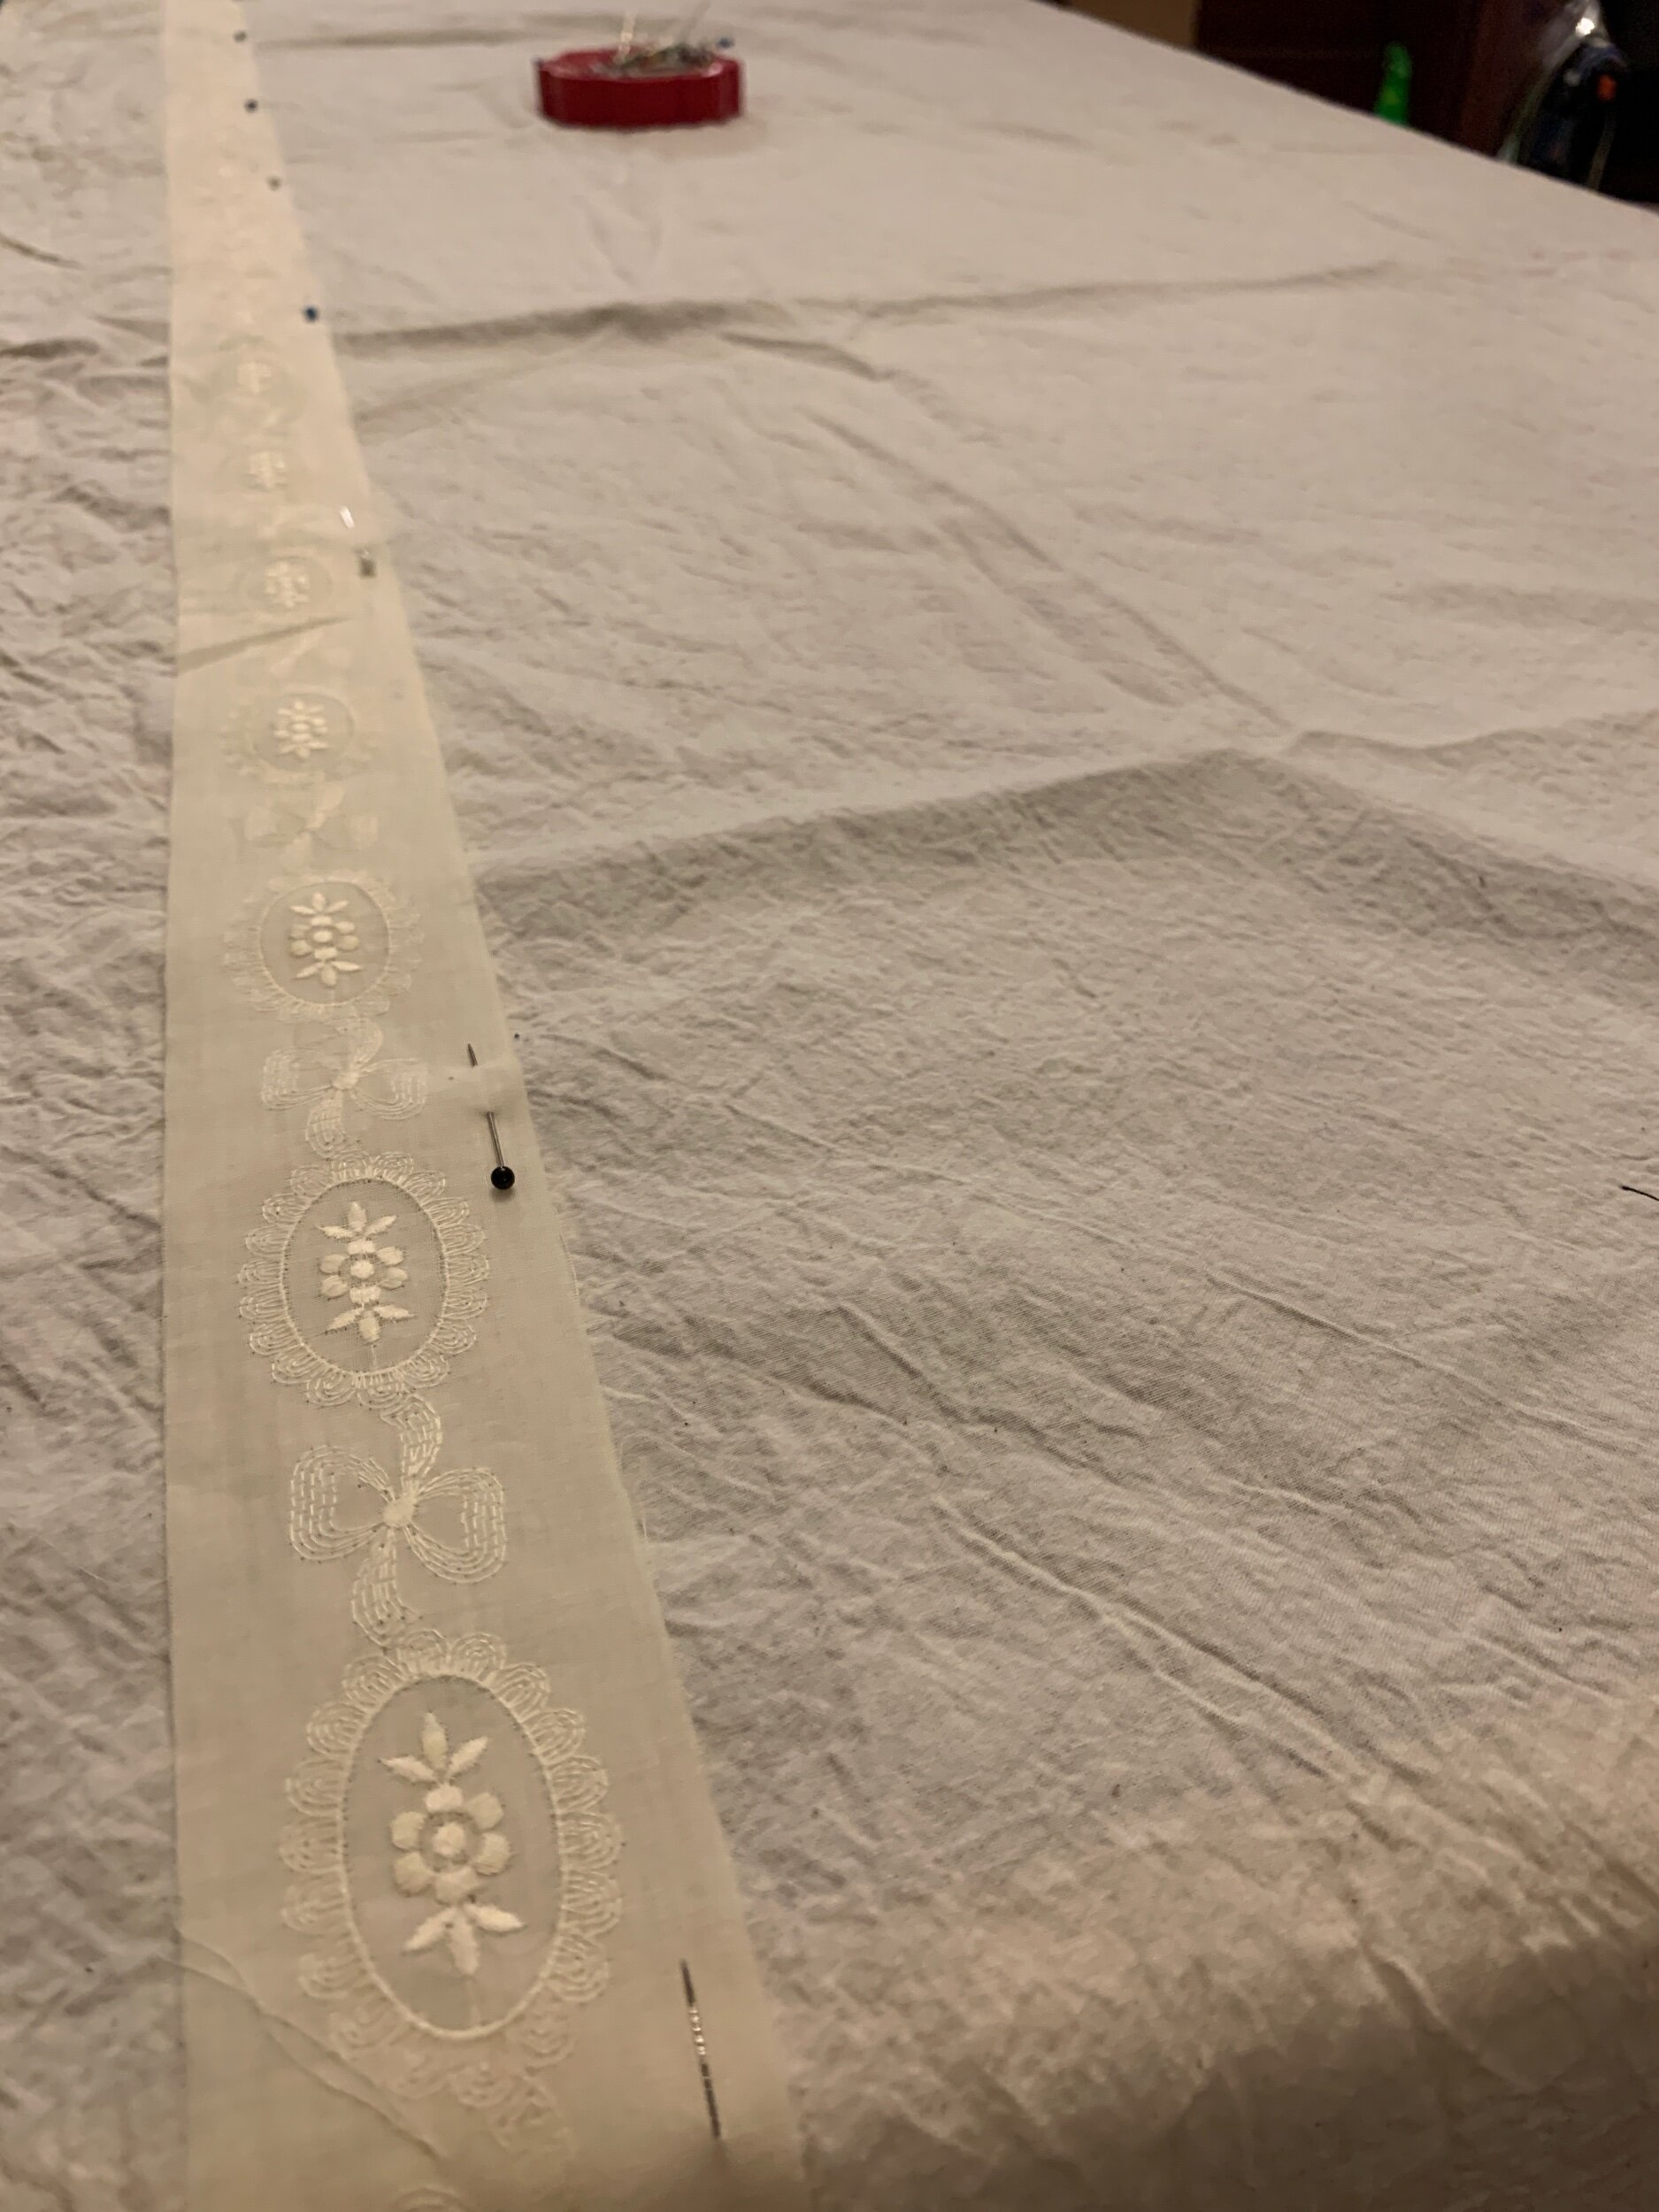
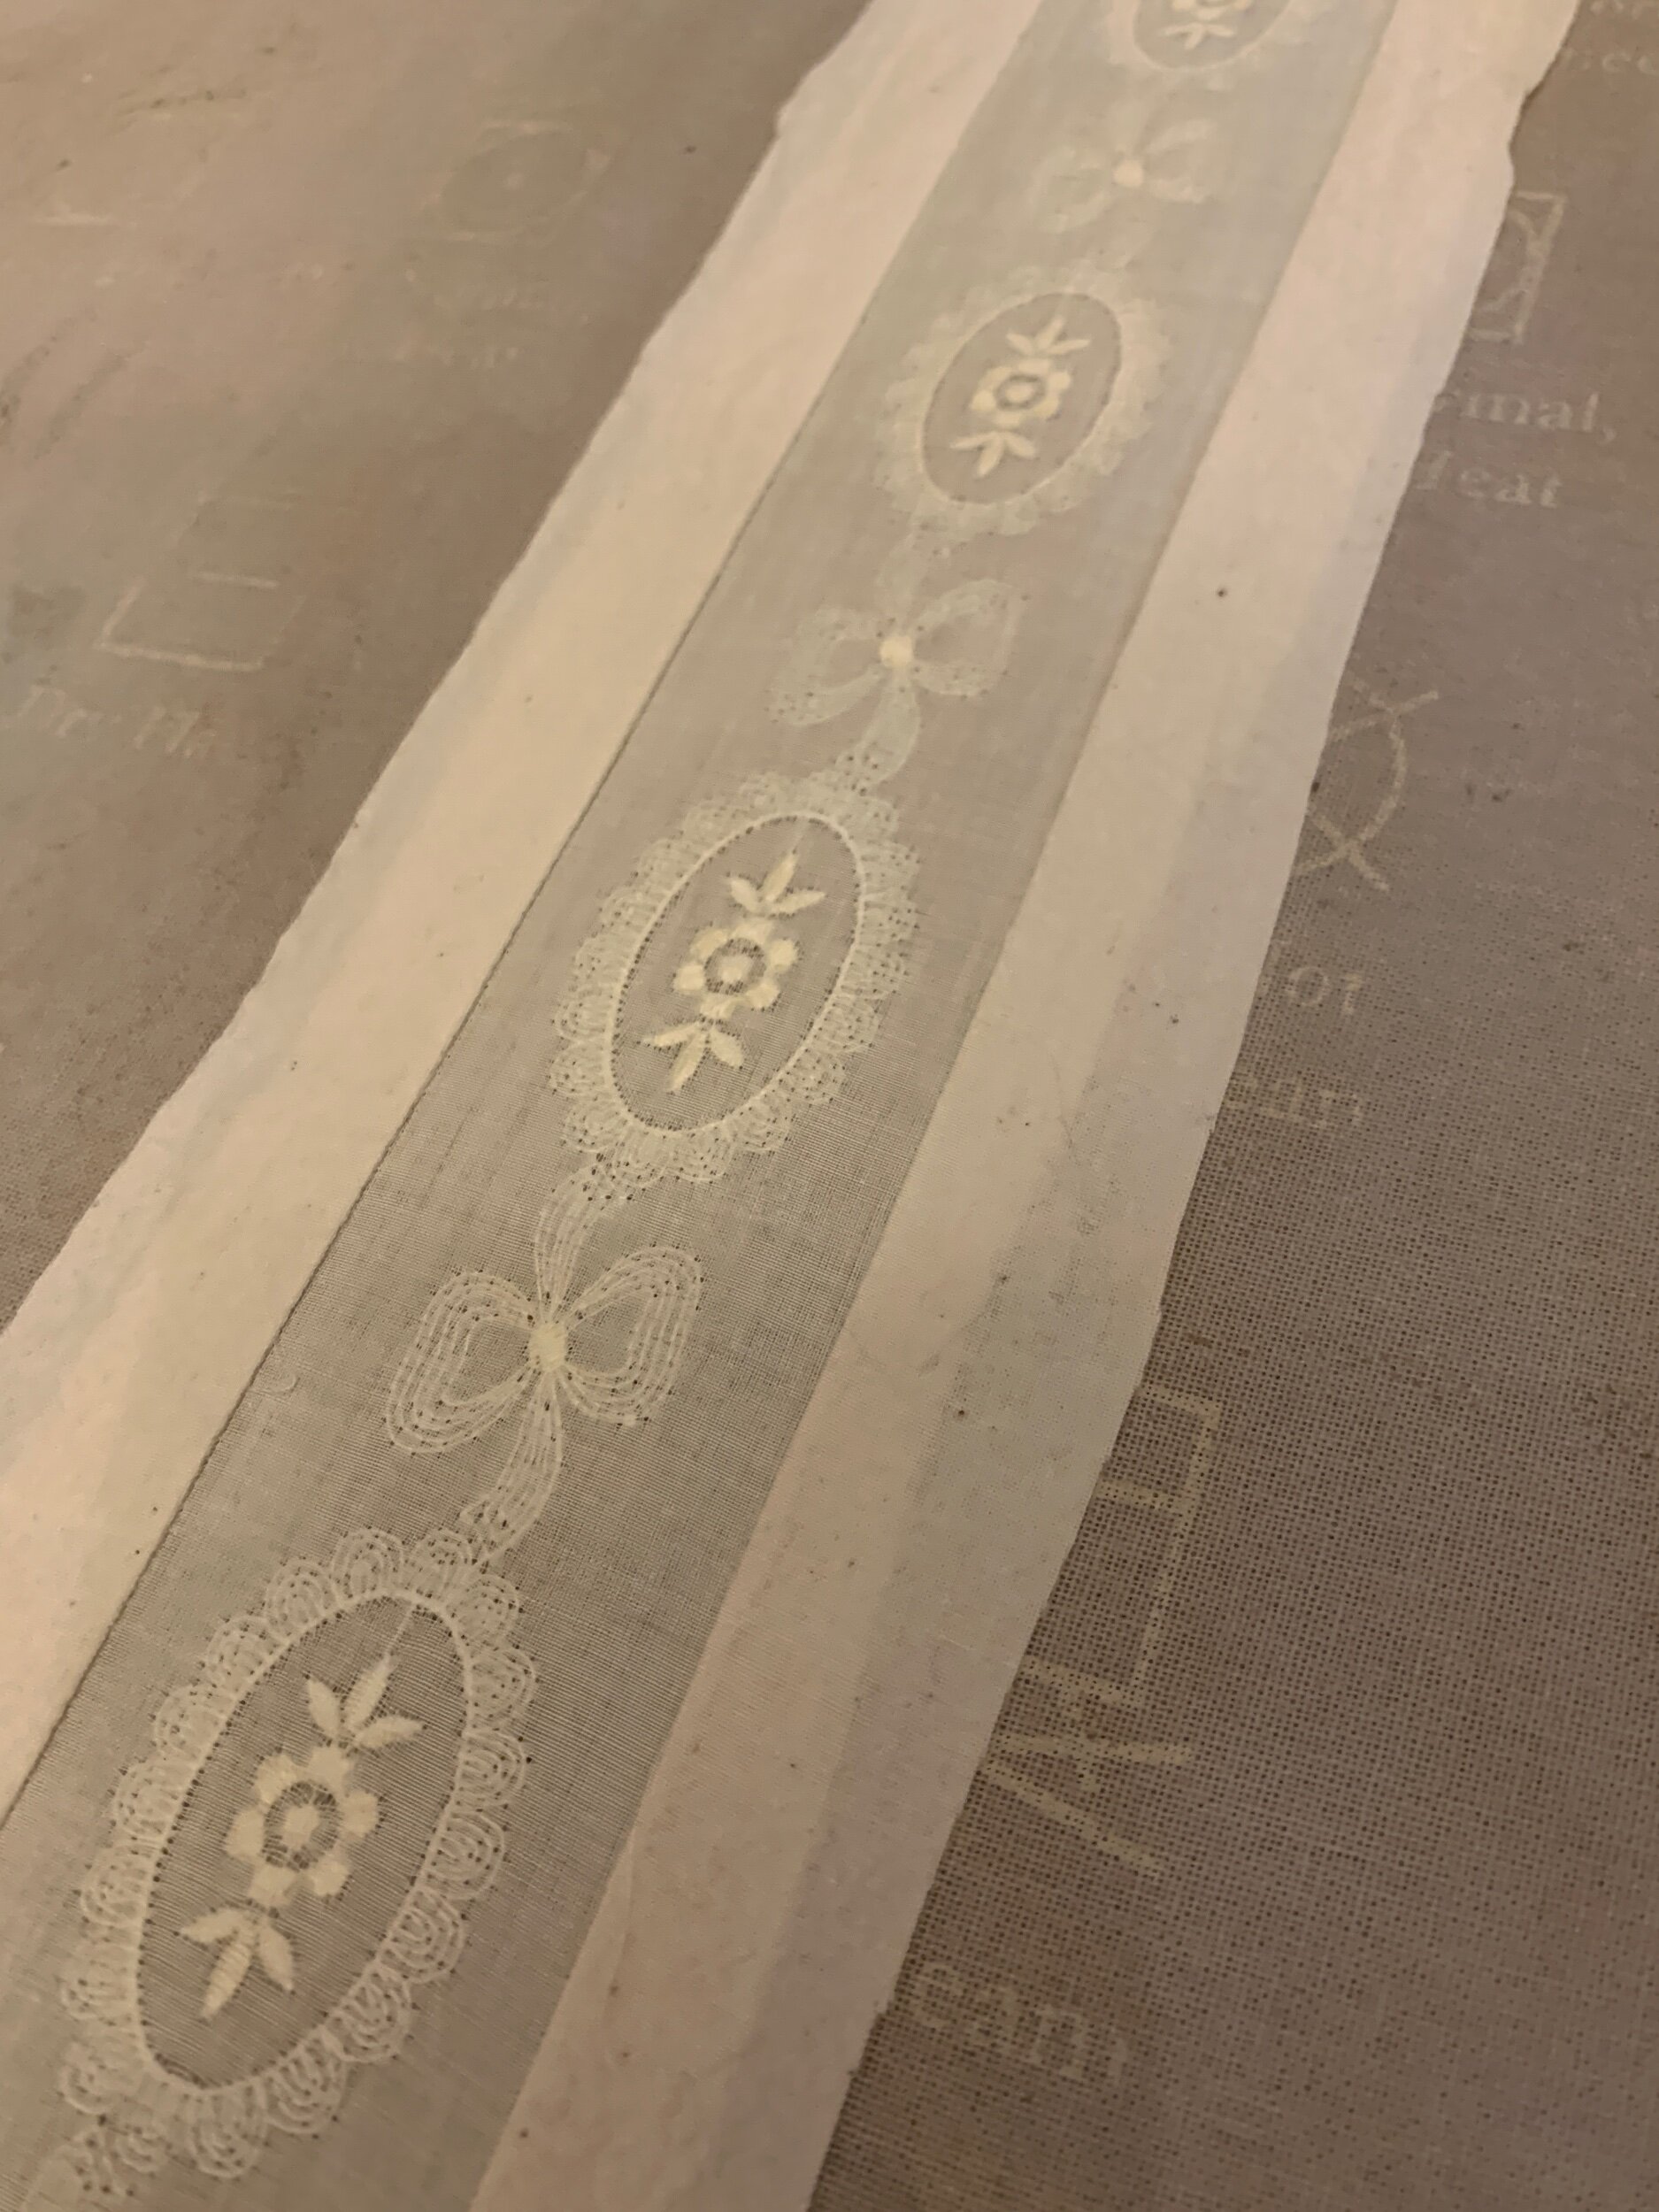
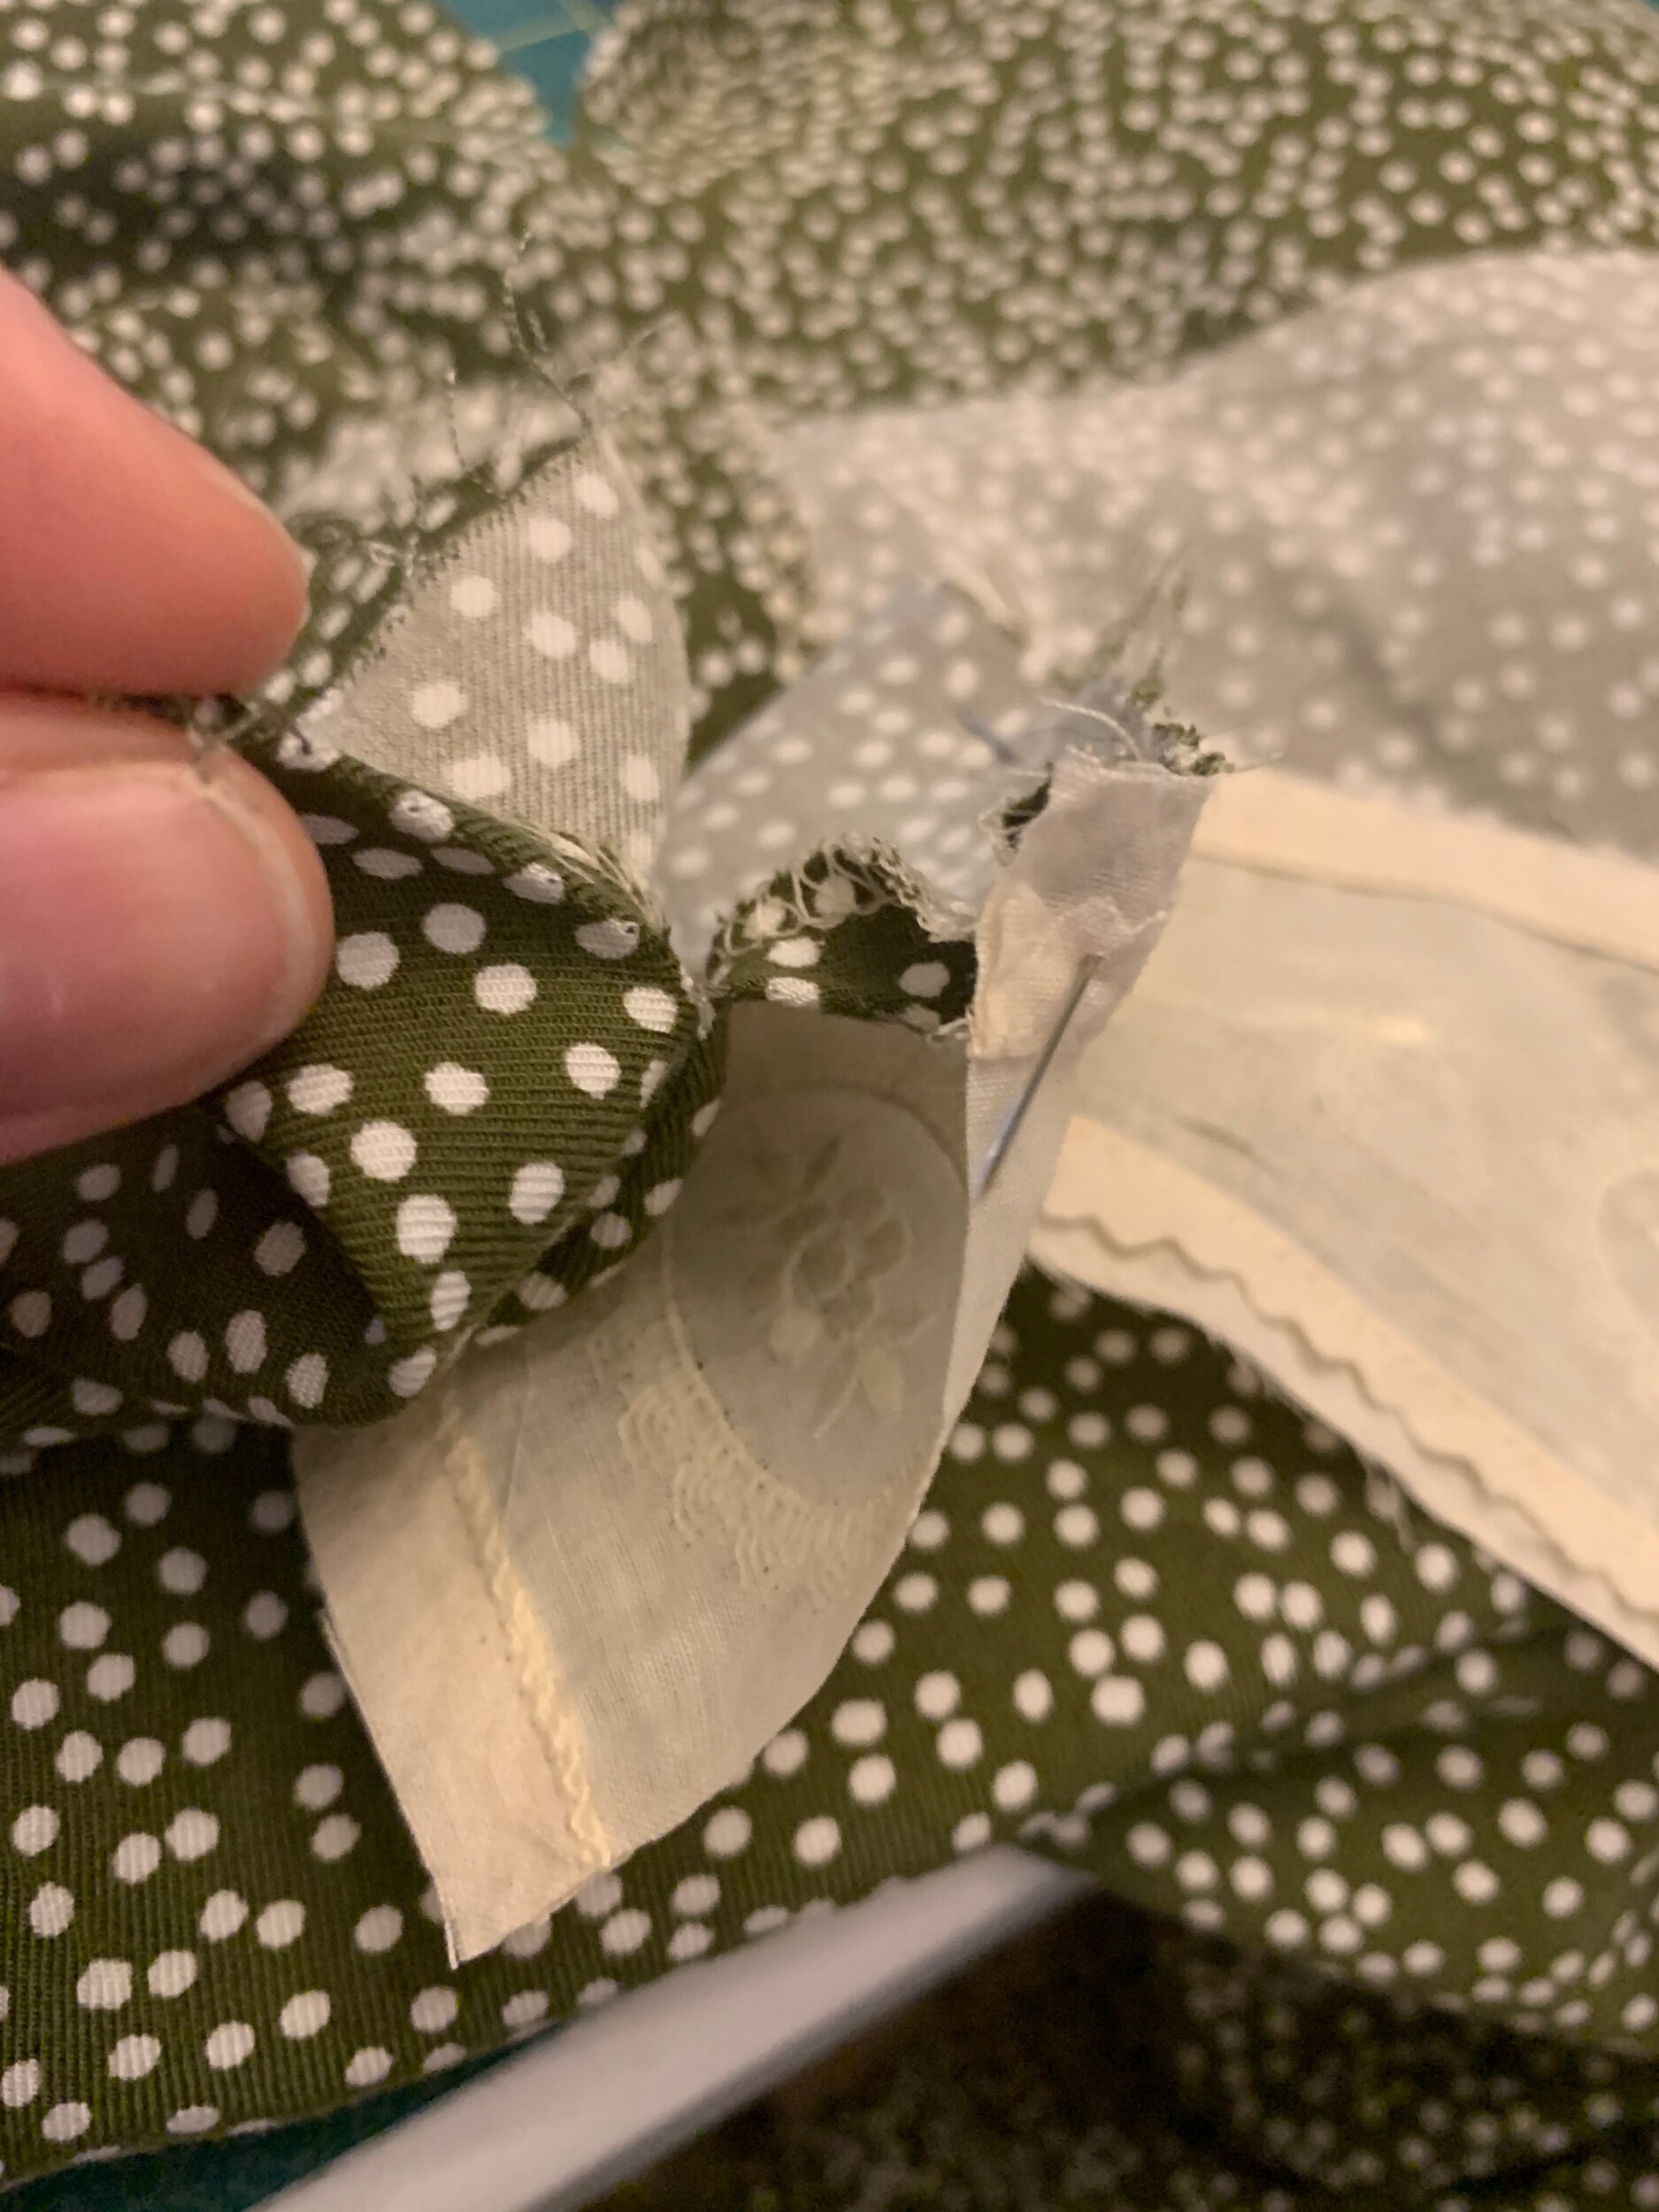
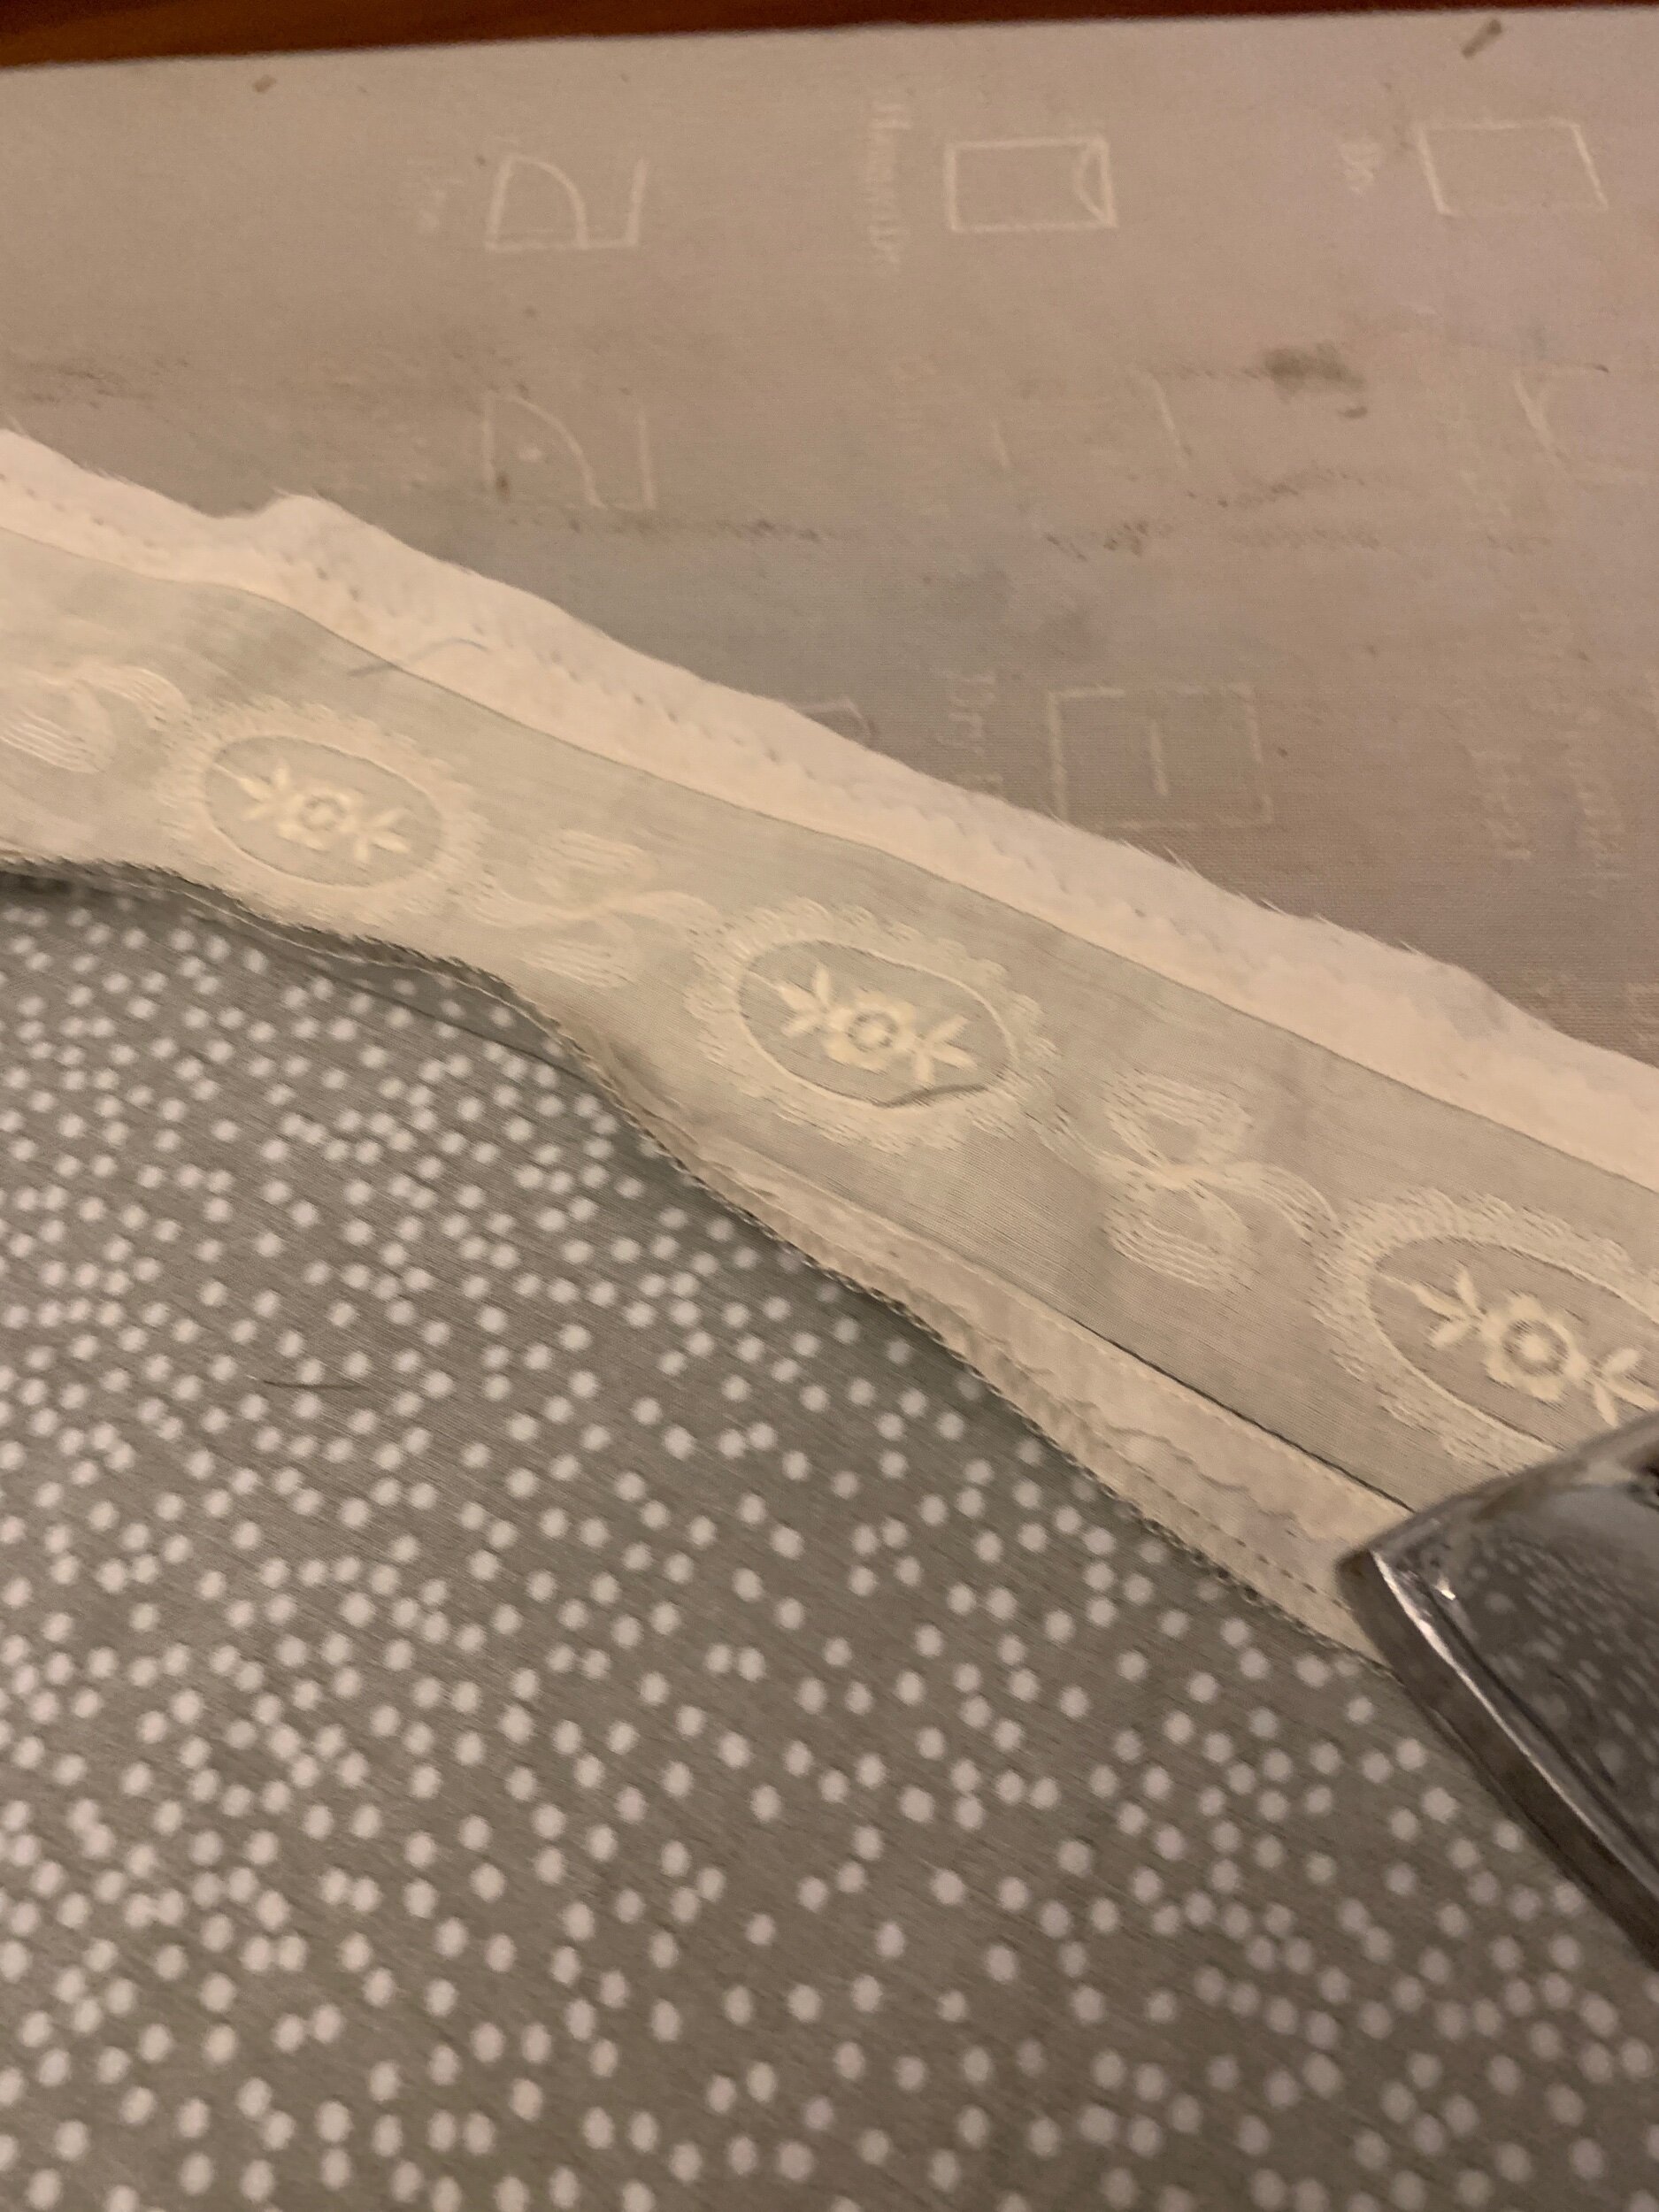
First, you need to pick out some lace that has flat sides. If you cannot find this, have a good look on Etsy. Lots of vintage laces there! I found several that I ordered! Your lace can have a scalloped edge but you will have to stitch on a straight line close to the edge or pick a straight edge. You will see what I mean!

Make sure your lace is in good condition before you decide to use it. Mine had a few stains here and there and so I had to be careful making sure I had enough straight continuous pieces before I started my project.
This brings me to measuring how much you will need. What I did was to lay out the pattern pieces. You need to decide where you want the lace to go and realize that it will lengthen your dress or garment depending on where it is placed. I decided I wanted my lace between the gathered layers! You want to attach lace first to the part of the garment that is not gathered (or the bottom of the bodice or first tier). It is basically attaching an extension to these pieces and then that new lace will be the bottom and is treated as it would normally be treated if there were no lace there.

I went ahead and laid all of my pattern pieces out on the floor and roughly measured the bottom of the pattern pieces. I knew that I would need the circumference of the bottom of the bodice and the bottom of the first layer.
To do this, I had to measure the bottom of the bodice and multiply times 4 and then measure the bottom of the first tier and multiply times 4! You have to multiply in this case because each pattern piece is cut on the fold and it is cut twice (front and back). I then made sure I had enough lace! You can just eyeball this and measure your lace straight up against your pattern pieces and that is actually what I did!

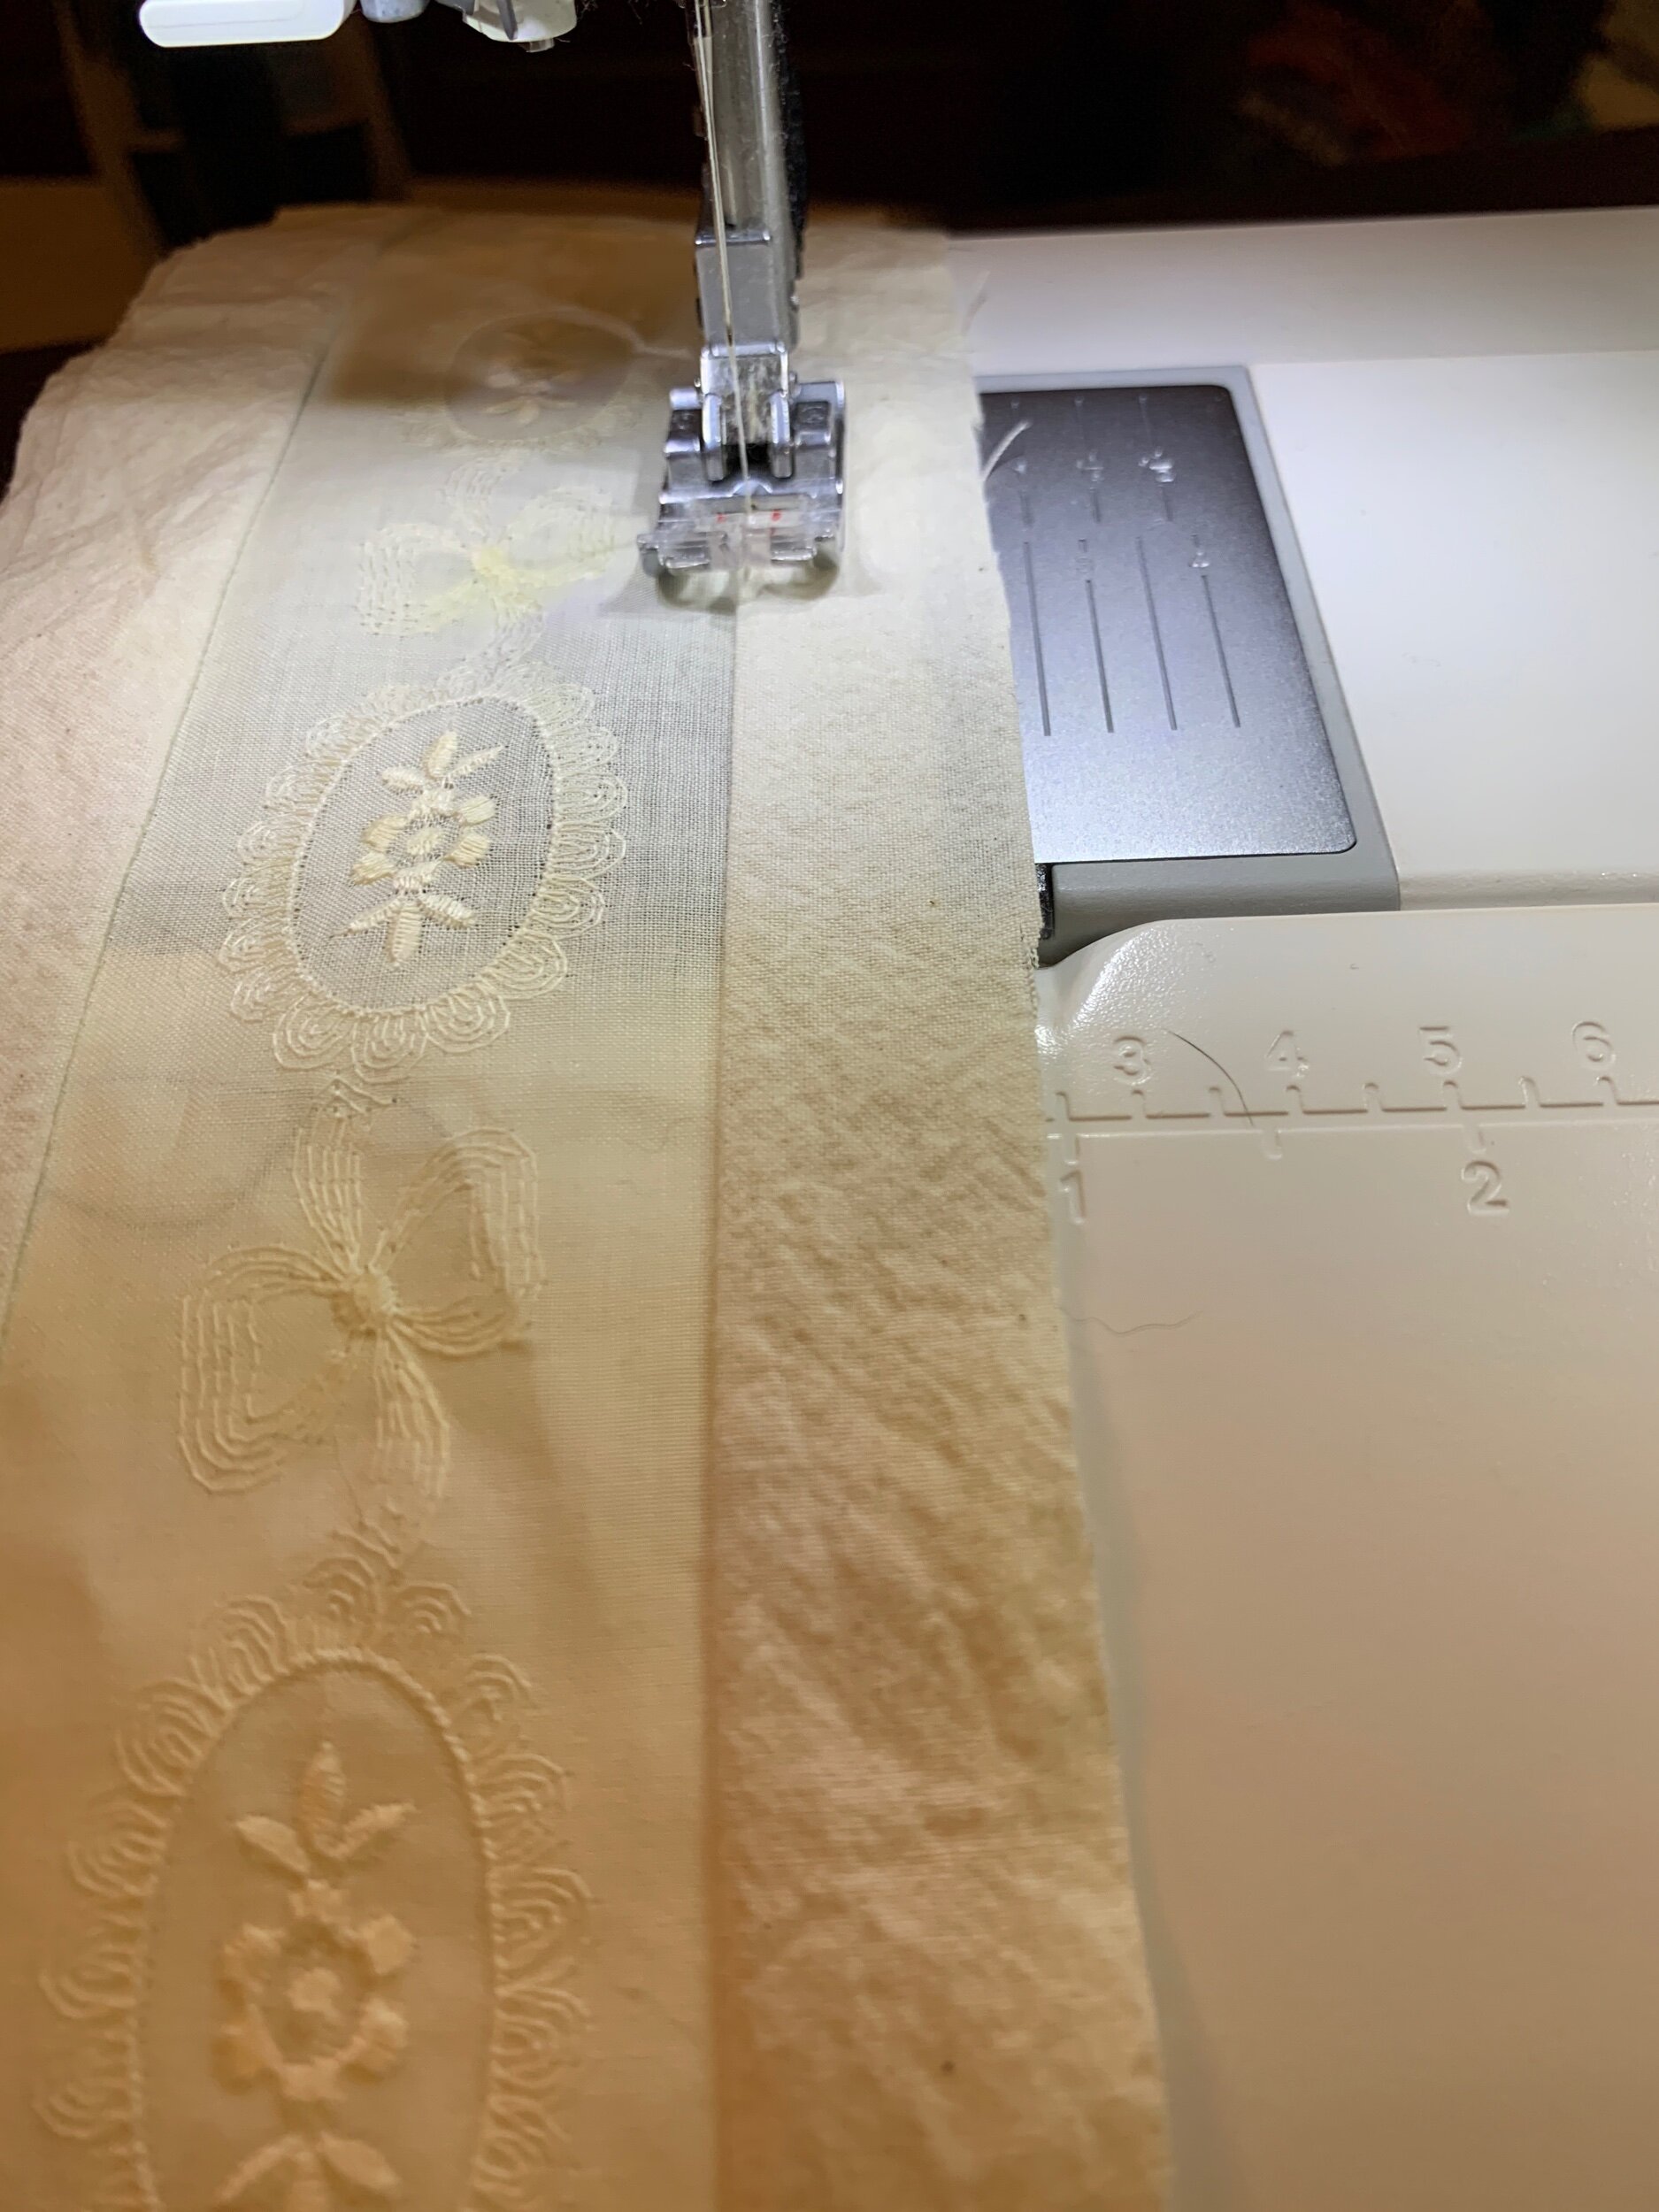
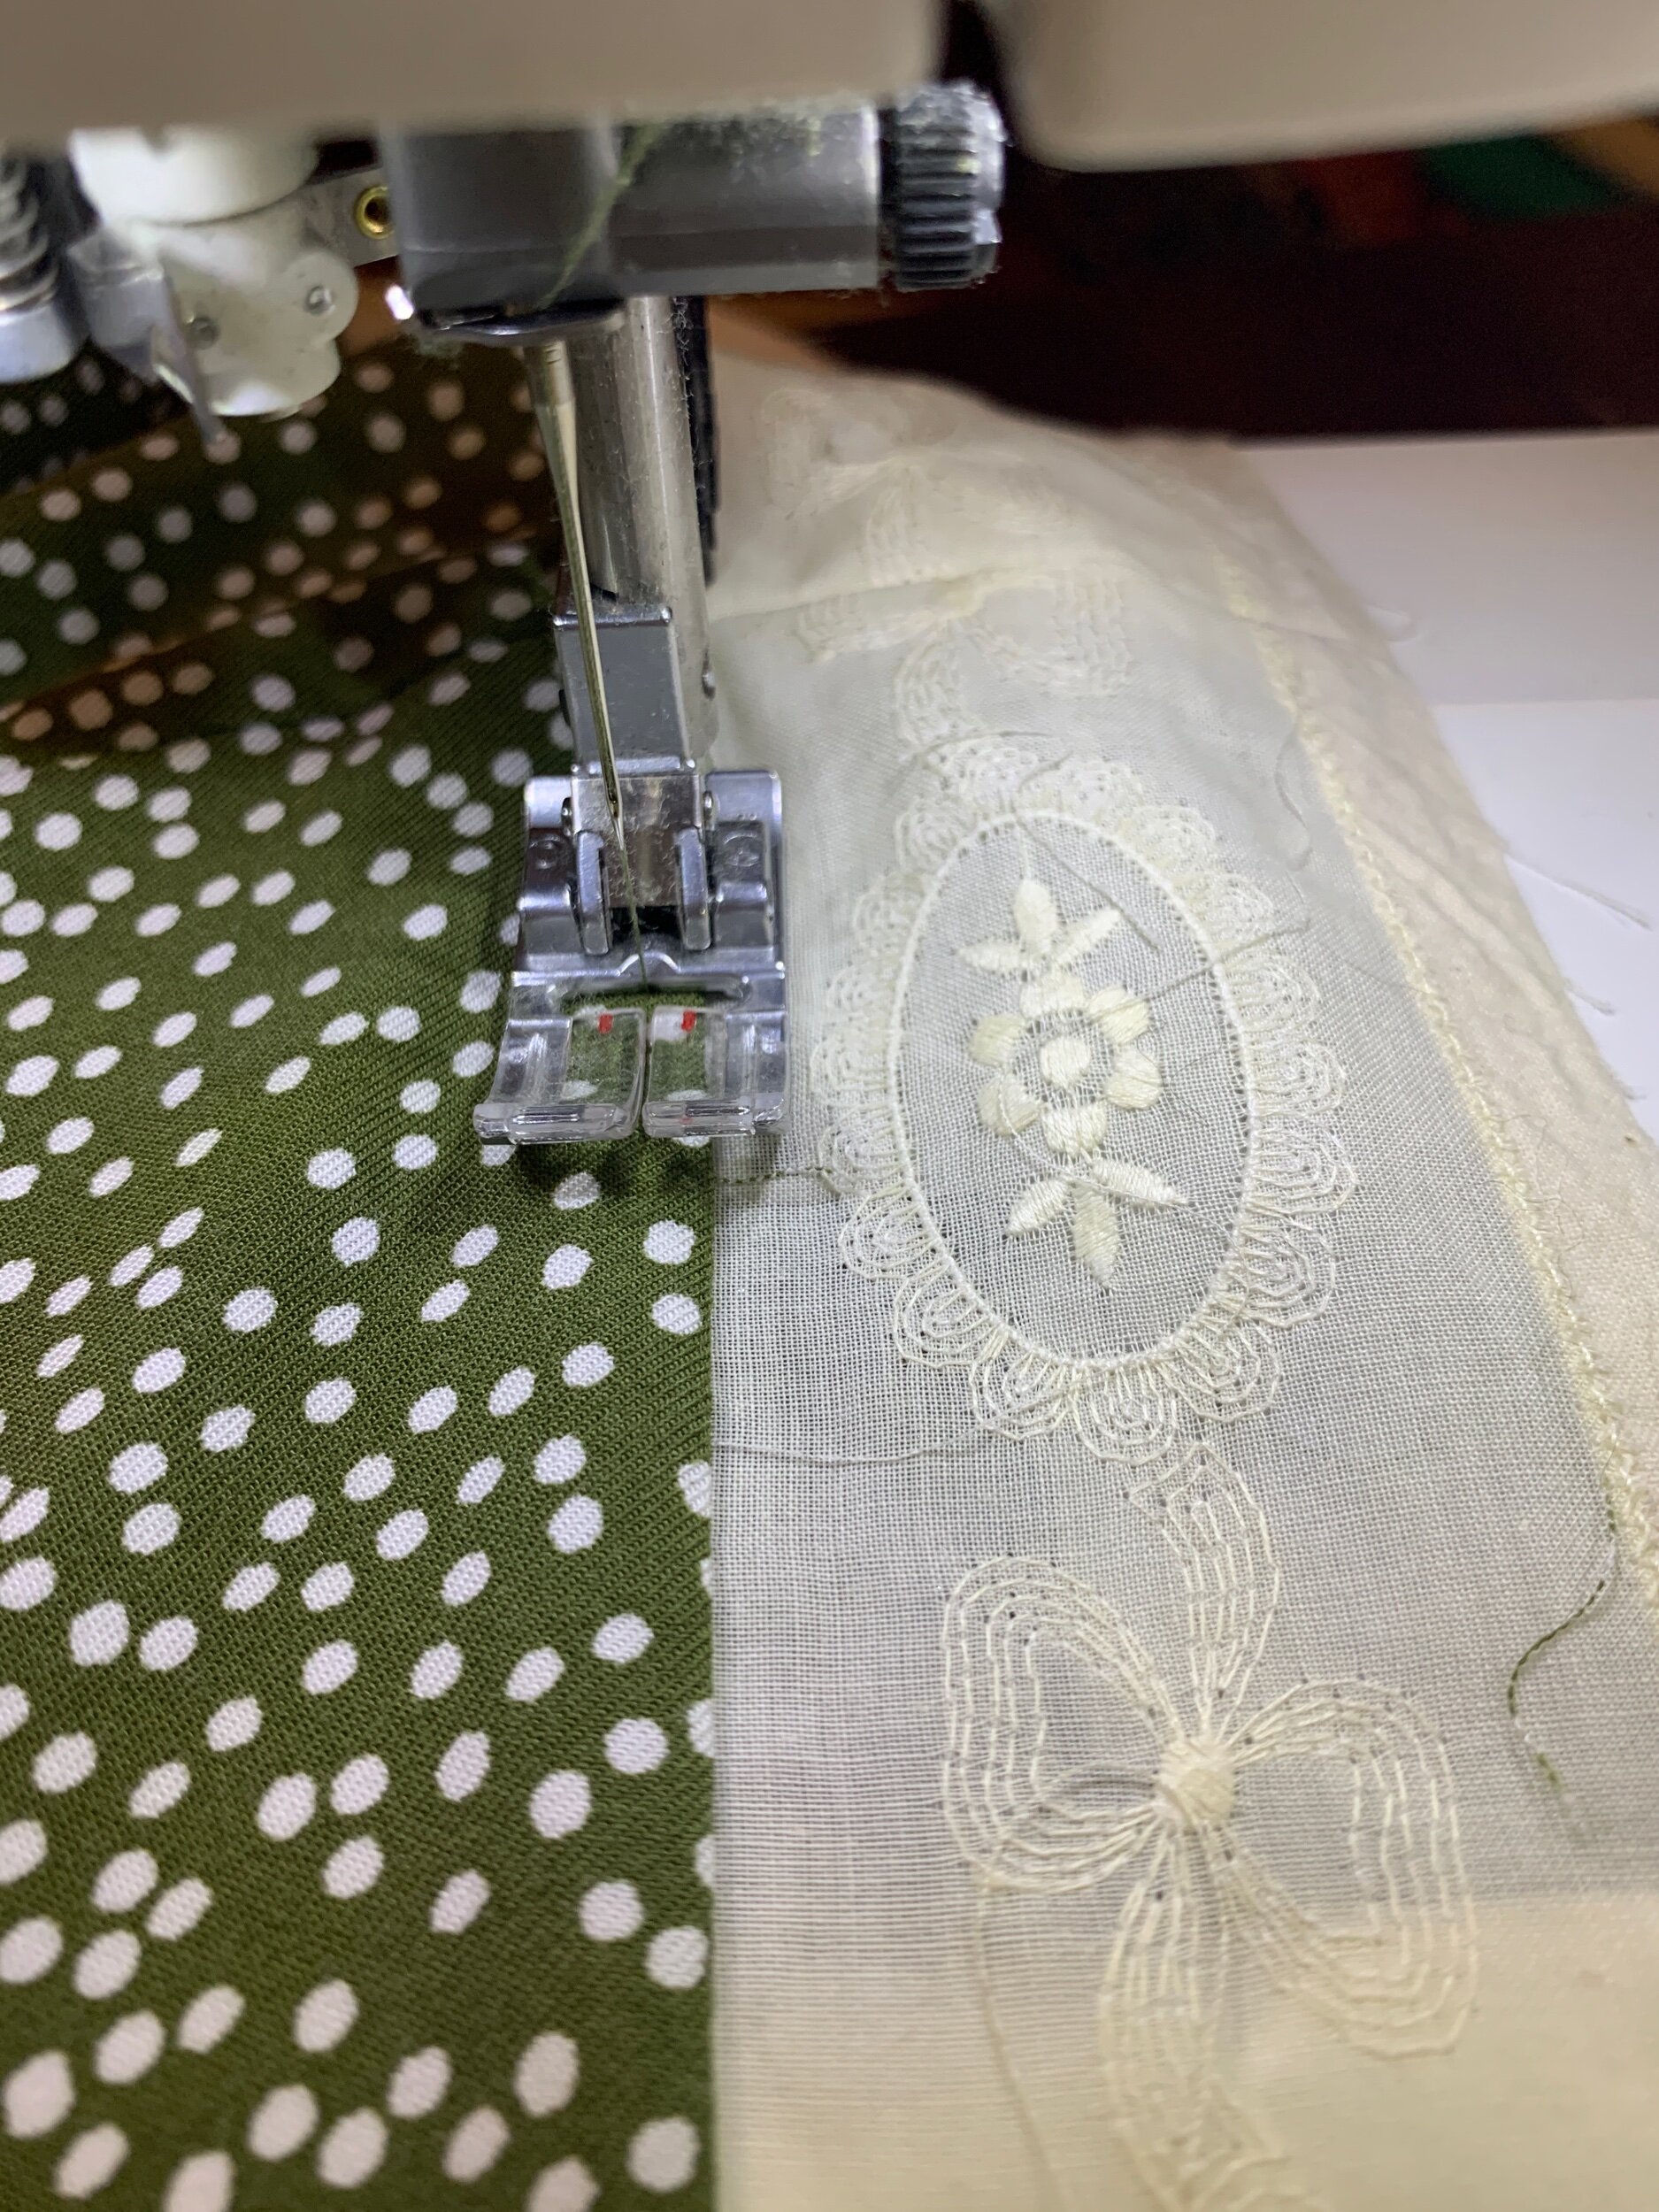
Once I knew I had enough of the vintage lace (you can’t order more! Ha!) I decided to attach it to something for structure and to create seam allowances! First I placed it onto muslin, but you can use broadcloth or something else if you would like. I pinned it onto the entire length of the muslin I had, on grain. When I needed more muslin underneath I just cut out the piece I had pinned with very adequate seam allowances for now and I overlapped it onto another piece of muslin to keep going with the backing of my lace.
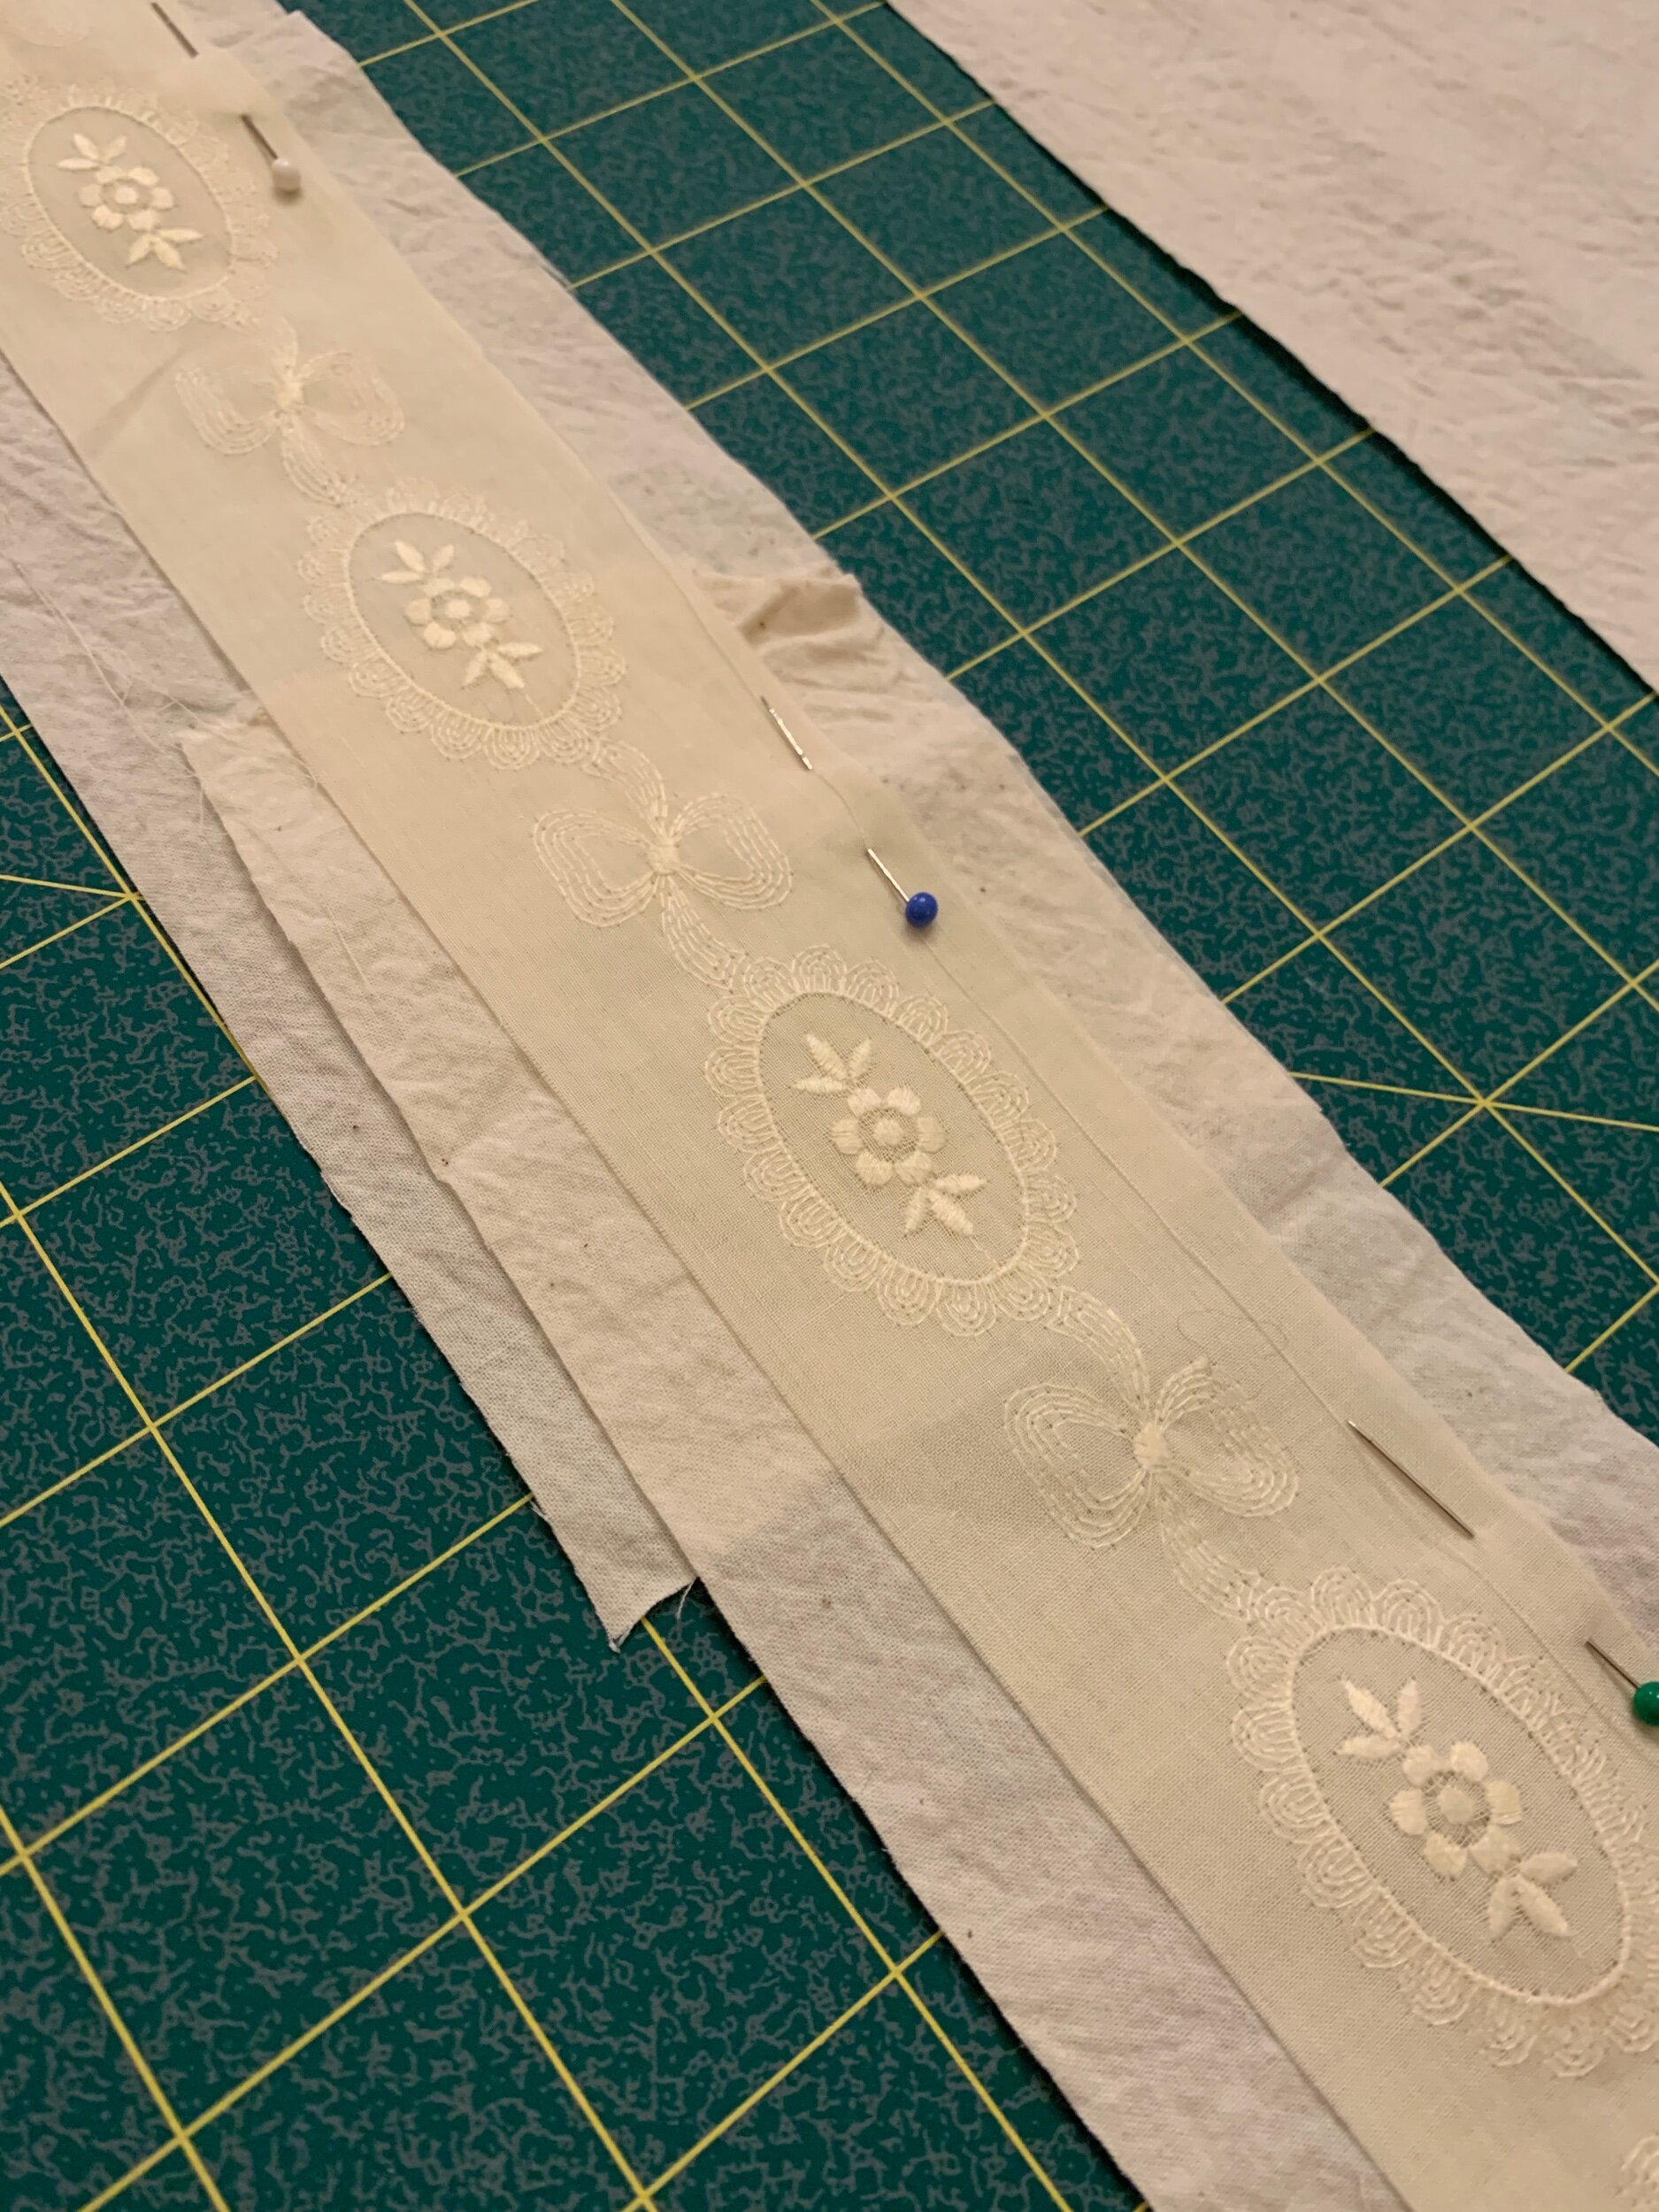
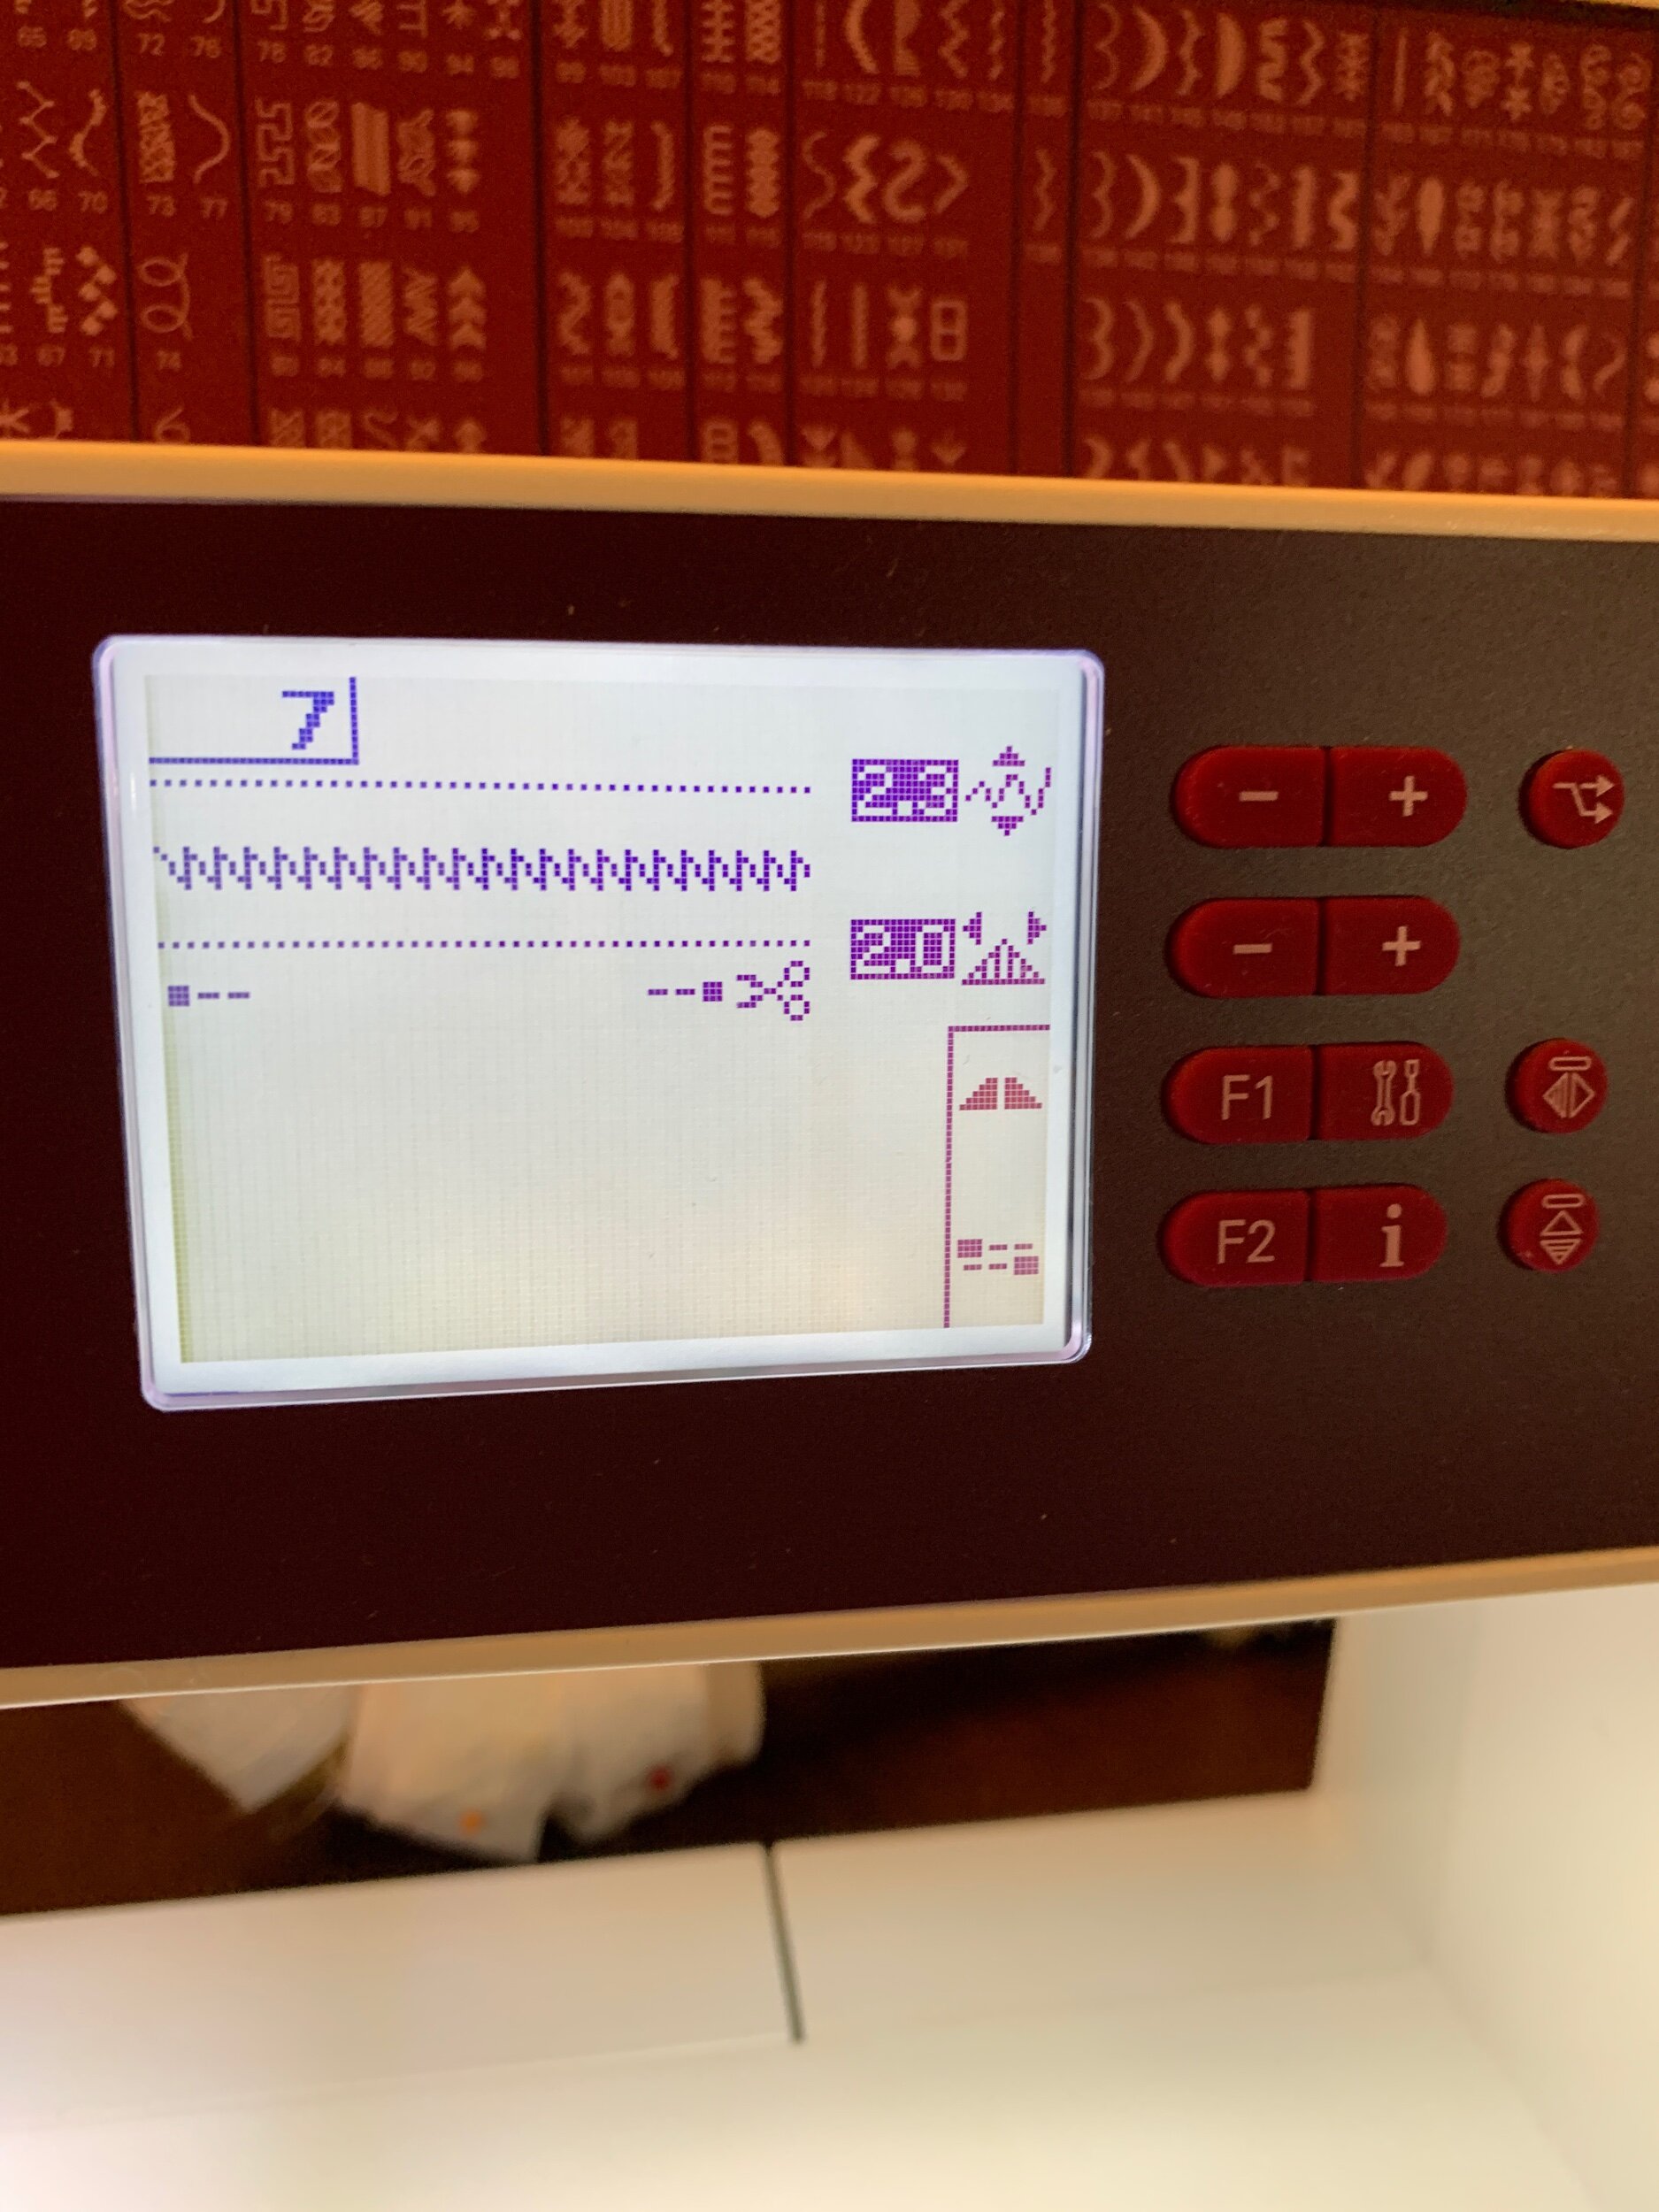
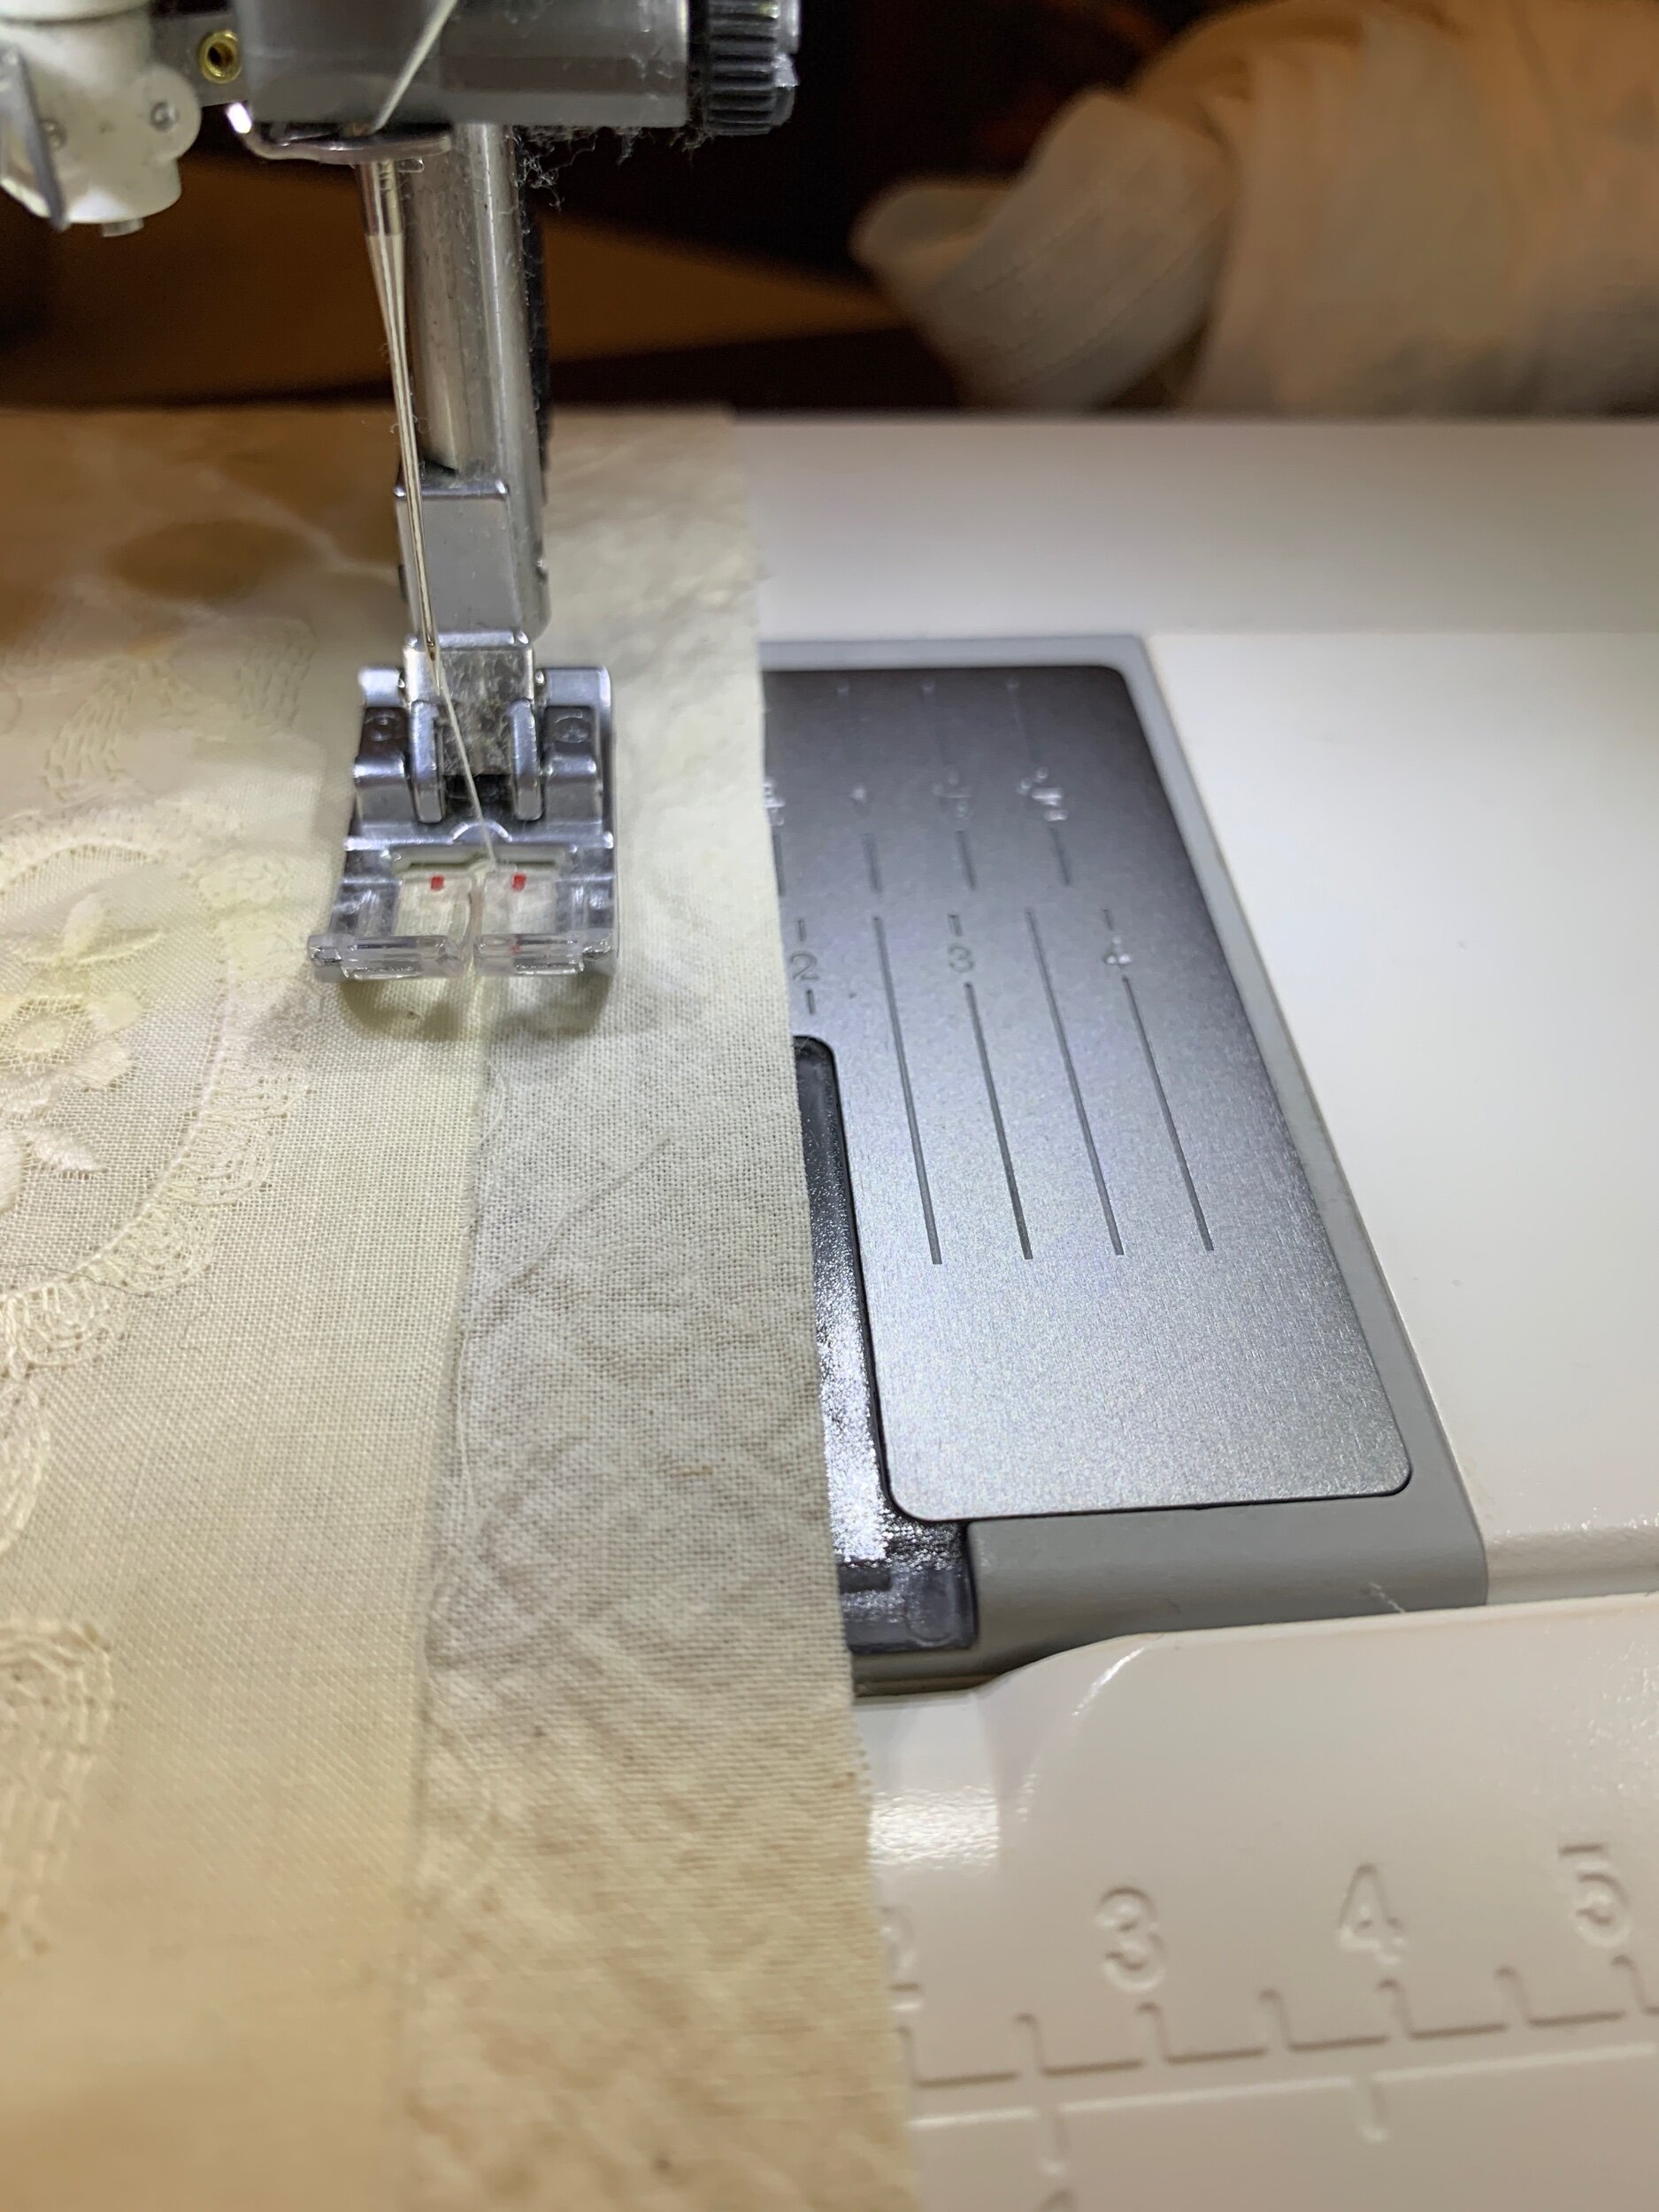
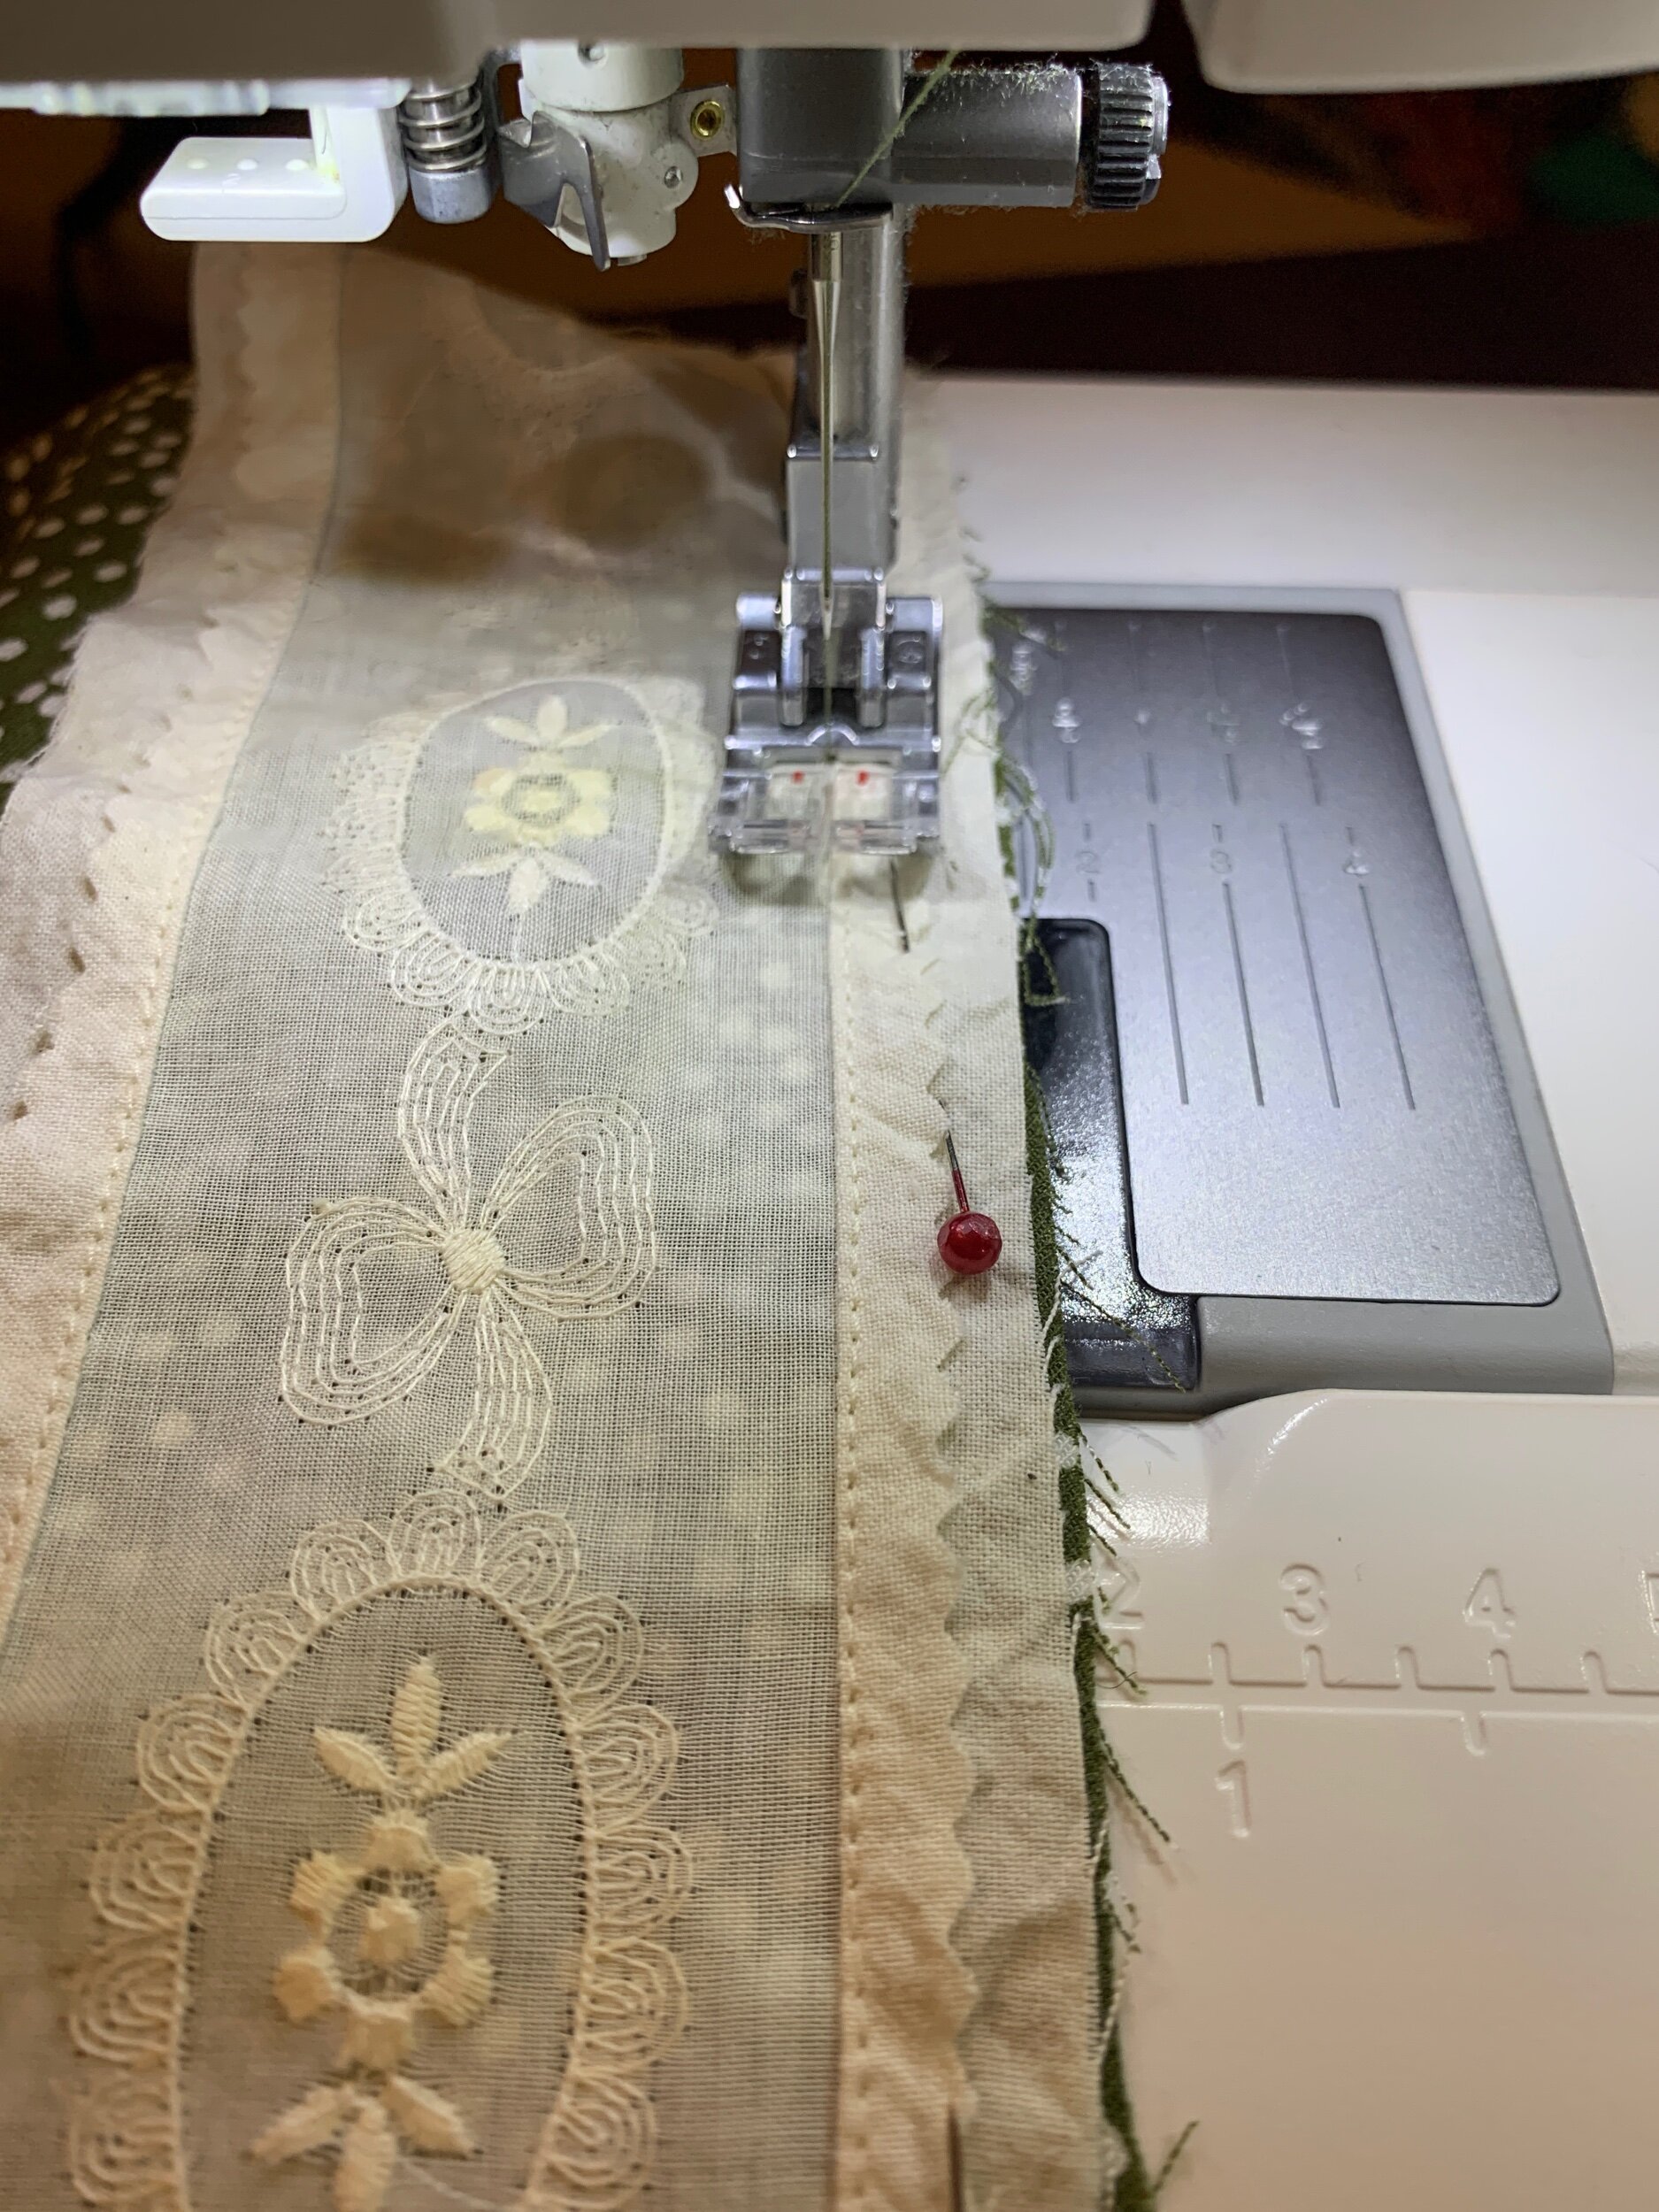
Now, the next step takes a while at your machine. What you need to do is choose a very small and tight zigzag or satin stitch to attach the lace edge to the muslin. Mine was a stitch length of about 2.0mm and a width of 2.3 mm. Just experiment with it until you have a good tight stitch that won’t come out or unravel! Do this on both sides of the lace until it is firmly attached!
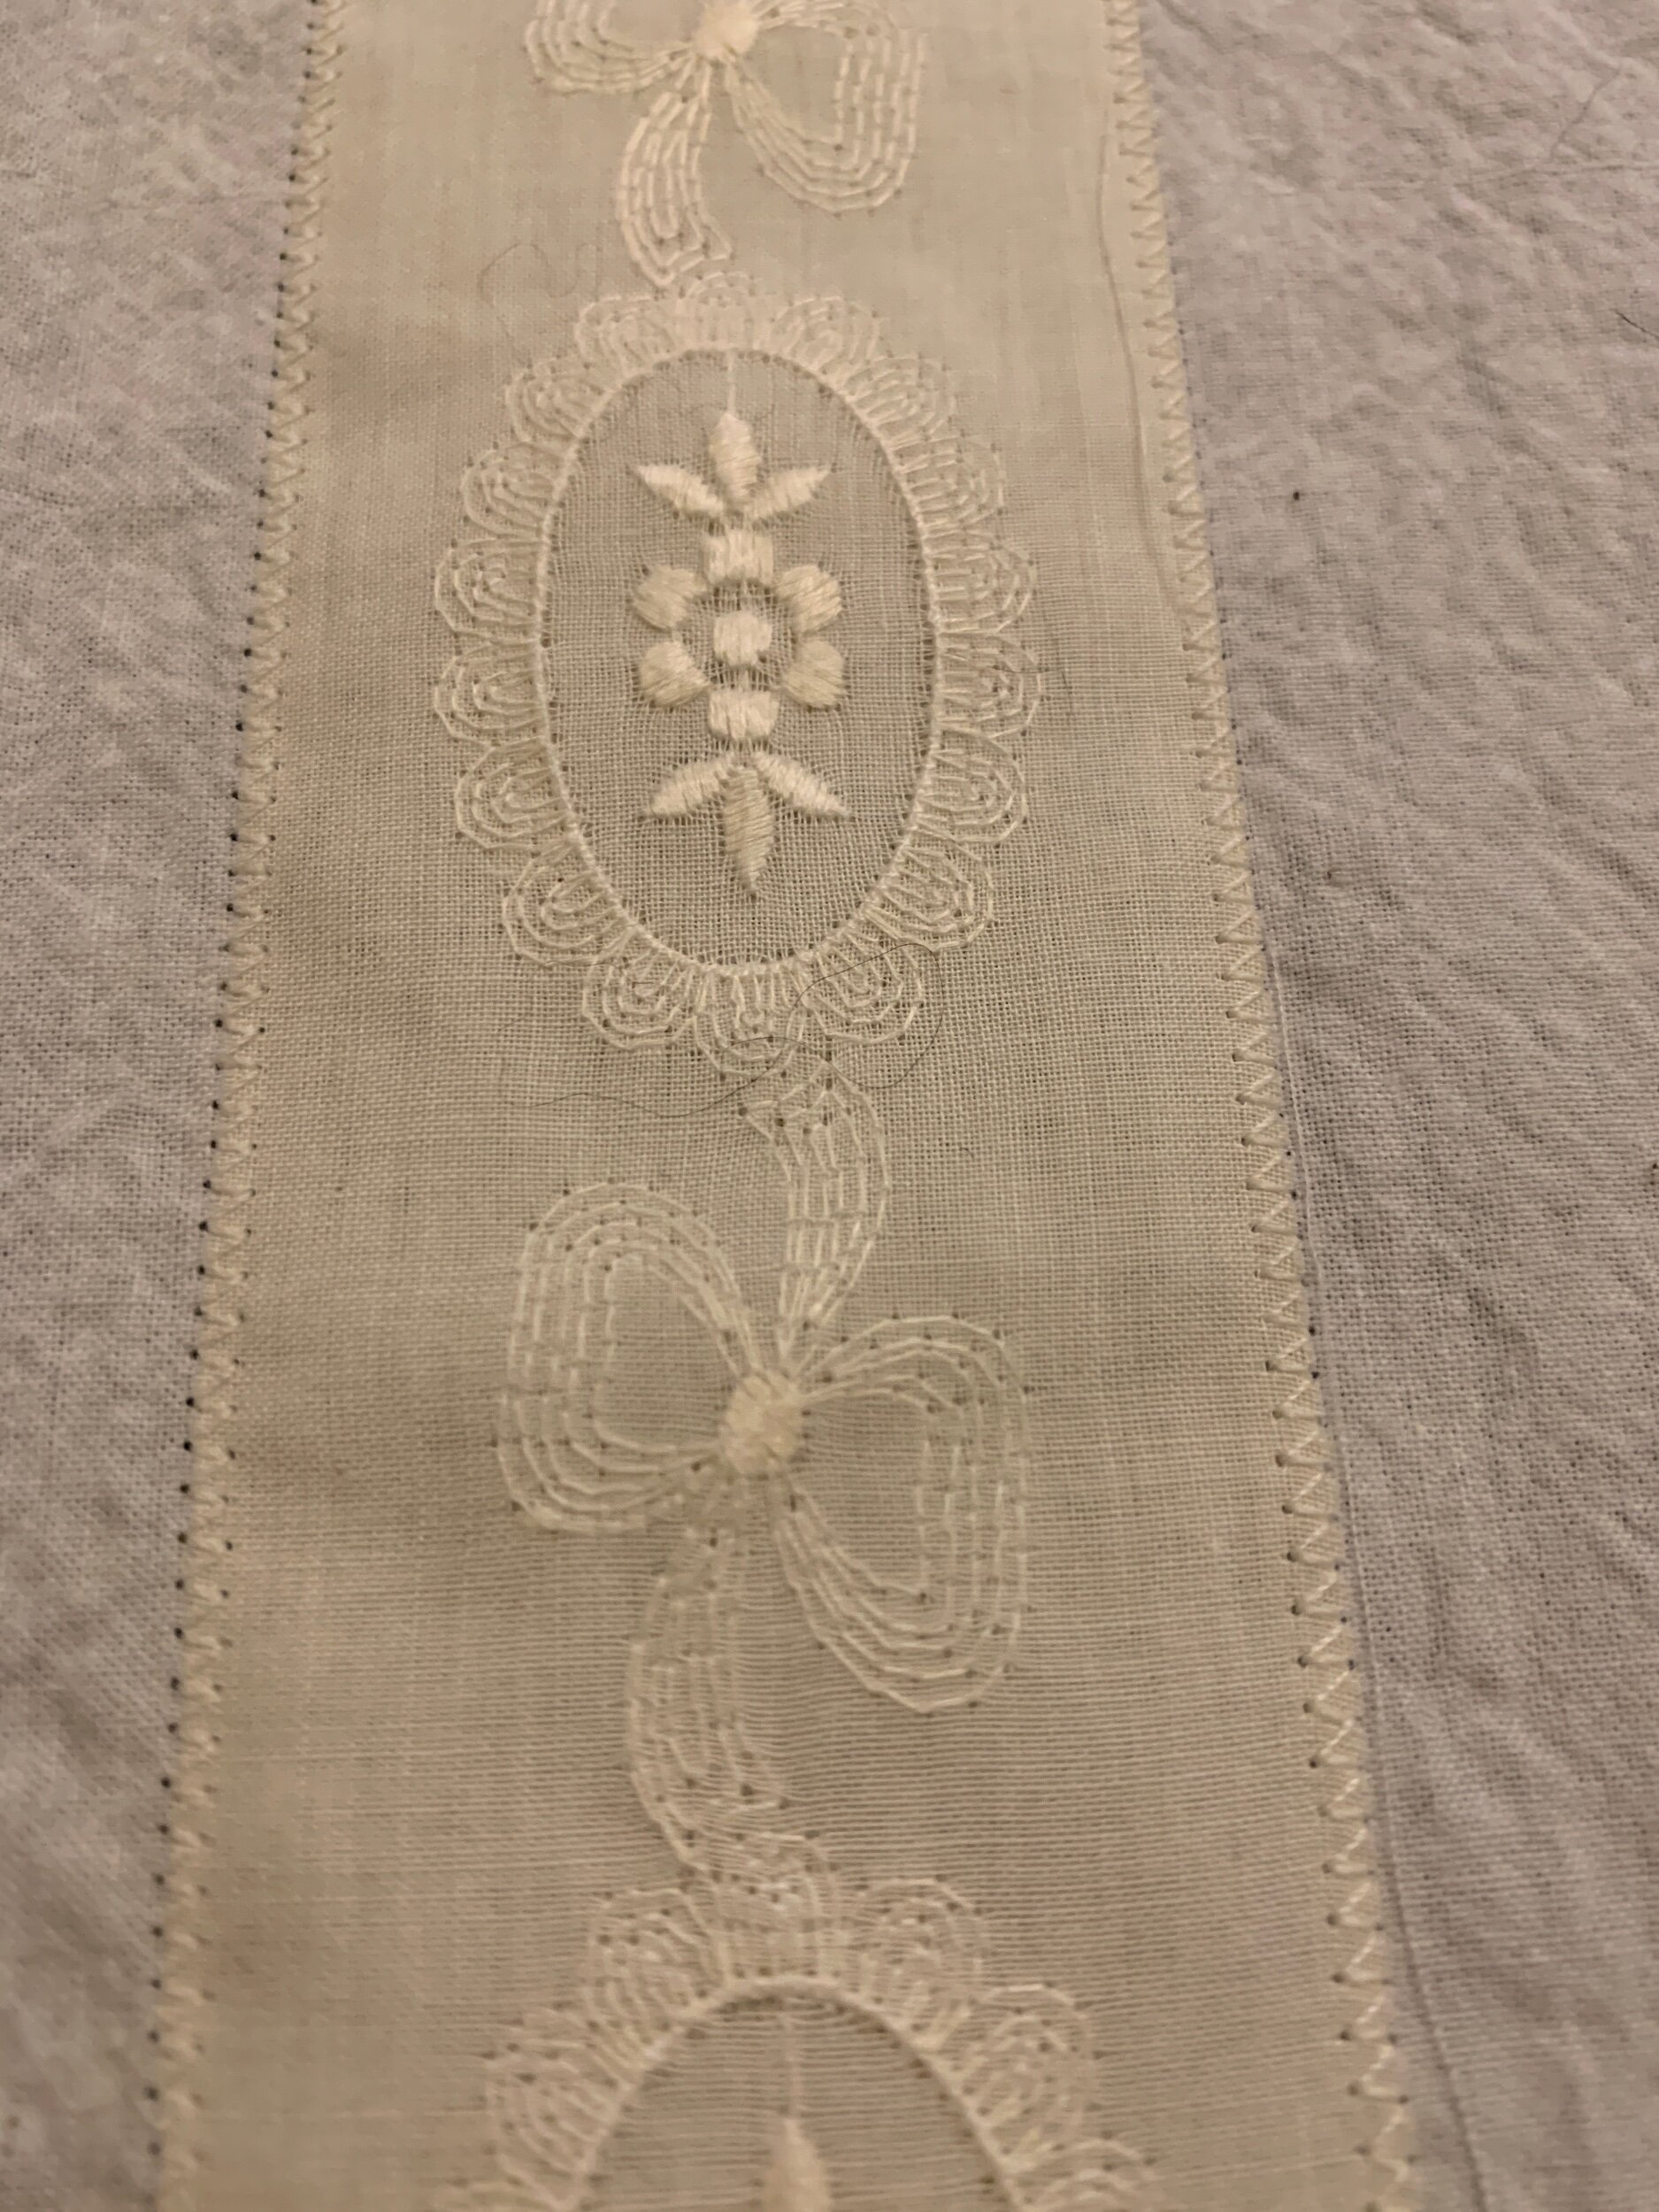
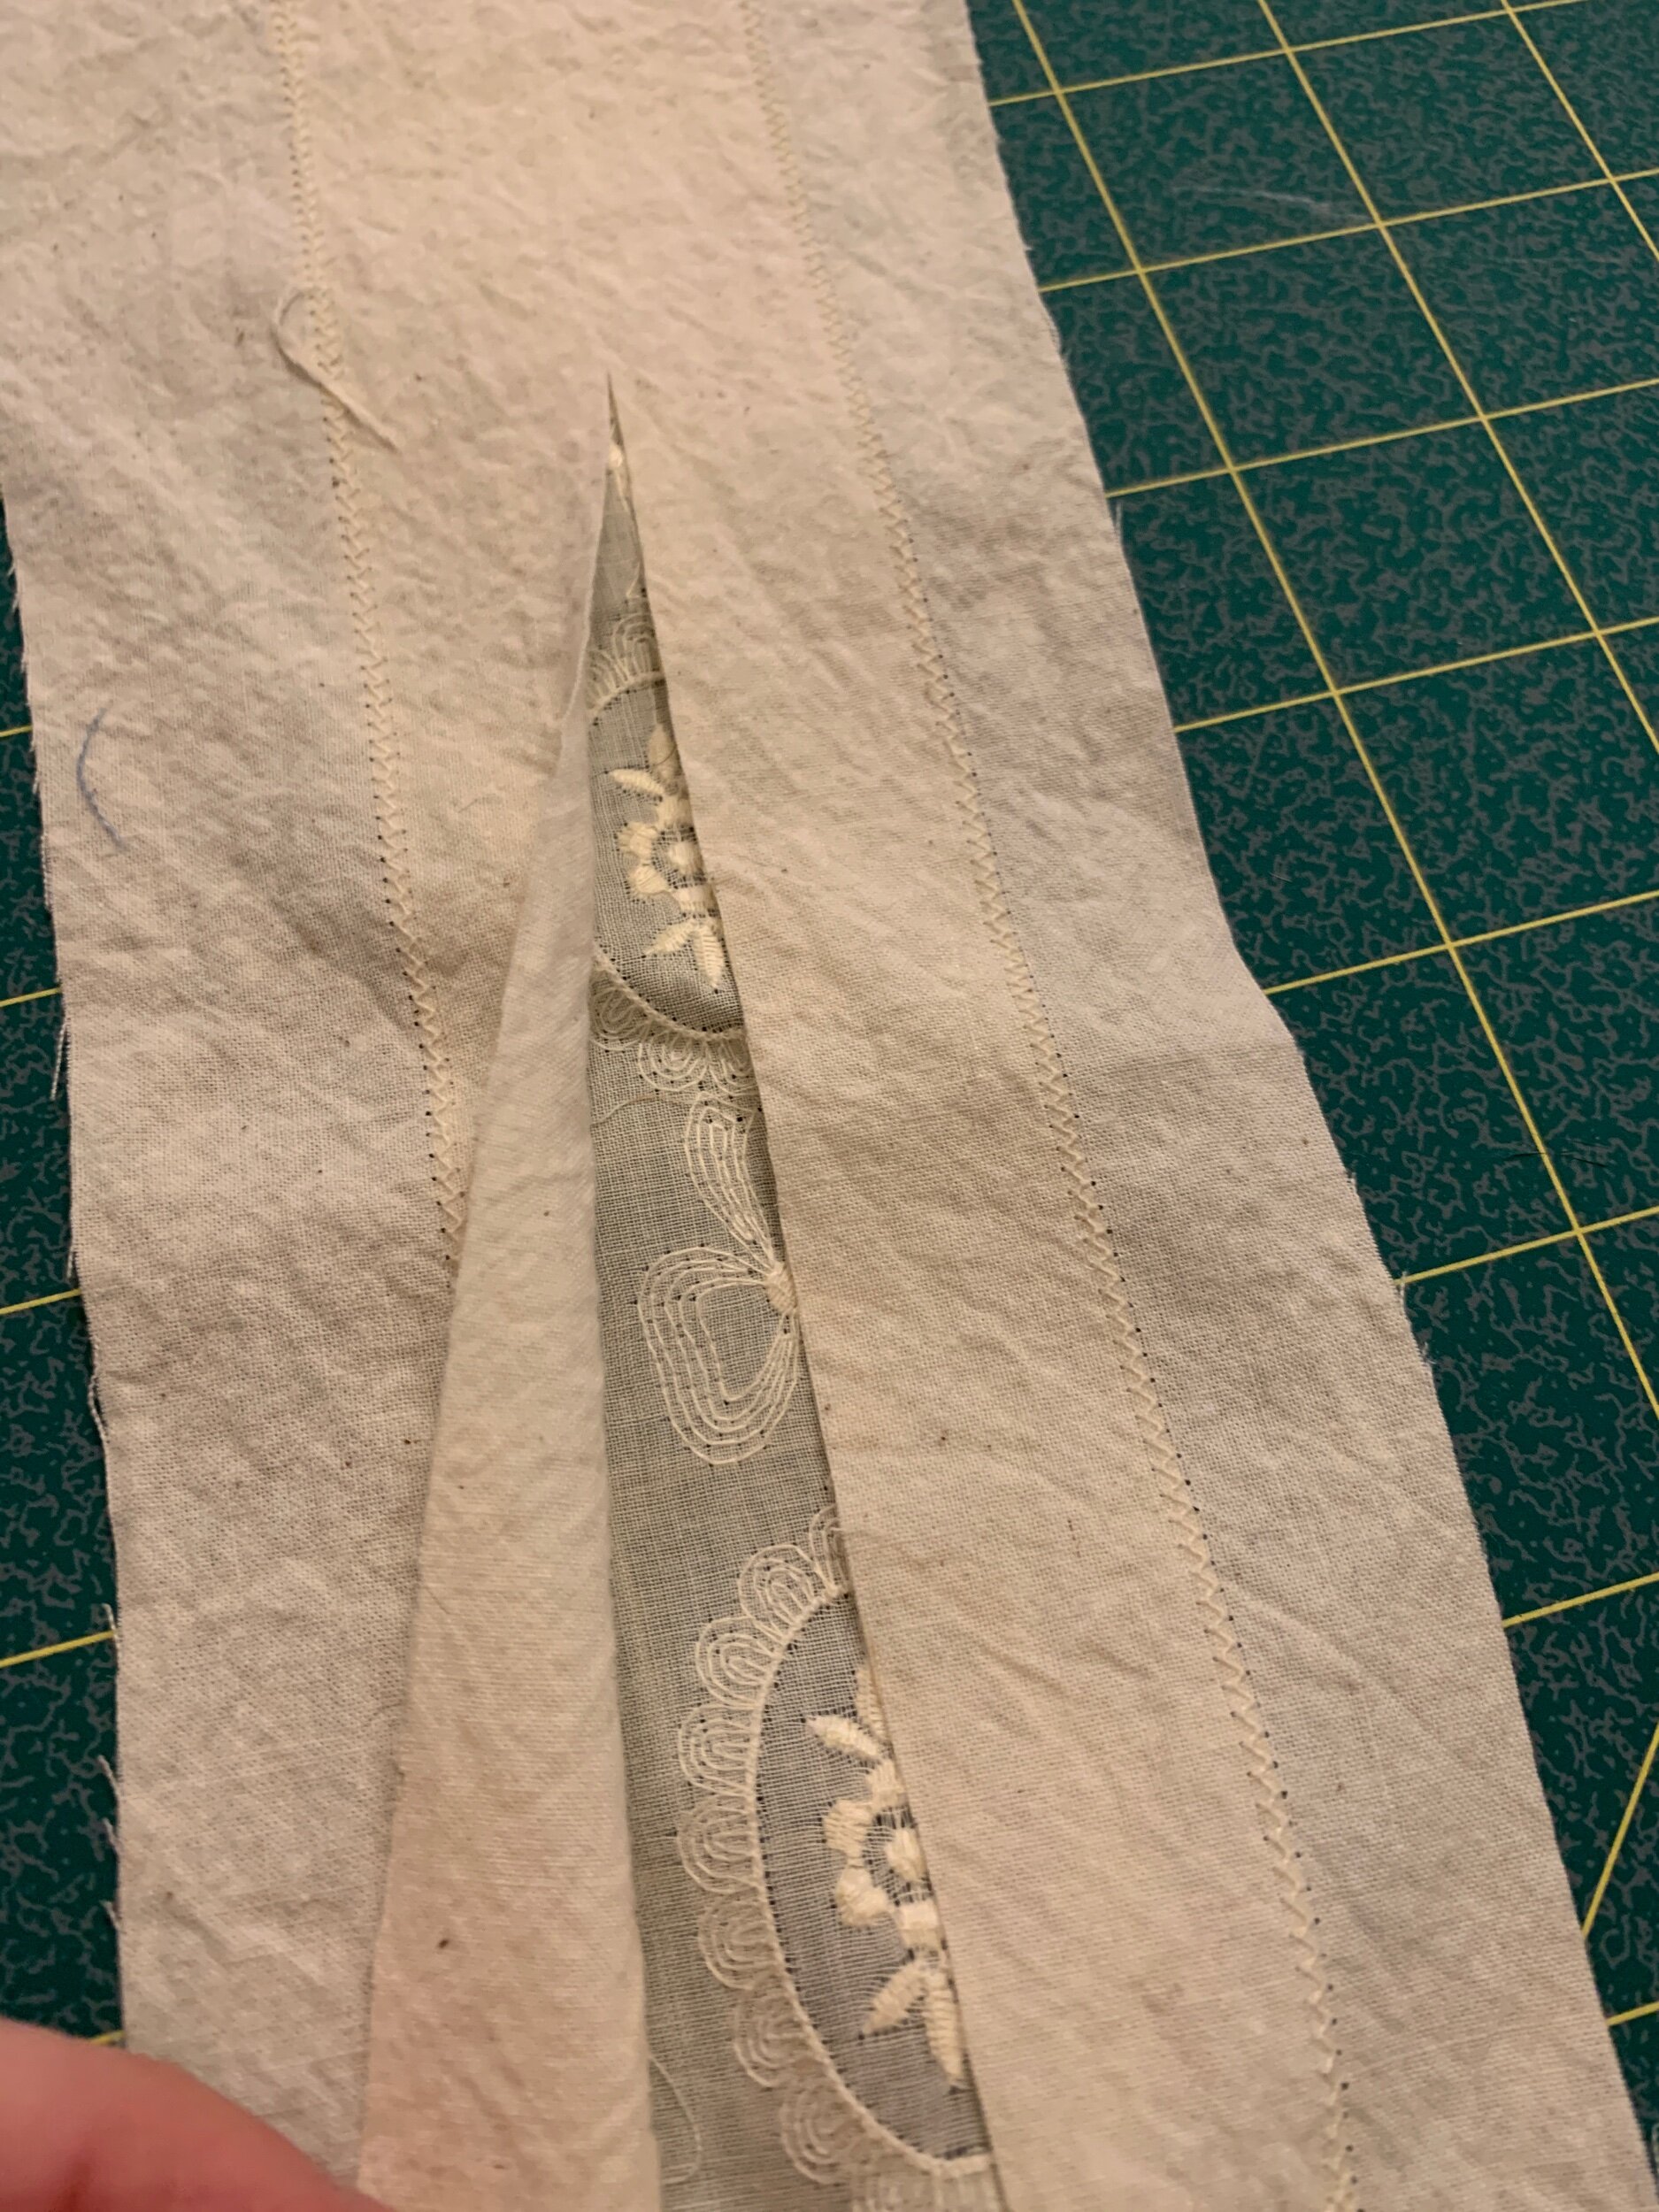
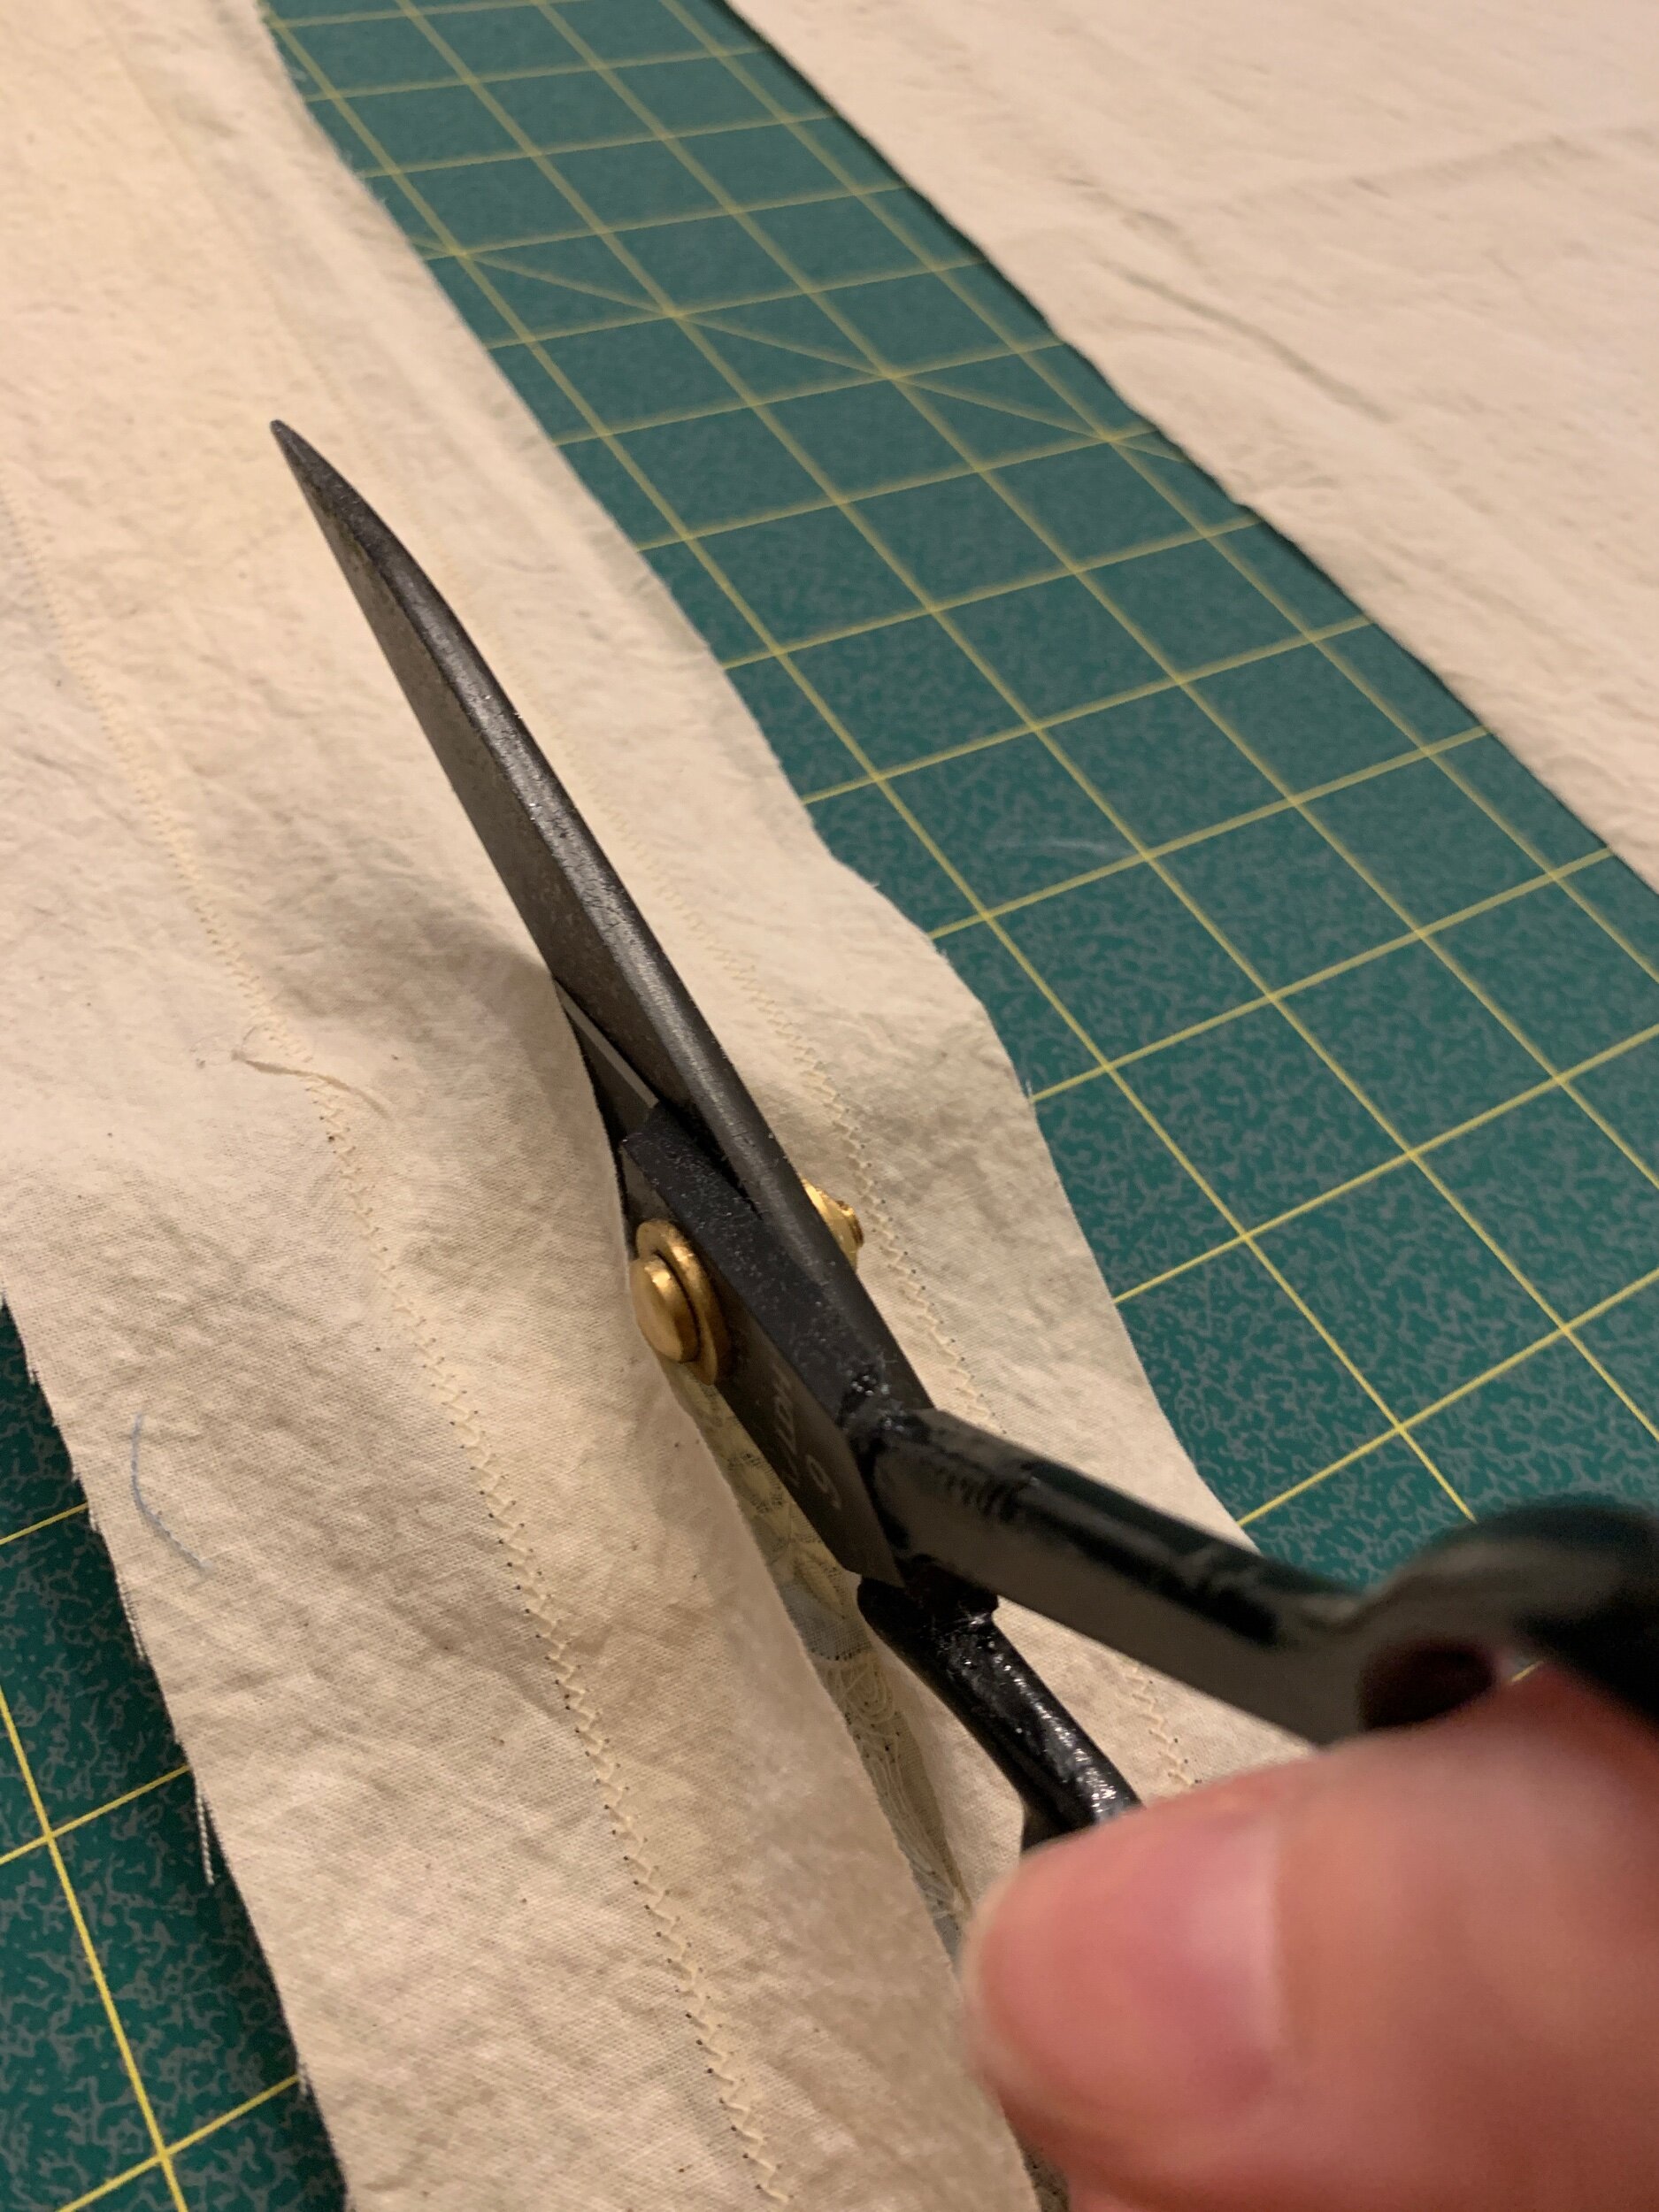
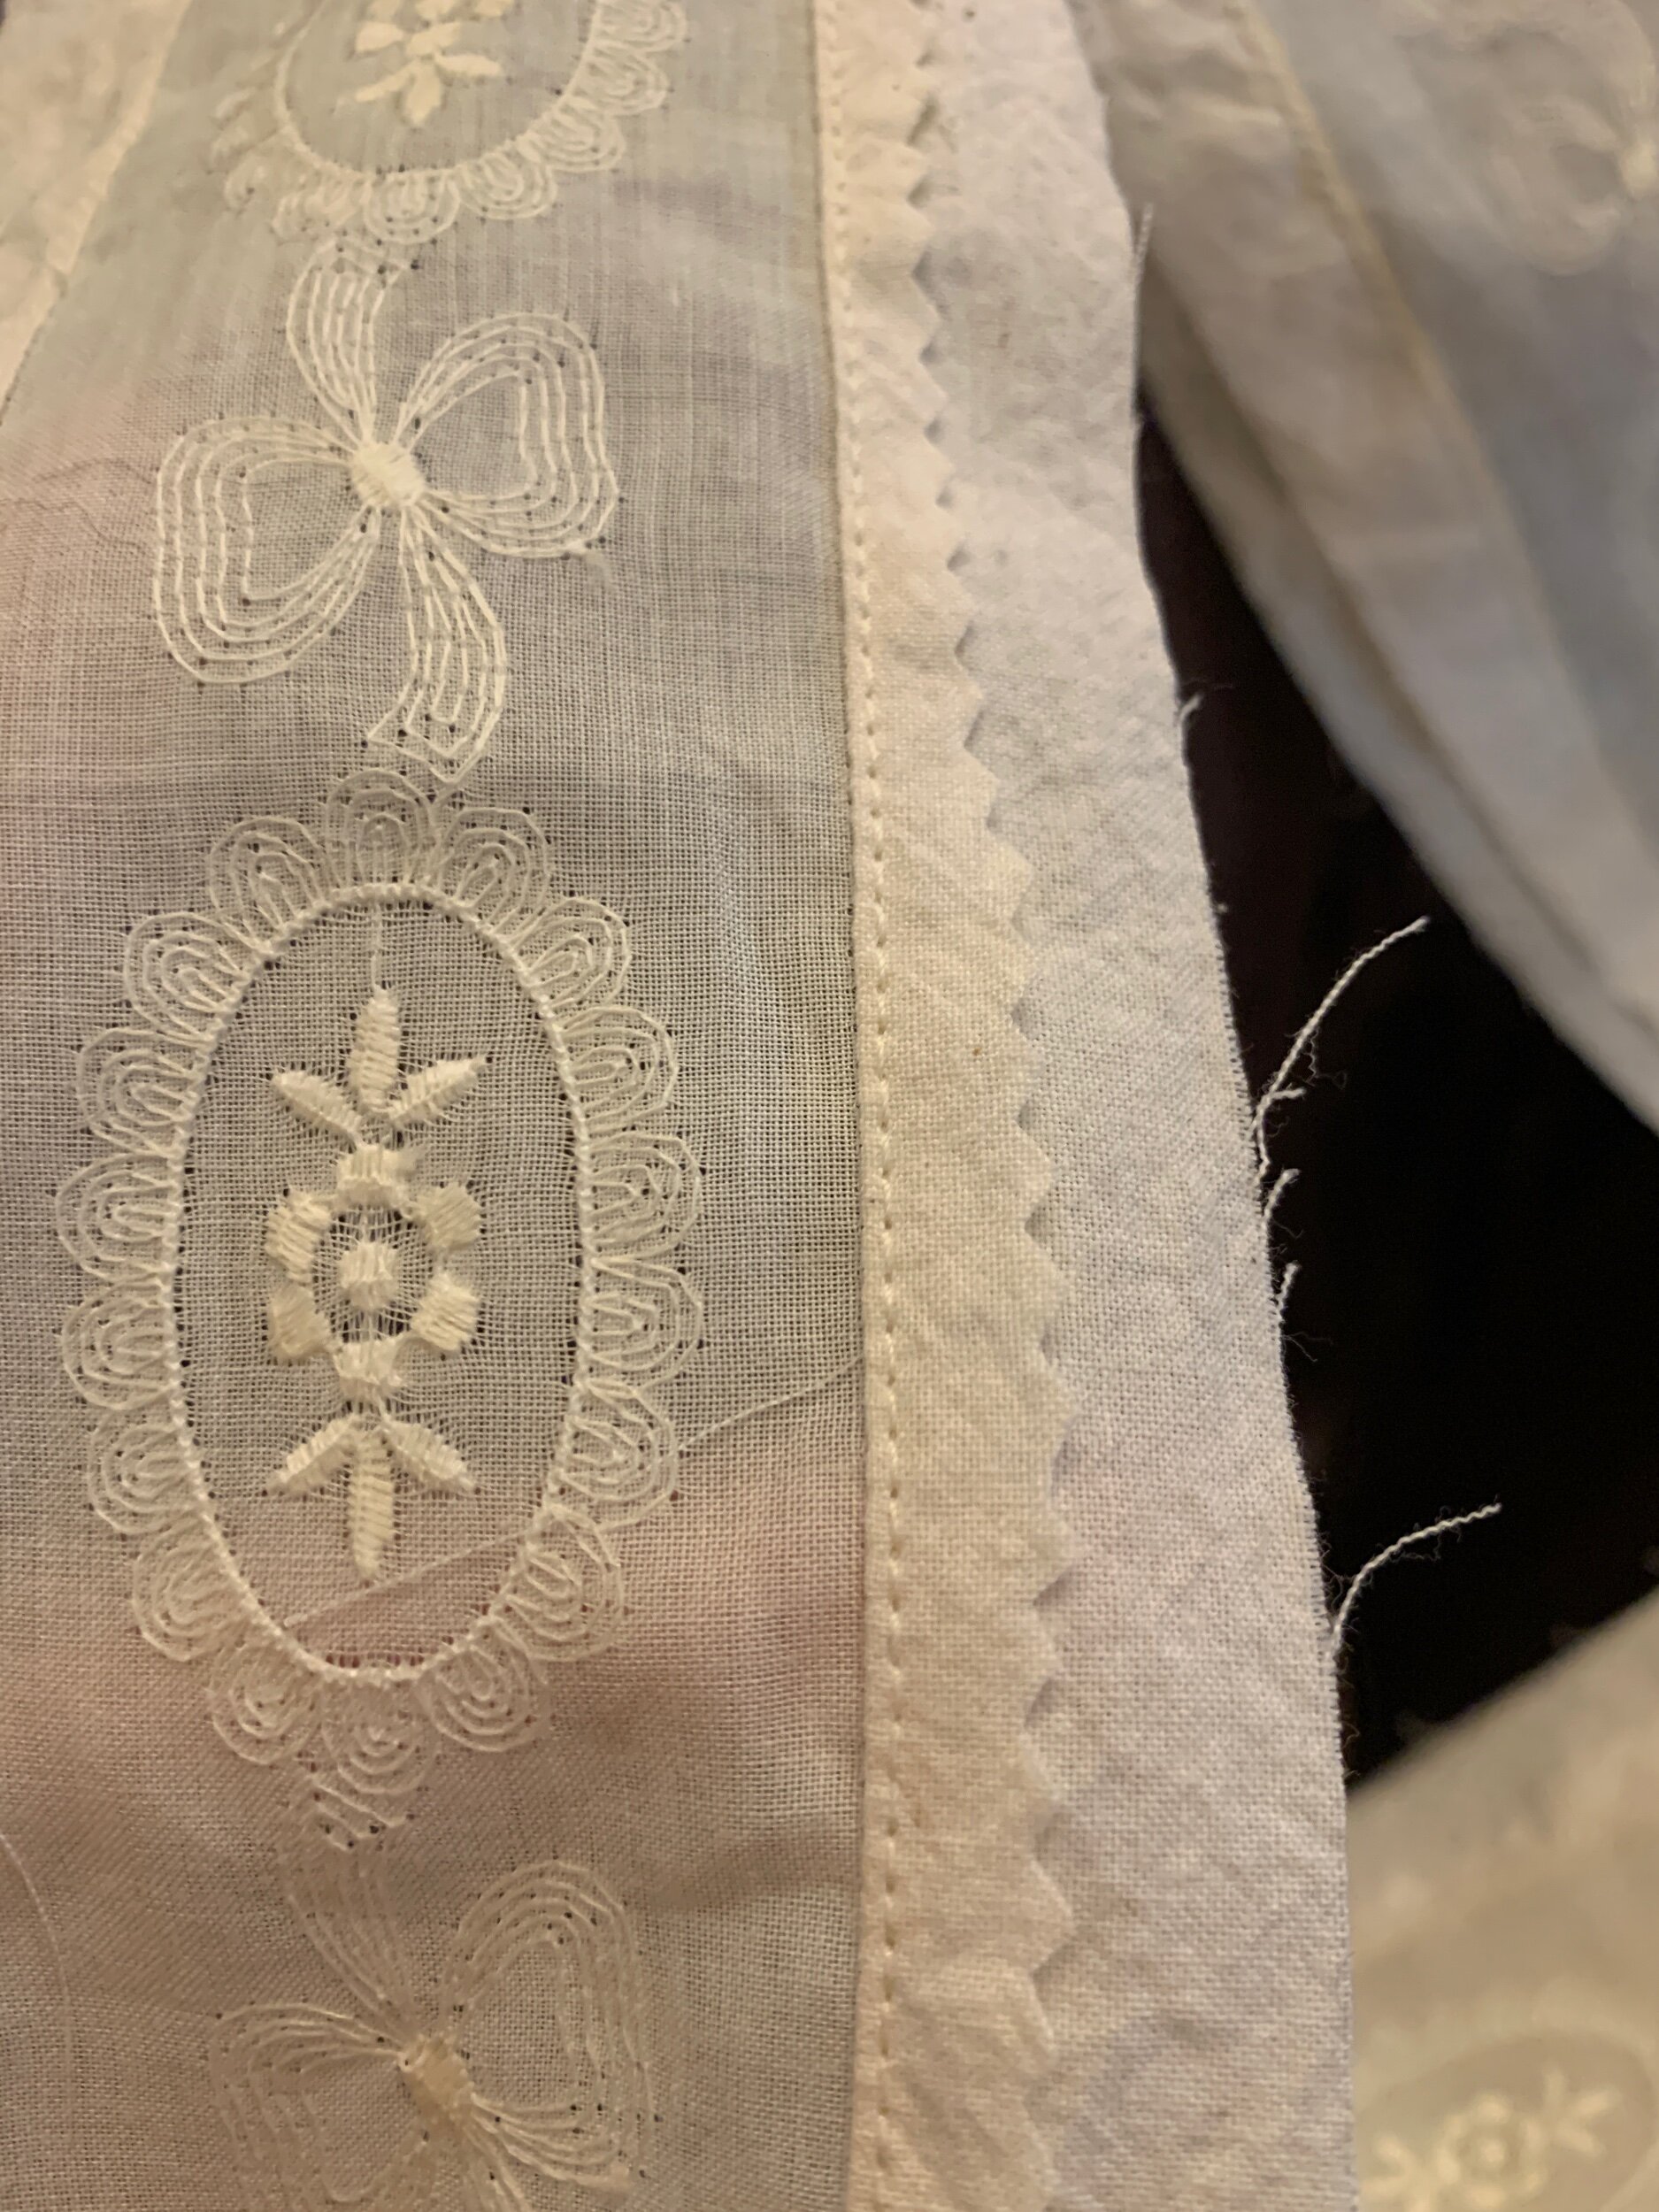
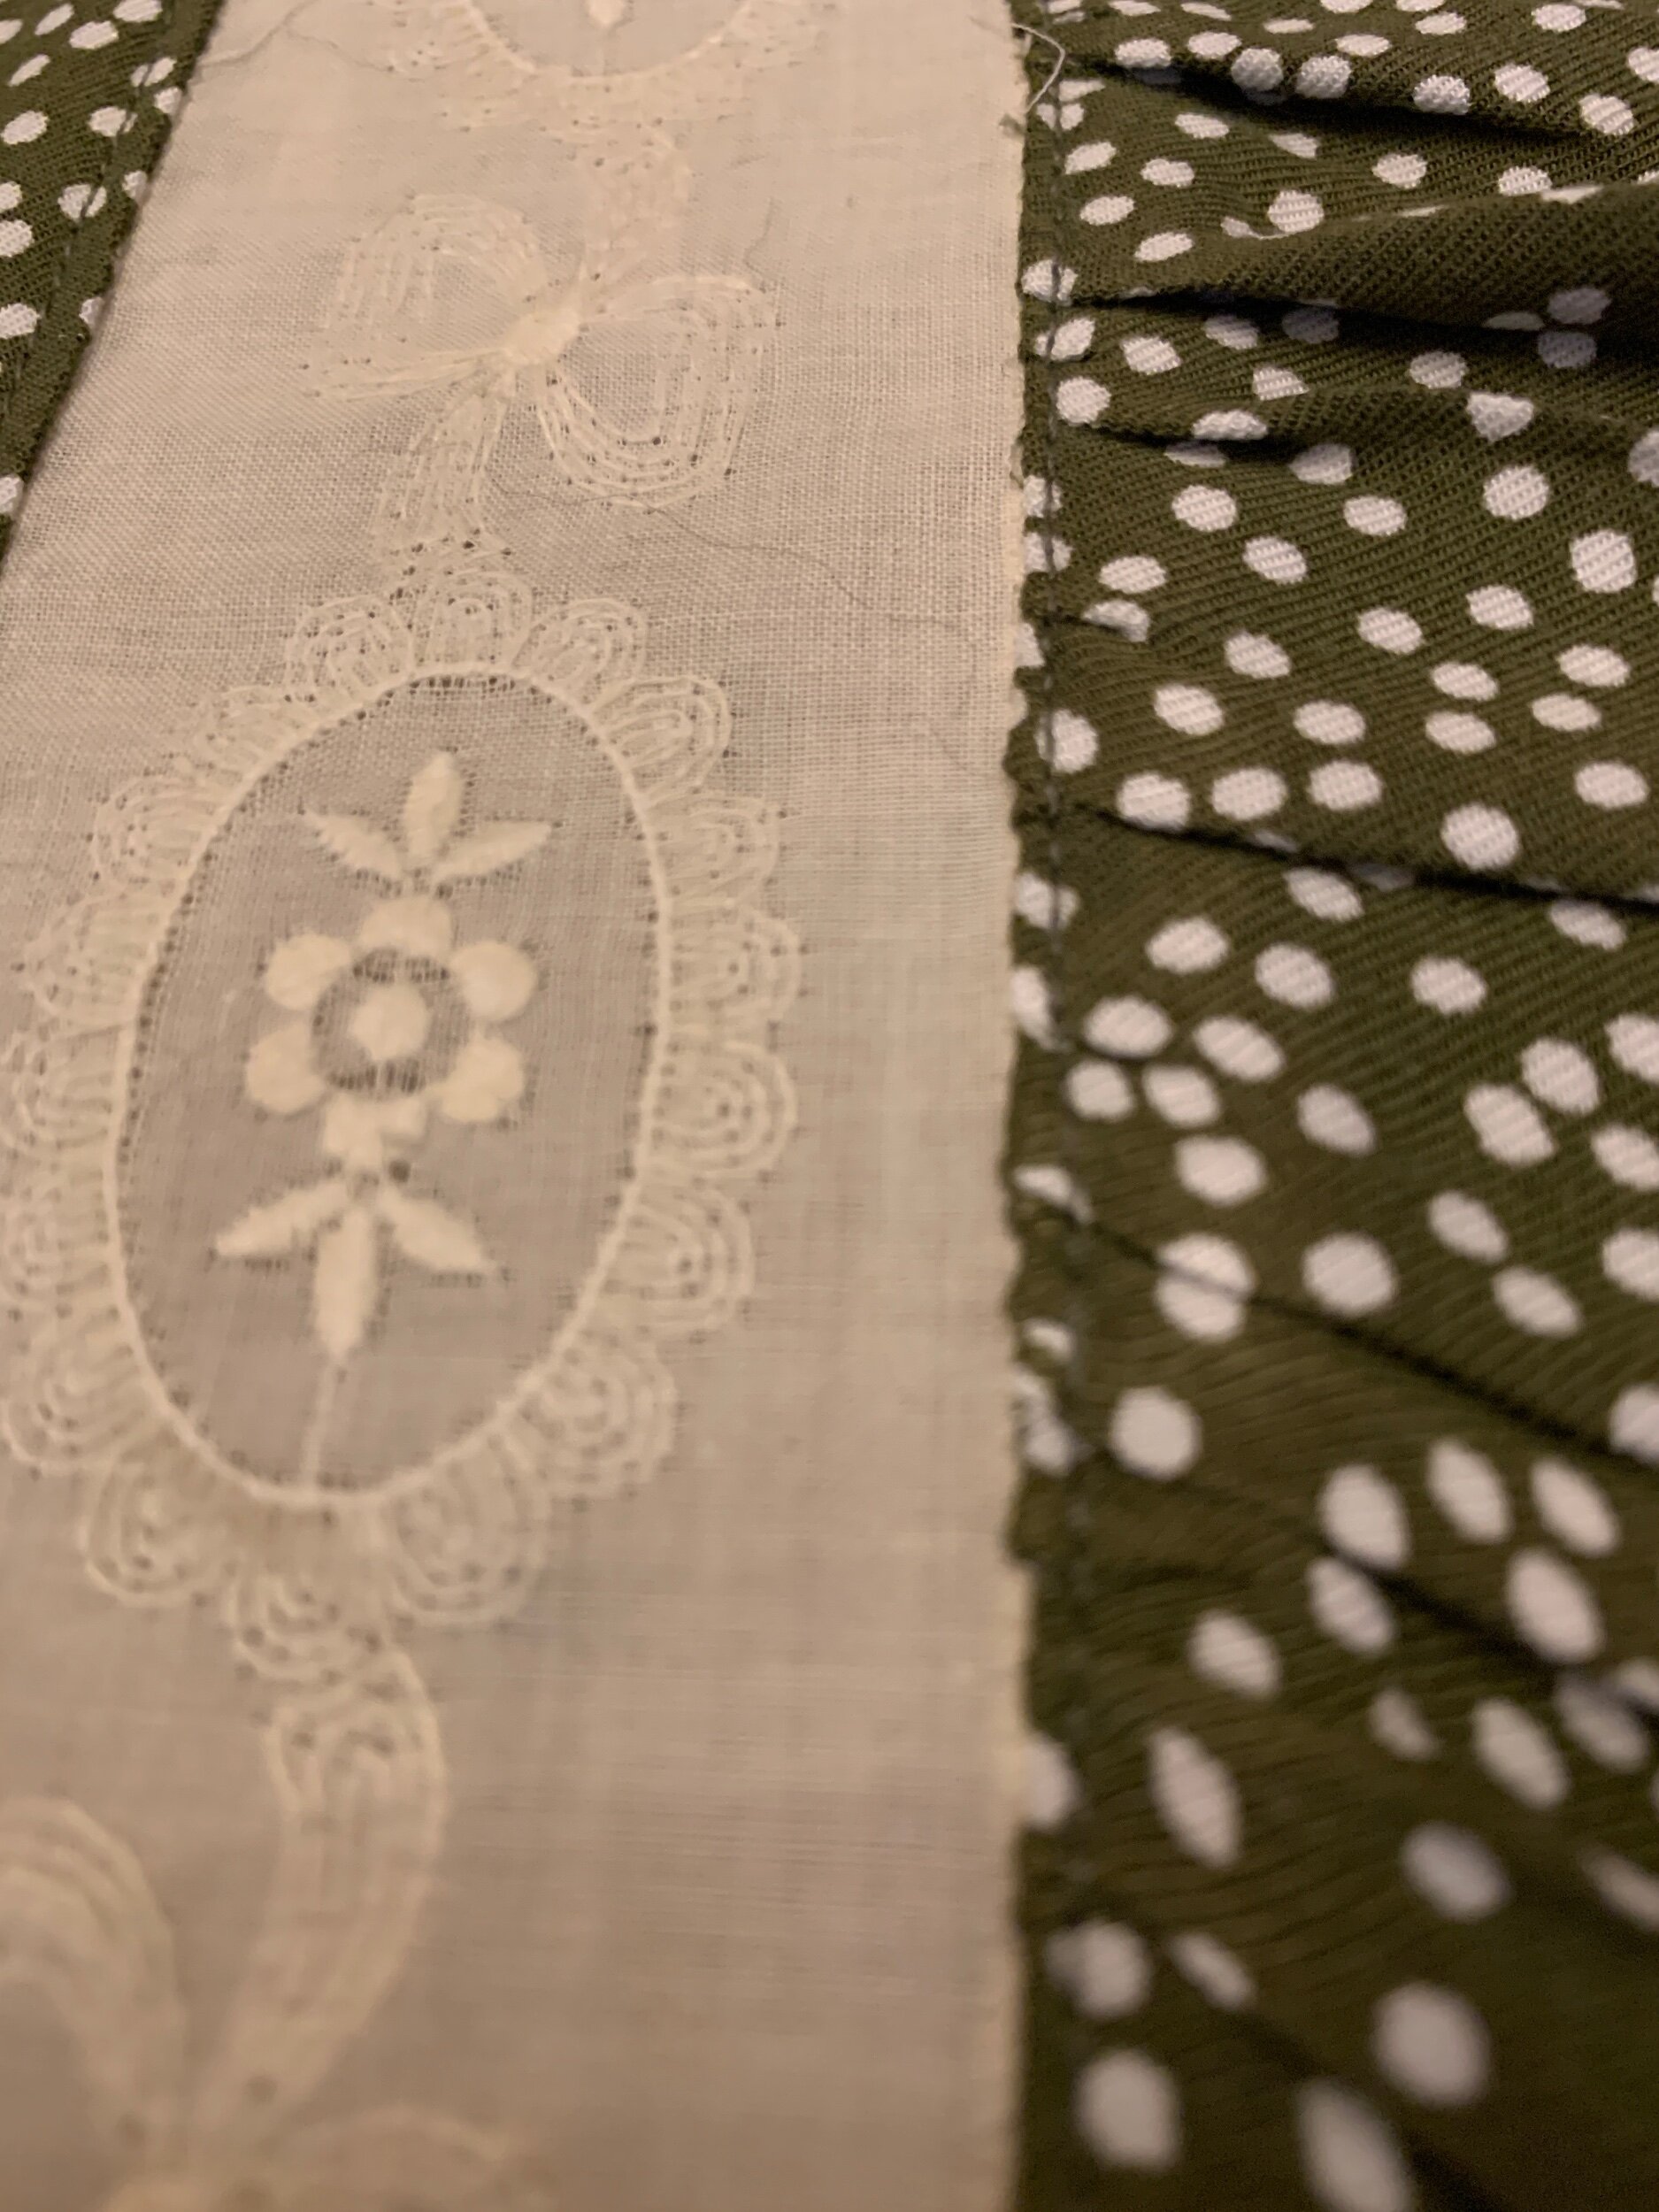
Now you have a backing, but you probably want to see through the lace as I did! You will take scissors and CAREFULLY cut through the muslin and NOT the lace down the middle. After you have done this, you will press this out to the sides. Press carefully or with a press cloth so as not to ruin your lace!
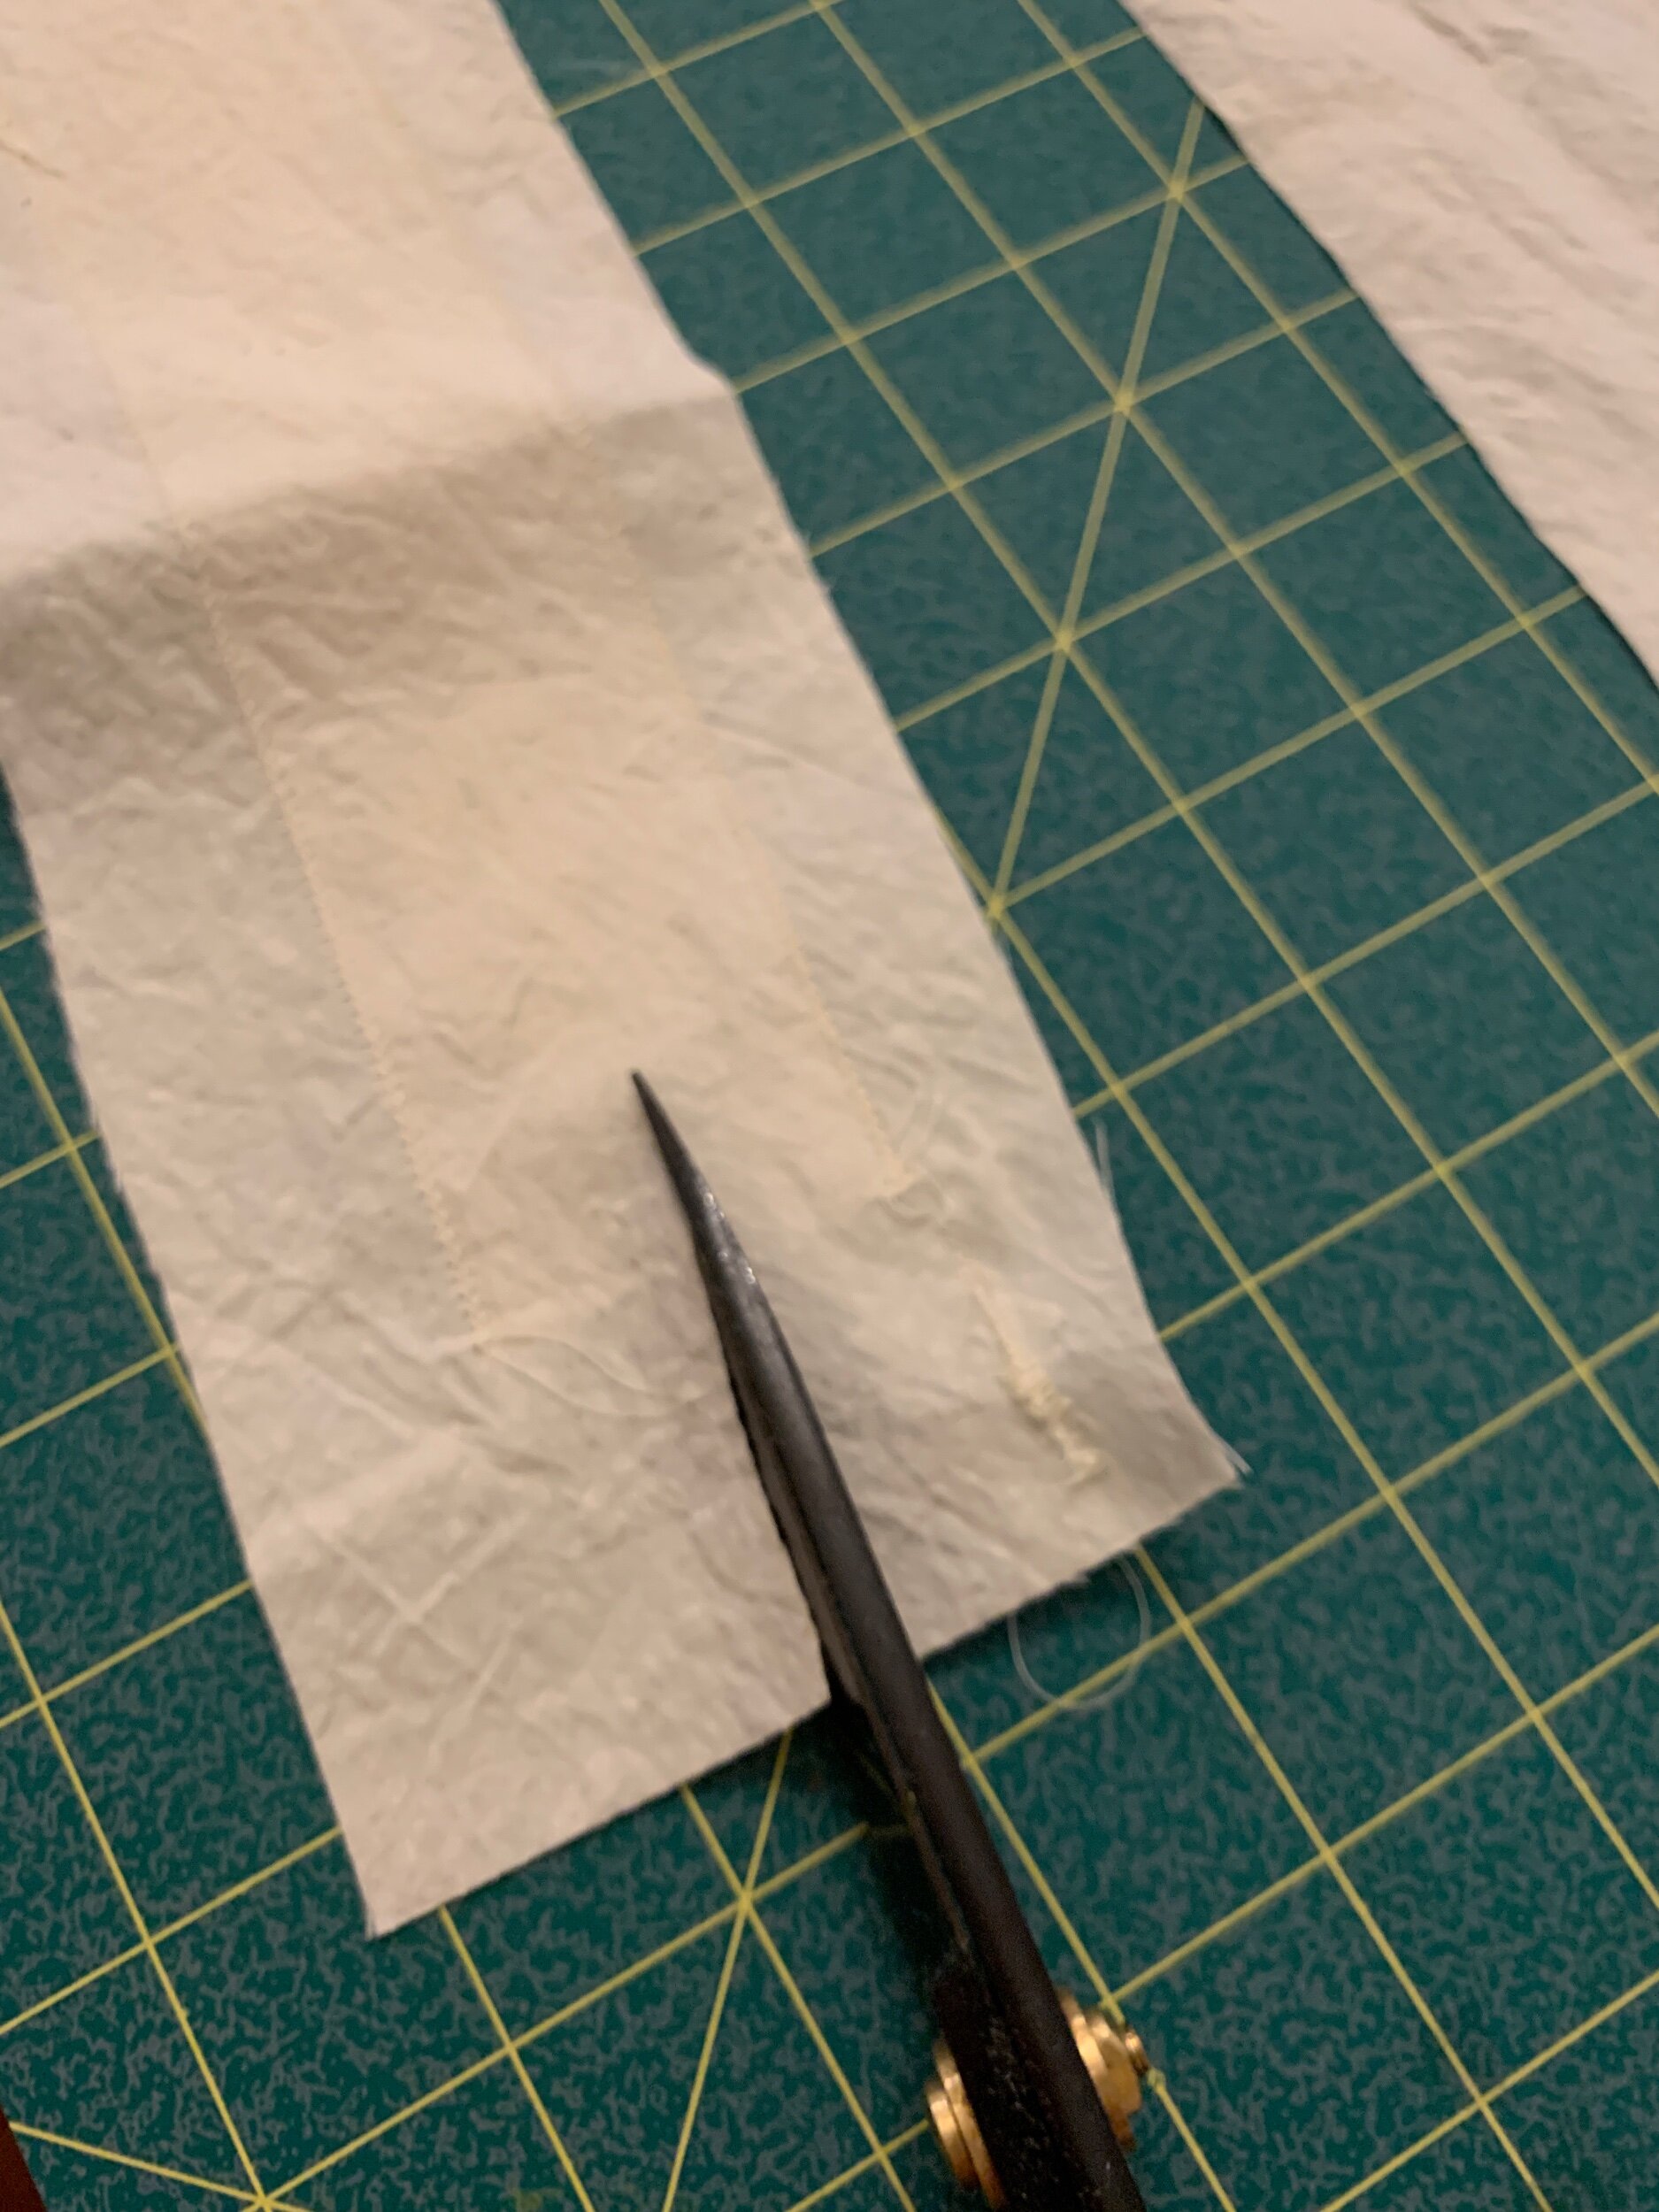
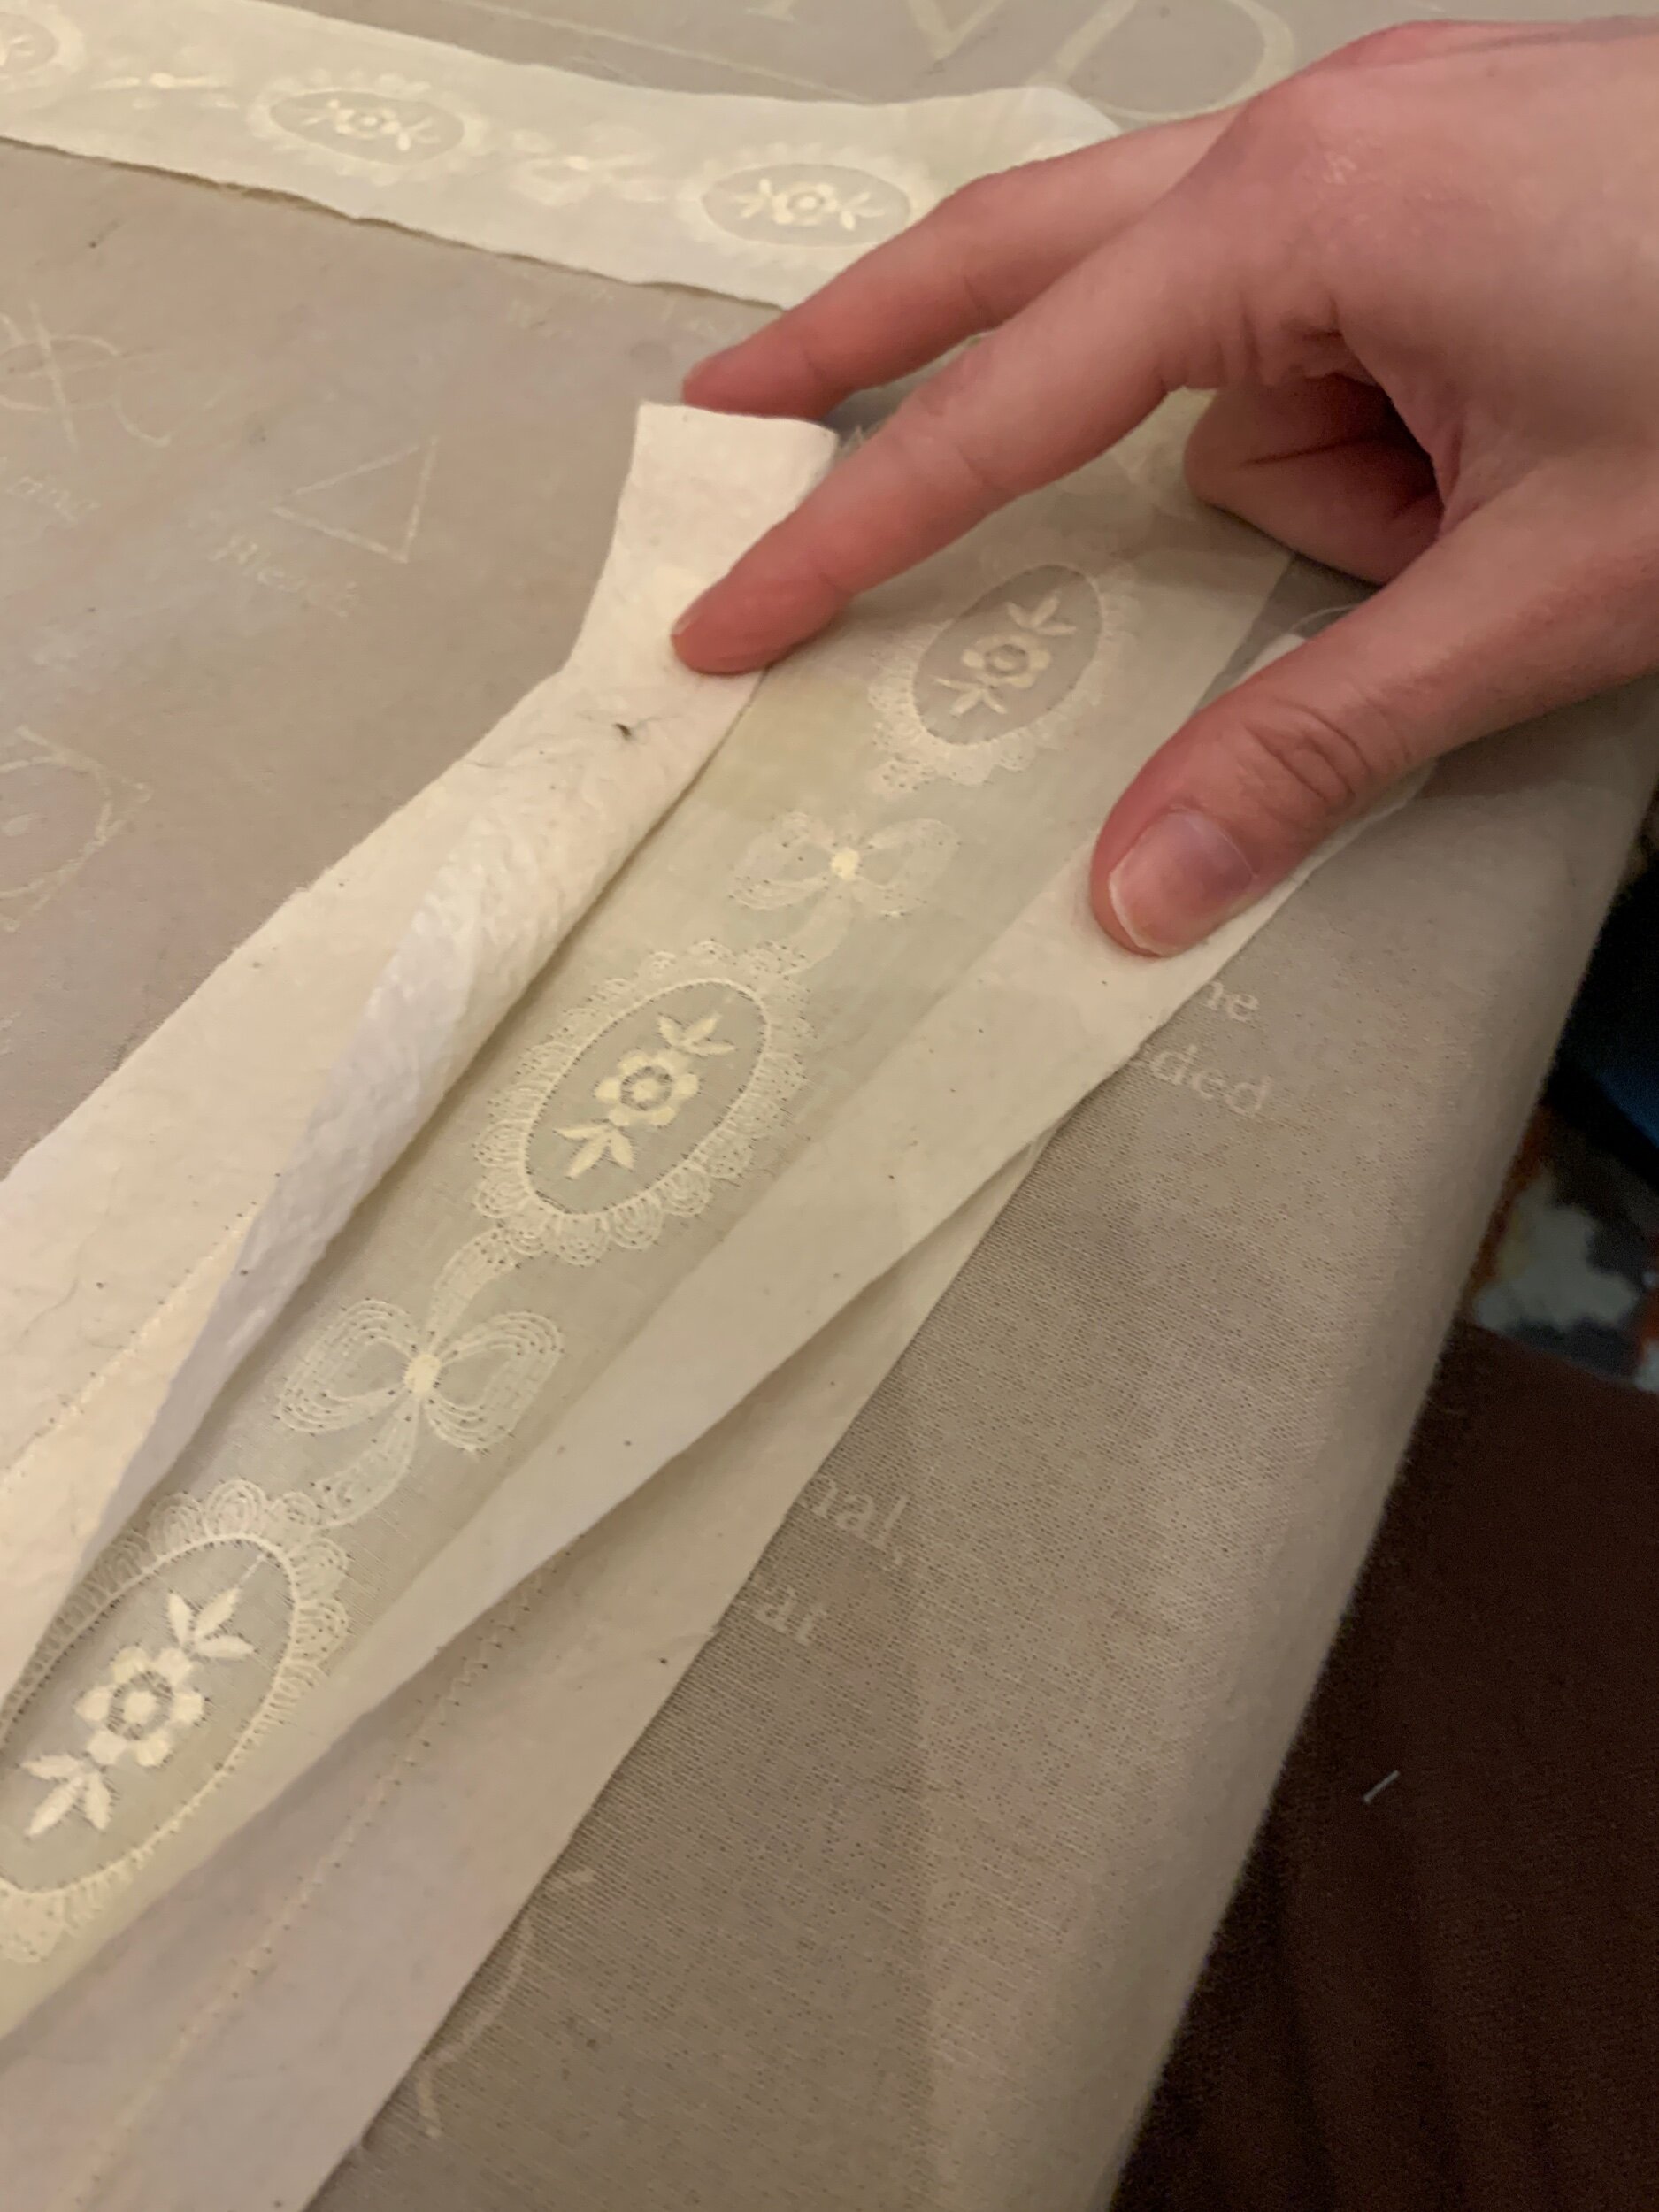
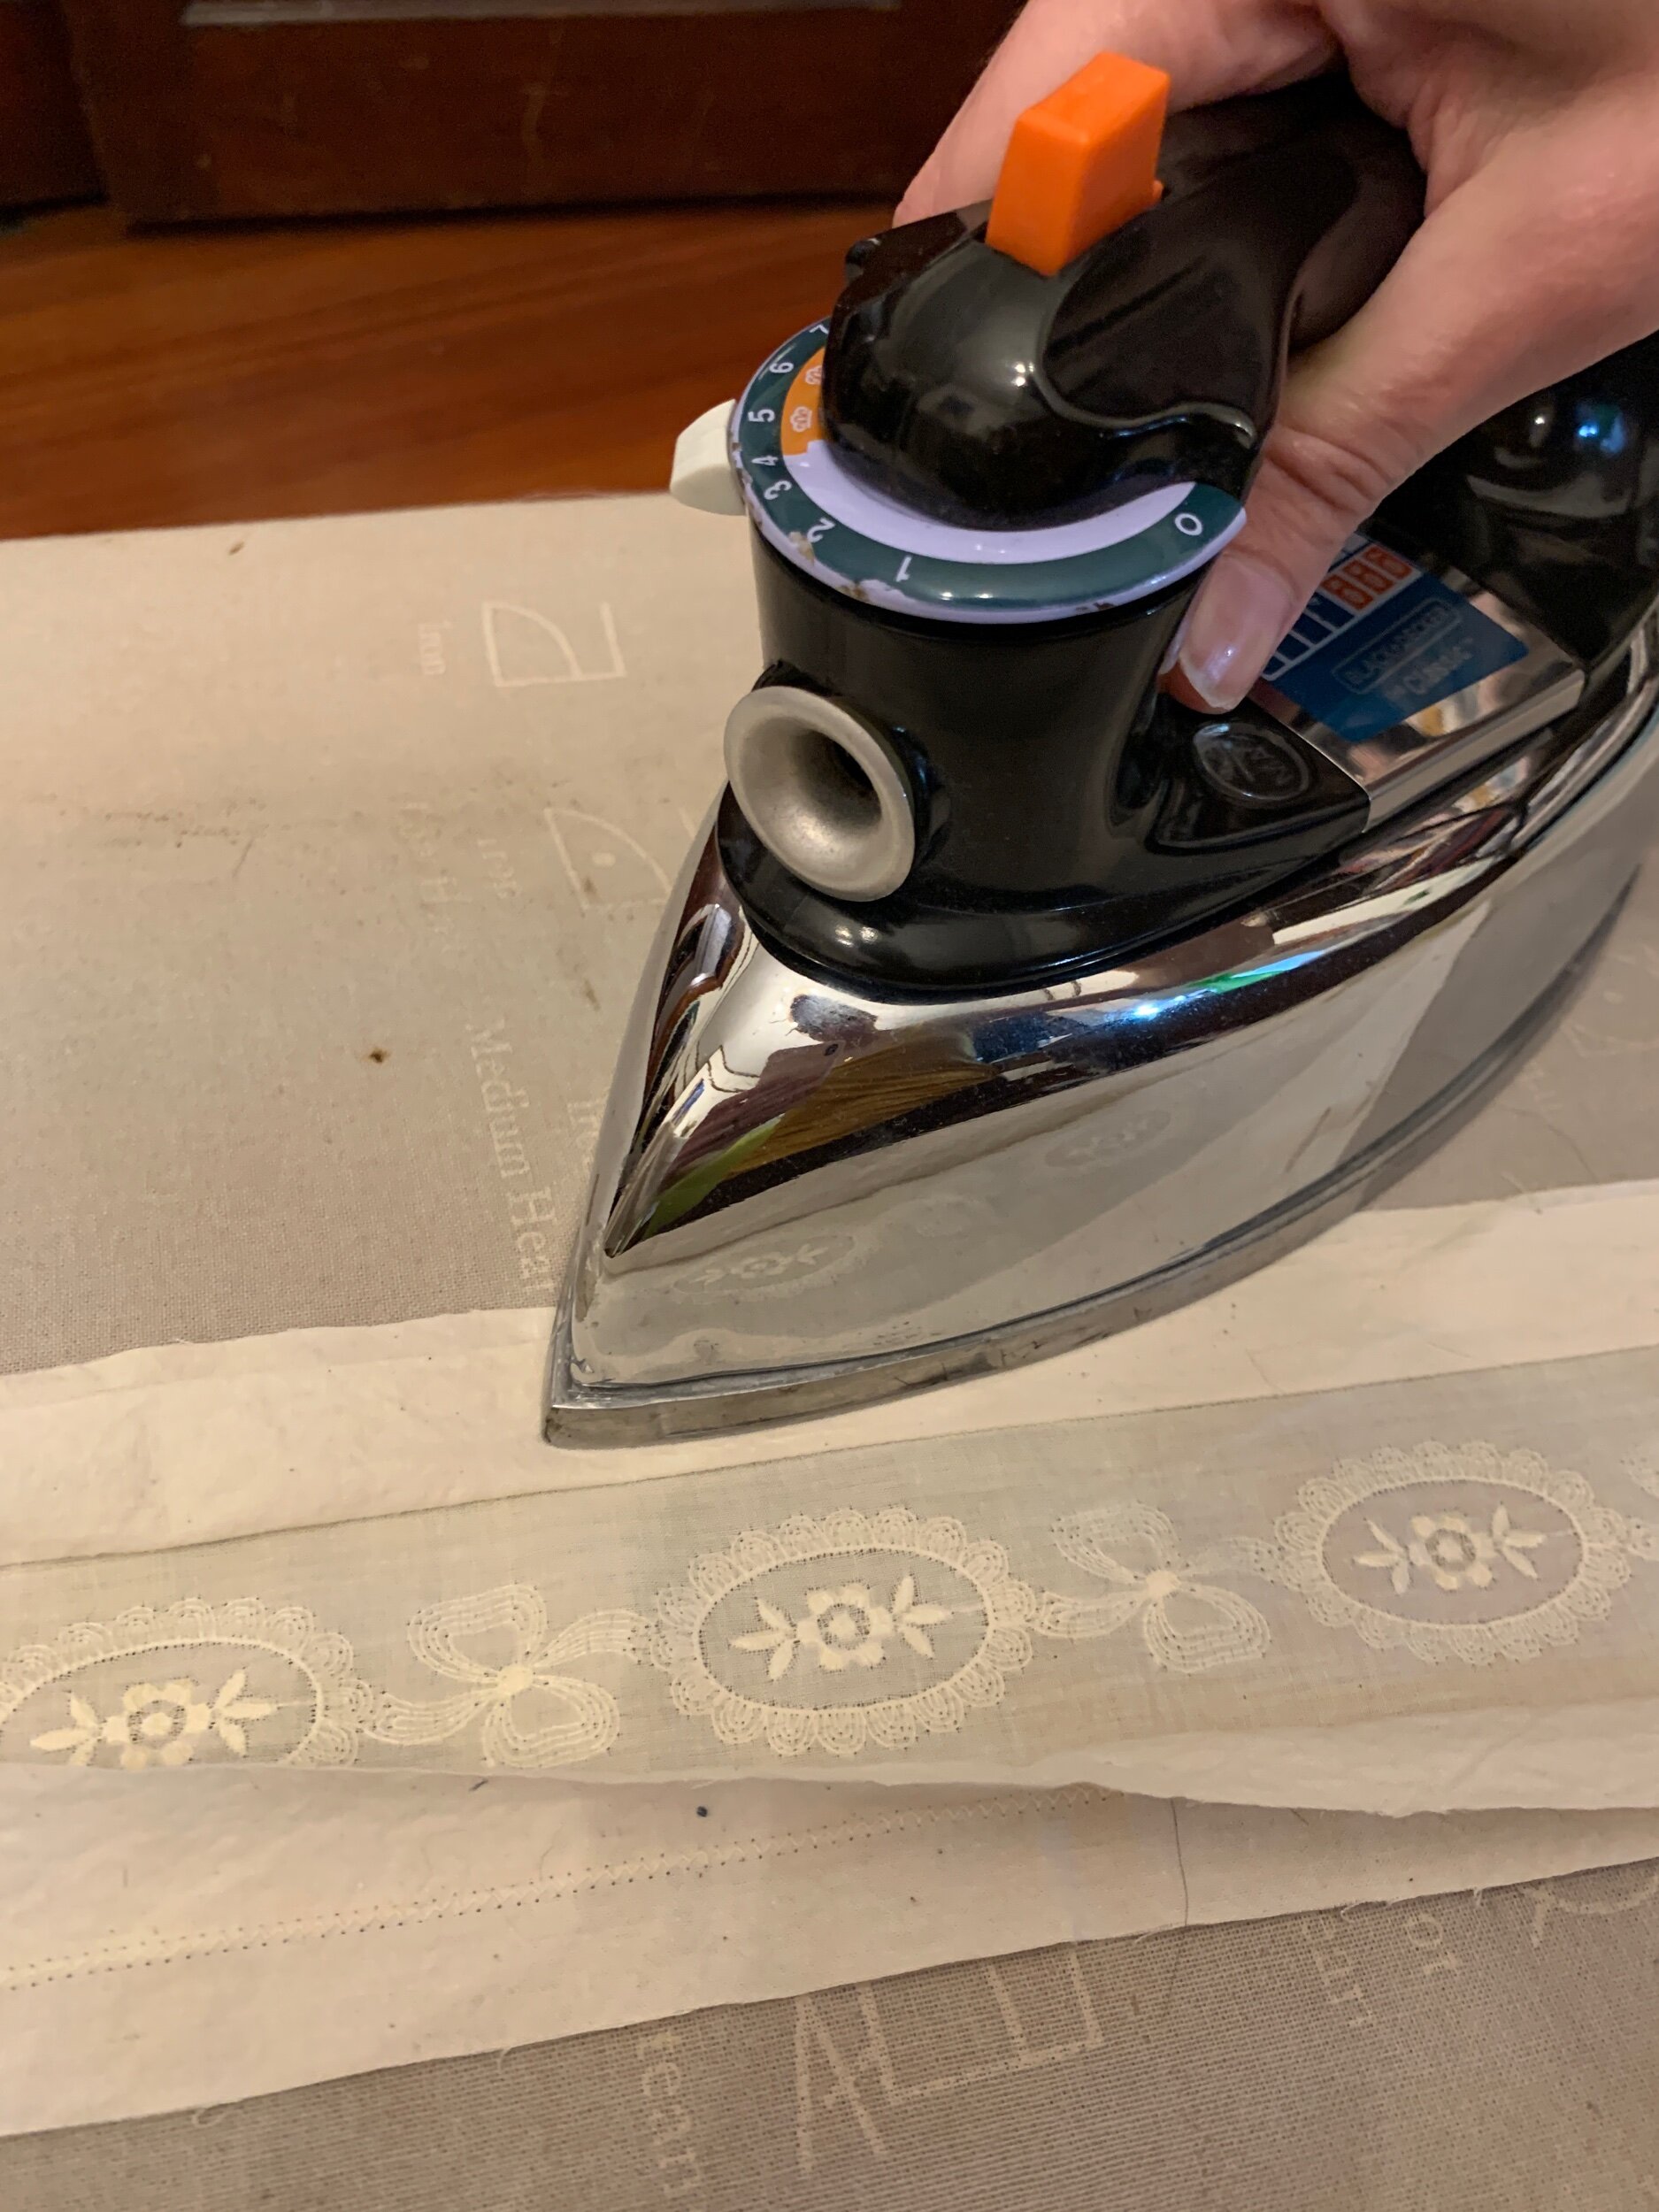
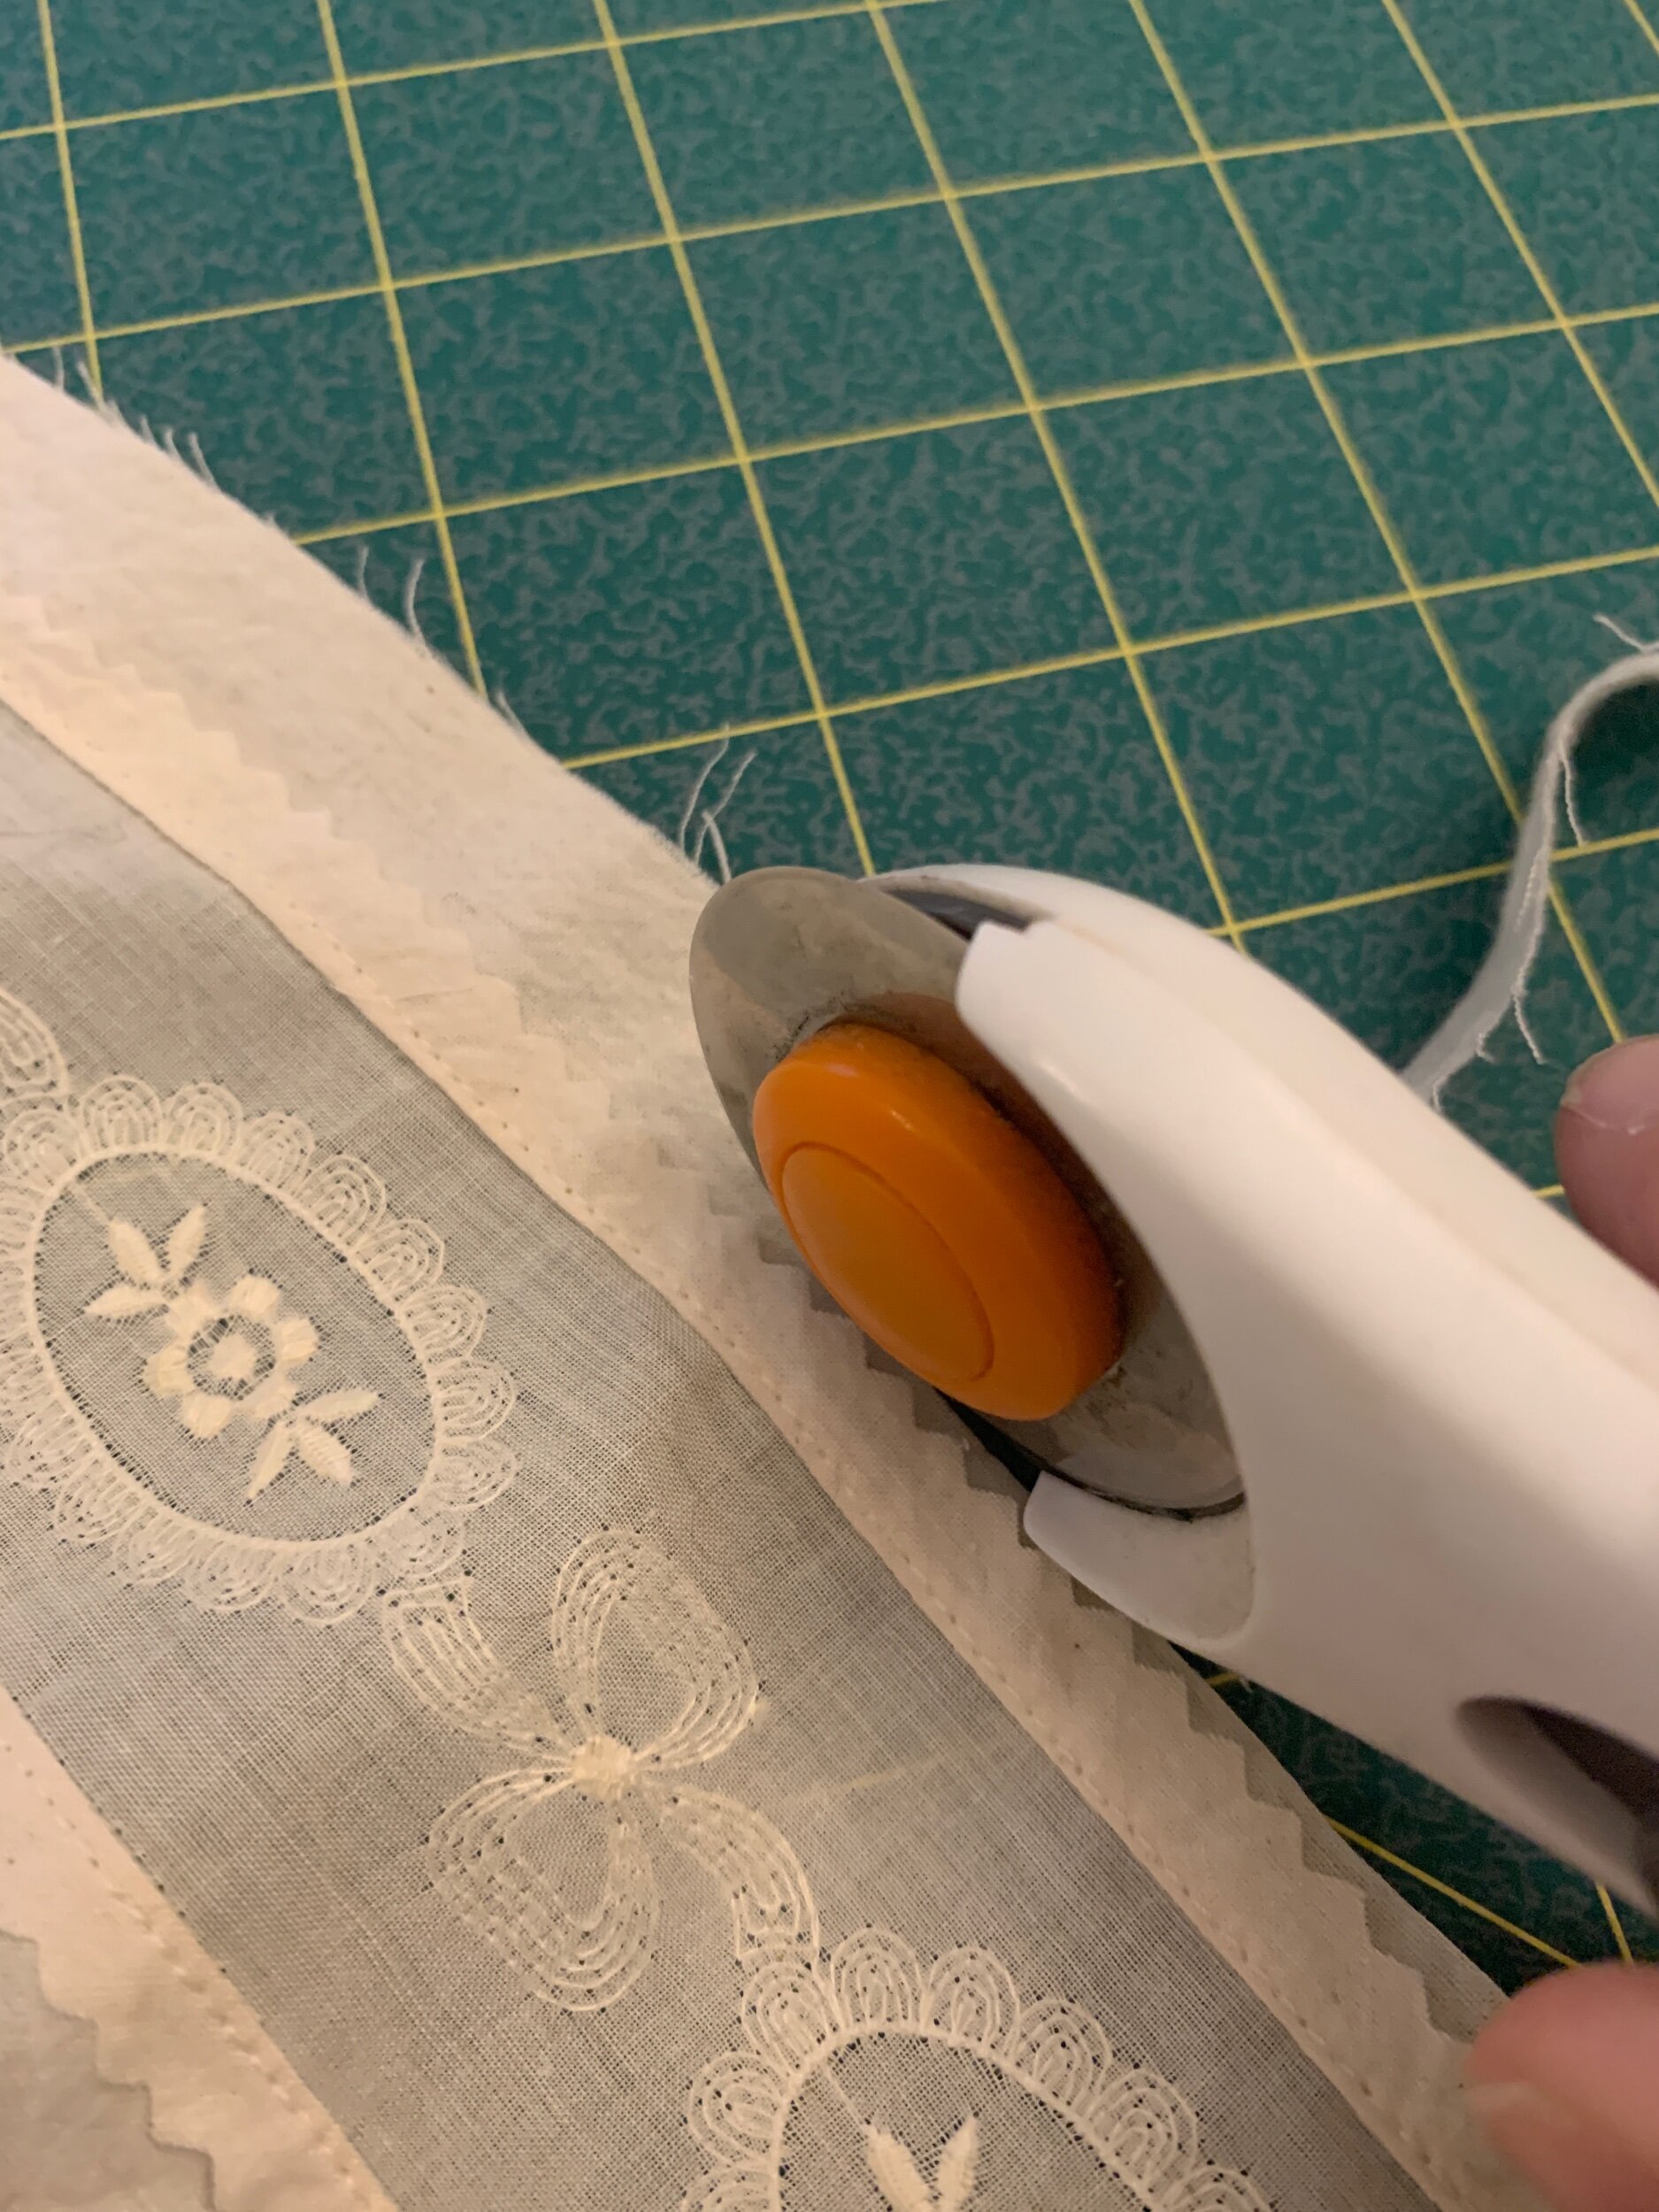
Now, you will want to take your ruler and measure out the seam allowance for your particular garment and then cut off the excess. You want to have the same seam allowance on both sides. This will be very easy and you can just use a long ruler and draw a straight line and cut with scissors or a rotary cutter. I added some extra steps but you really do not need to! Now, either cut this portion with pinking shears or after sewing your seam in your garment, include this piece in your serged or finished seam so that it doesn’t fray. Some think it is a good idea to stitch right outside the attachment of the lace to the muslin to keep the cut muslin that used to be under the lace folded out! I did this step but I think I could have avoided it with my good pressing and just waiting until I attach the lace.
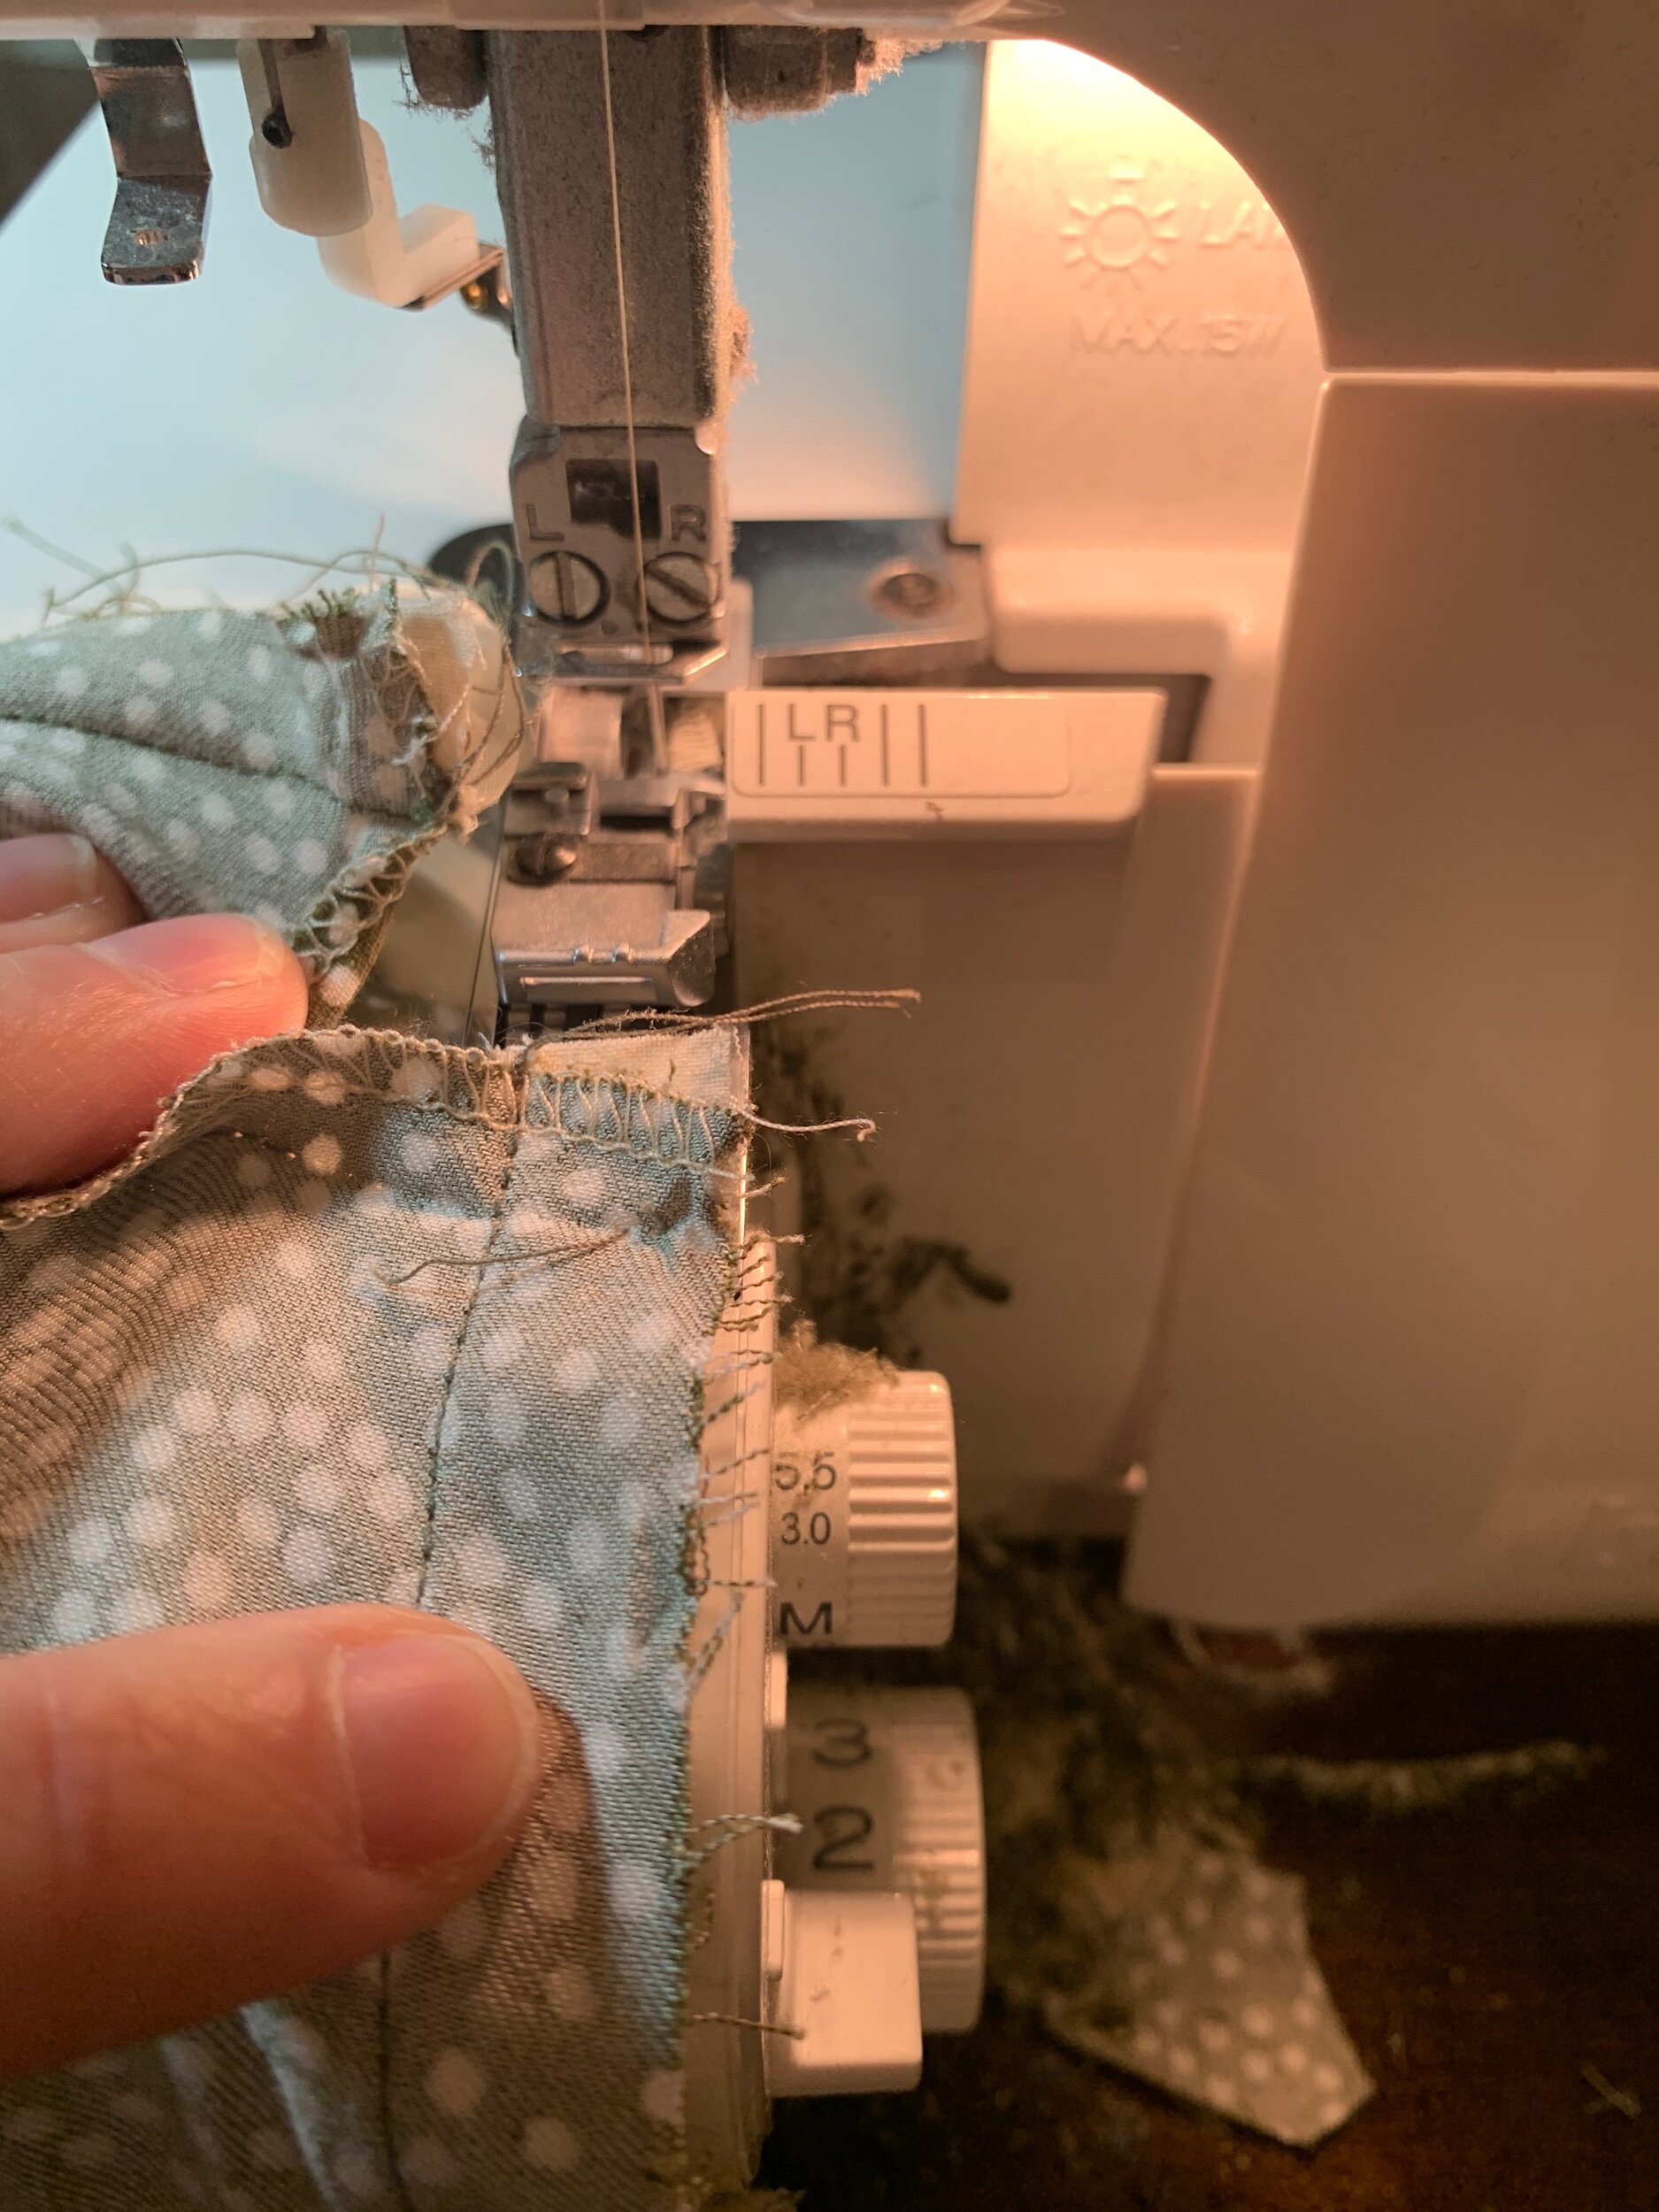
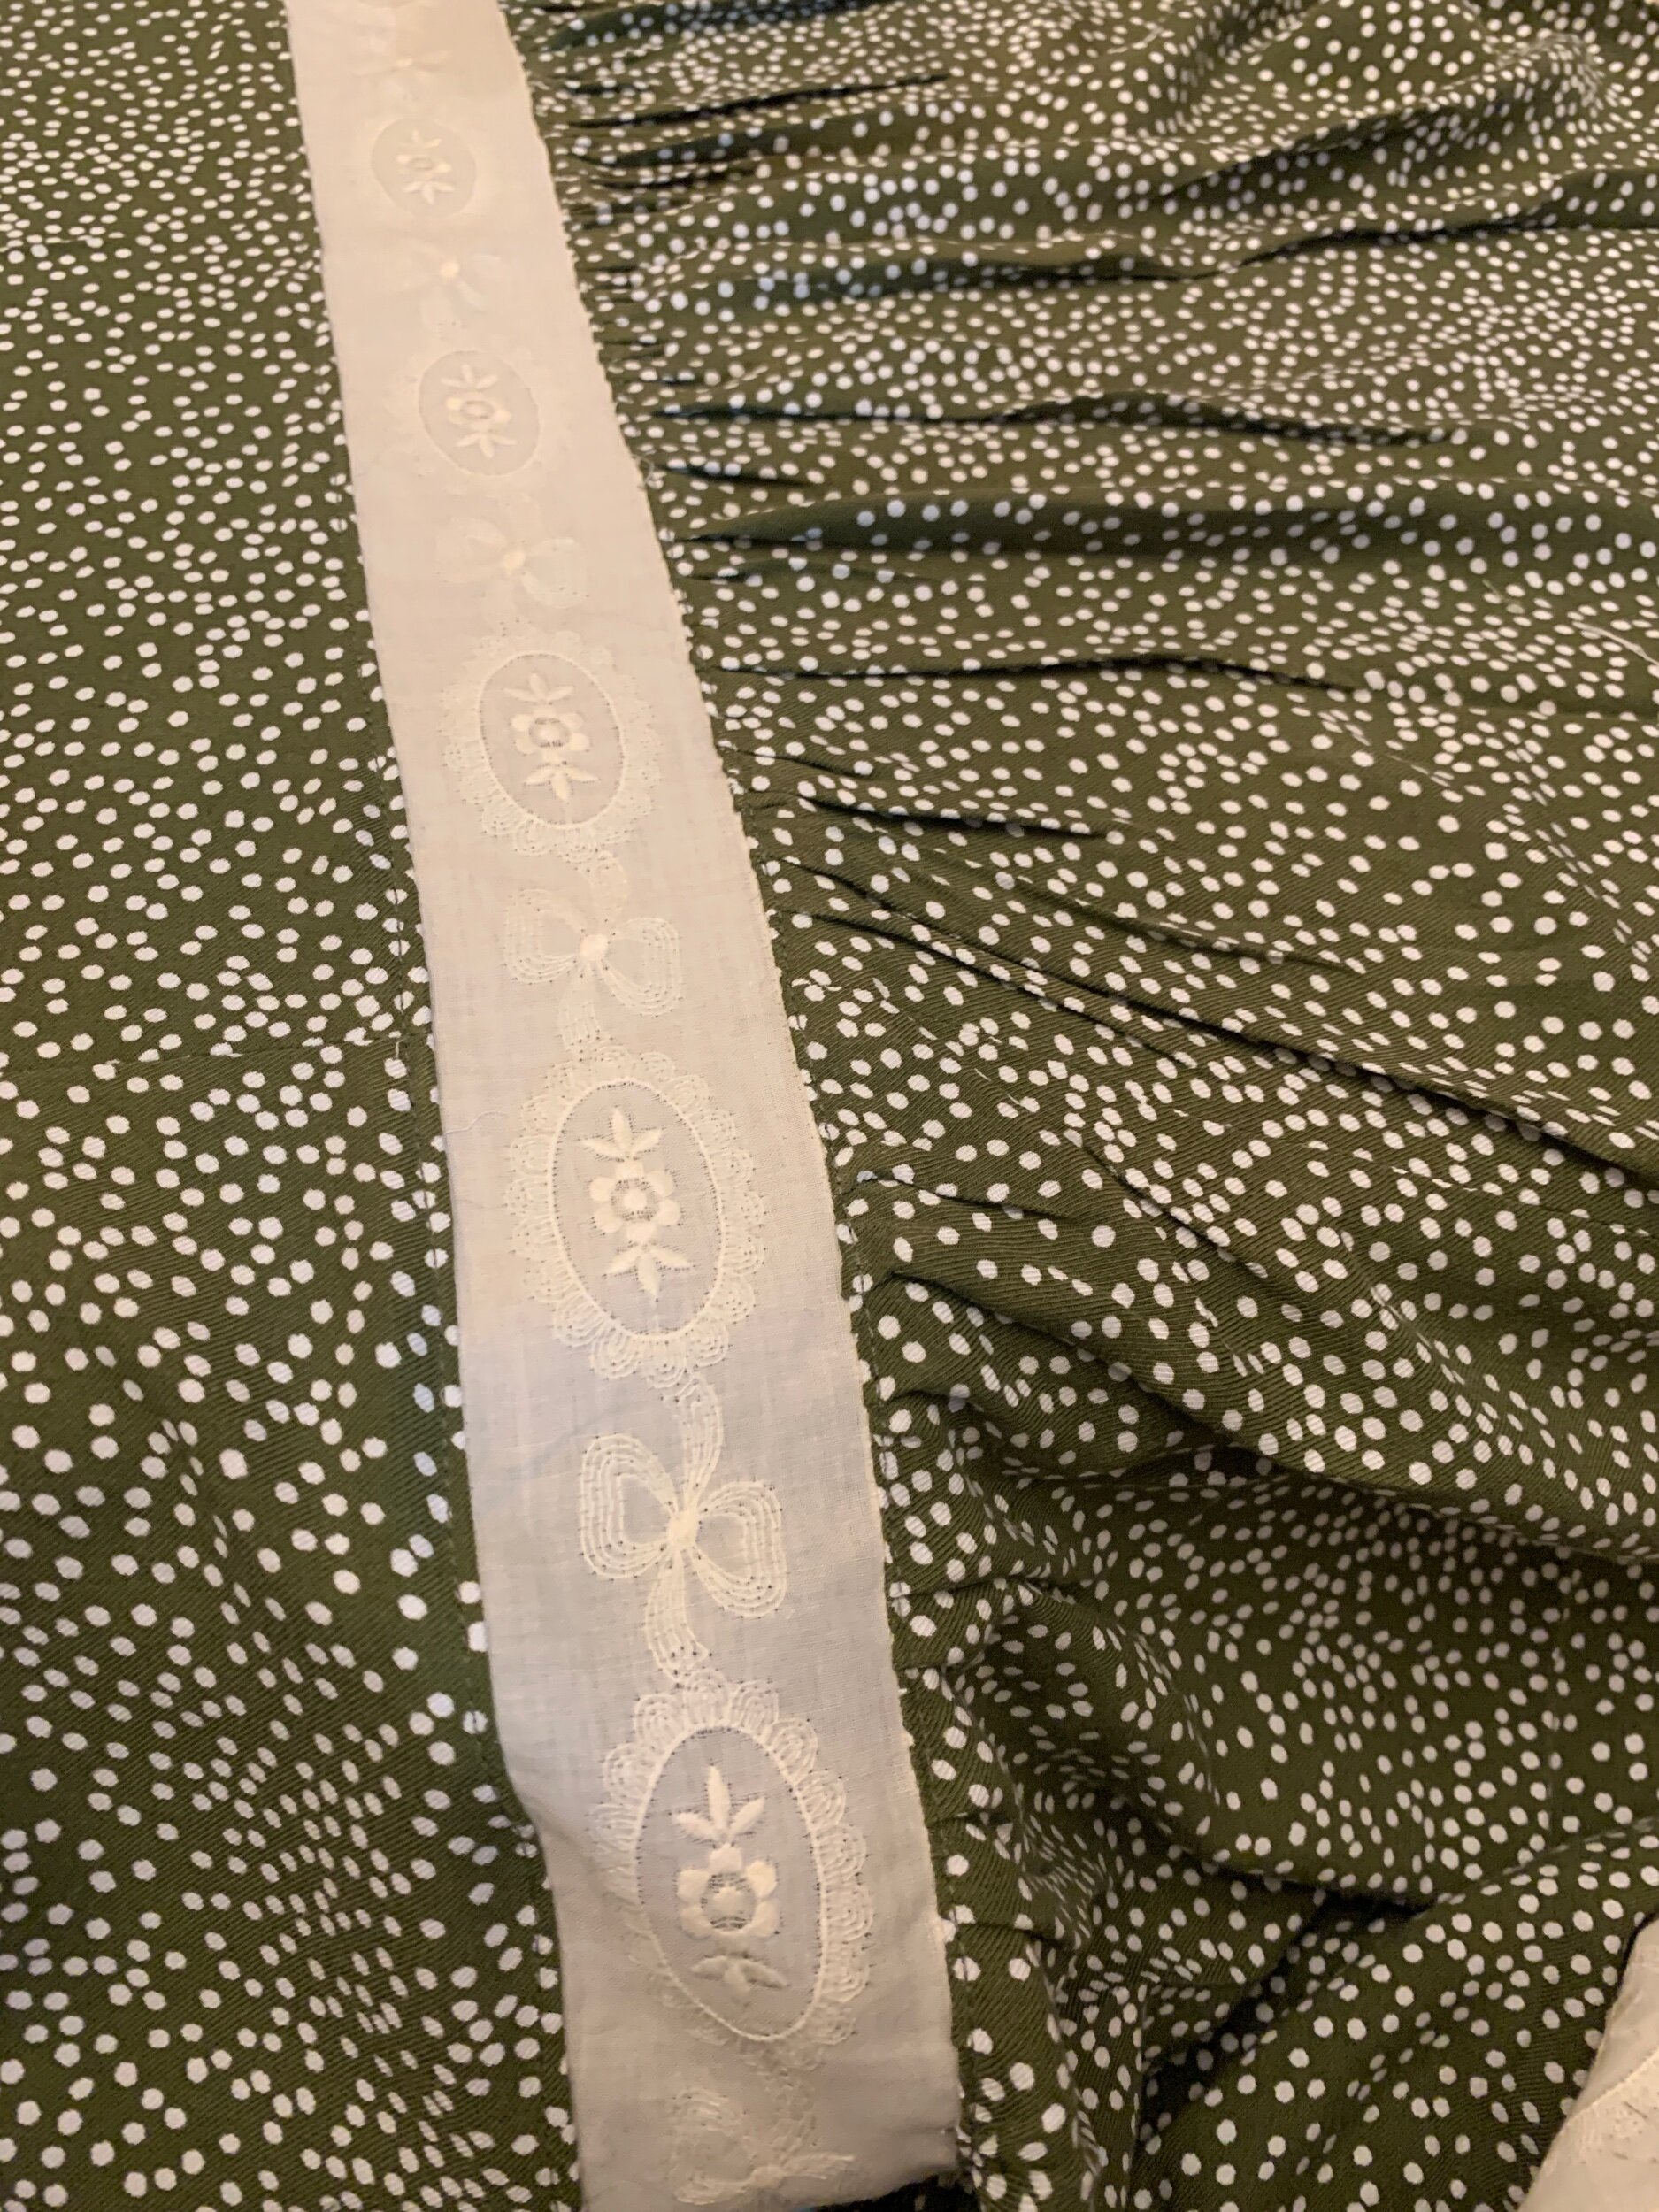
You will now attach this lace piece to the bottom of the bodice! I stitched one side of the side seam and left the other open at the bottom to attach the lace. That way the lace only has one seam on one side. When attaching the lace strip, I did this right sides together and stitched directly on the zigzag stitch that attached the lace to the muslin or you can stitch right outside of it. As long as none of the muslin really shows. I then serged the side seam on that side with the lace and then sewed together the side seam and and pressed the seams open!
You will then gather your first skirt layer and attach it to the bodice/trim as normal. Again, when I was stitching I sewed with the lace side up and gathers on the bottom so I could carefully follow that line!

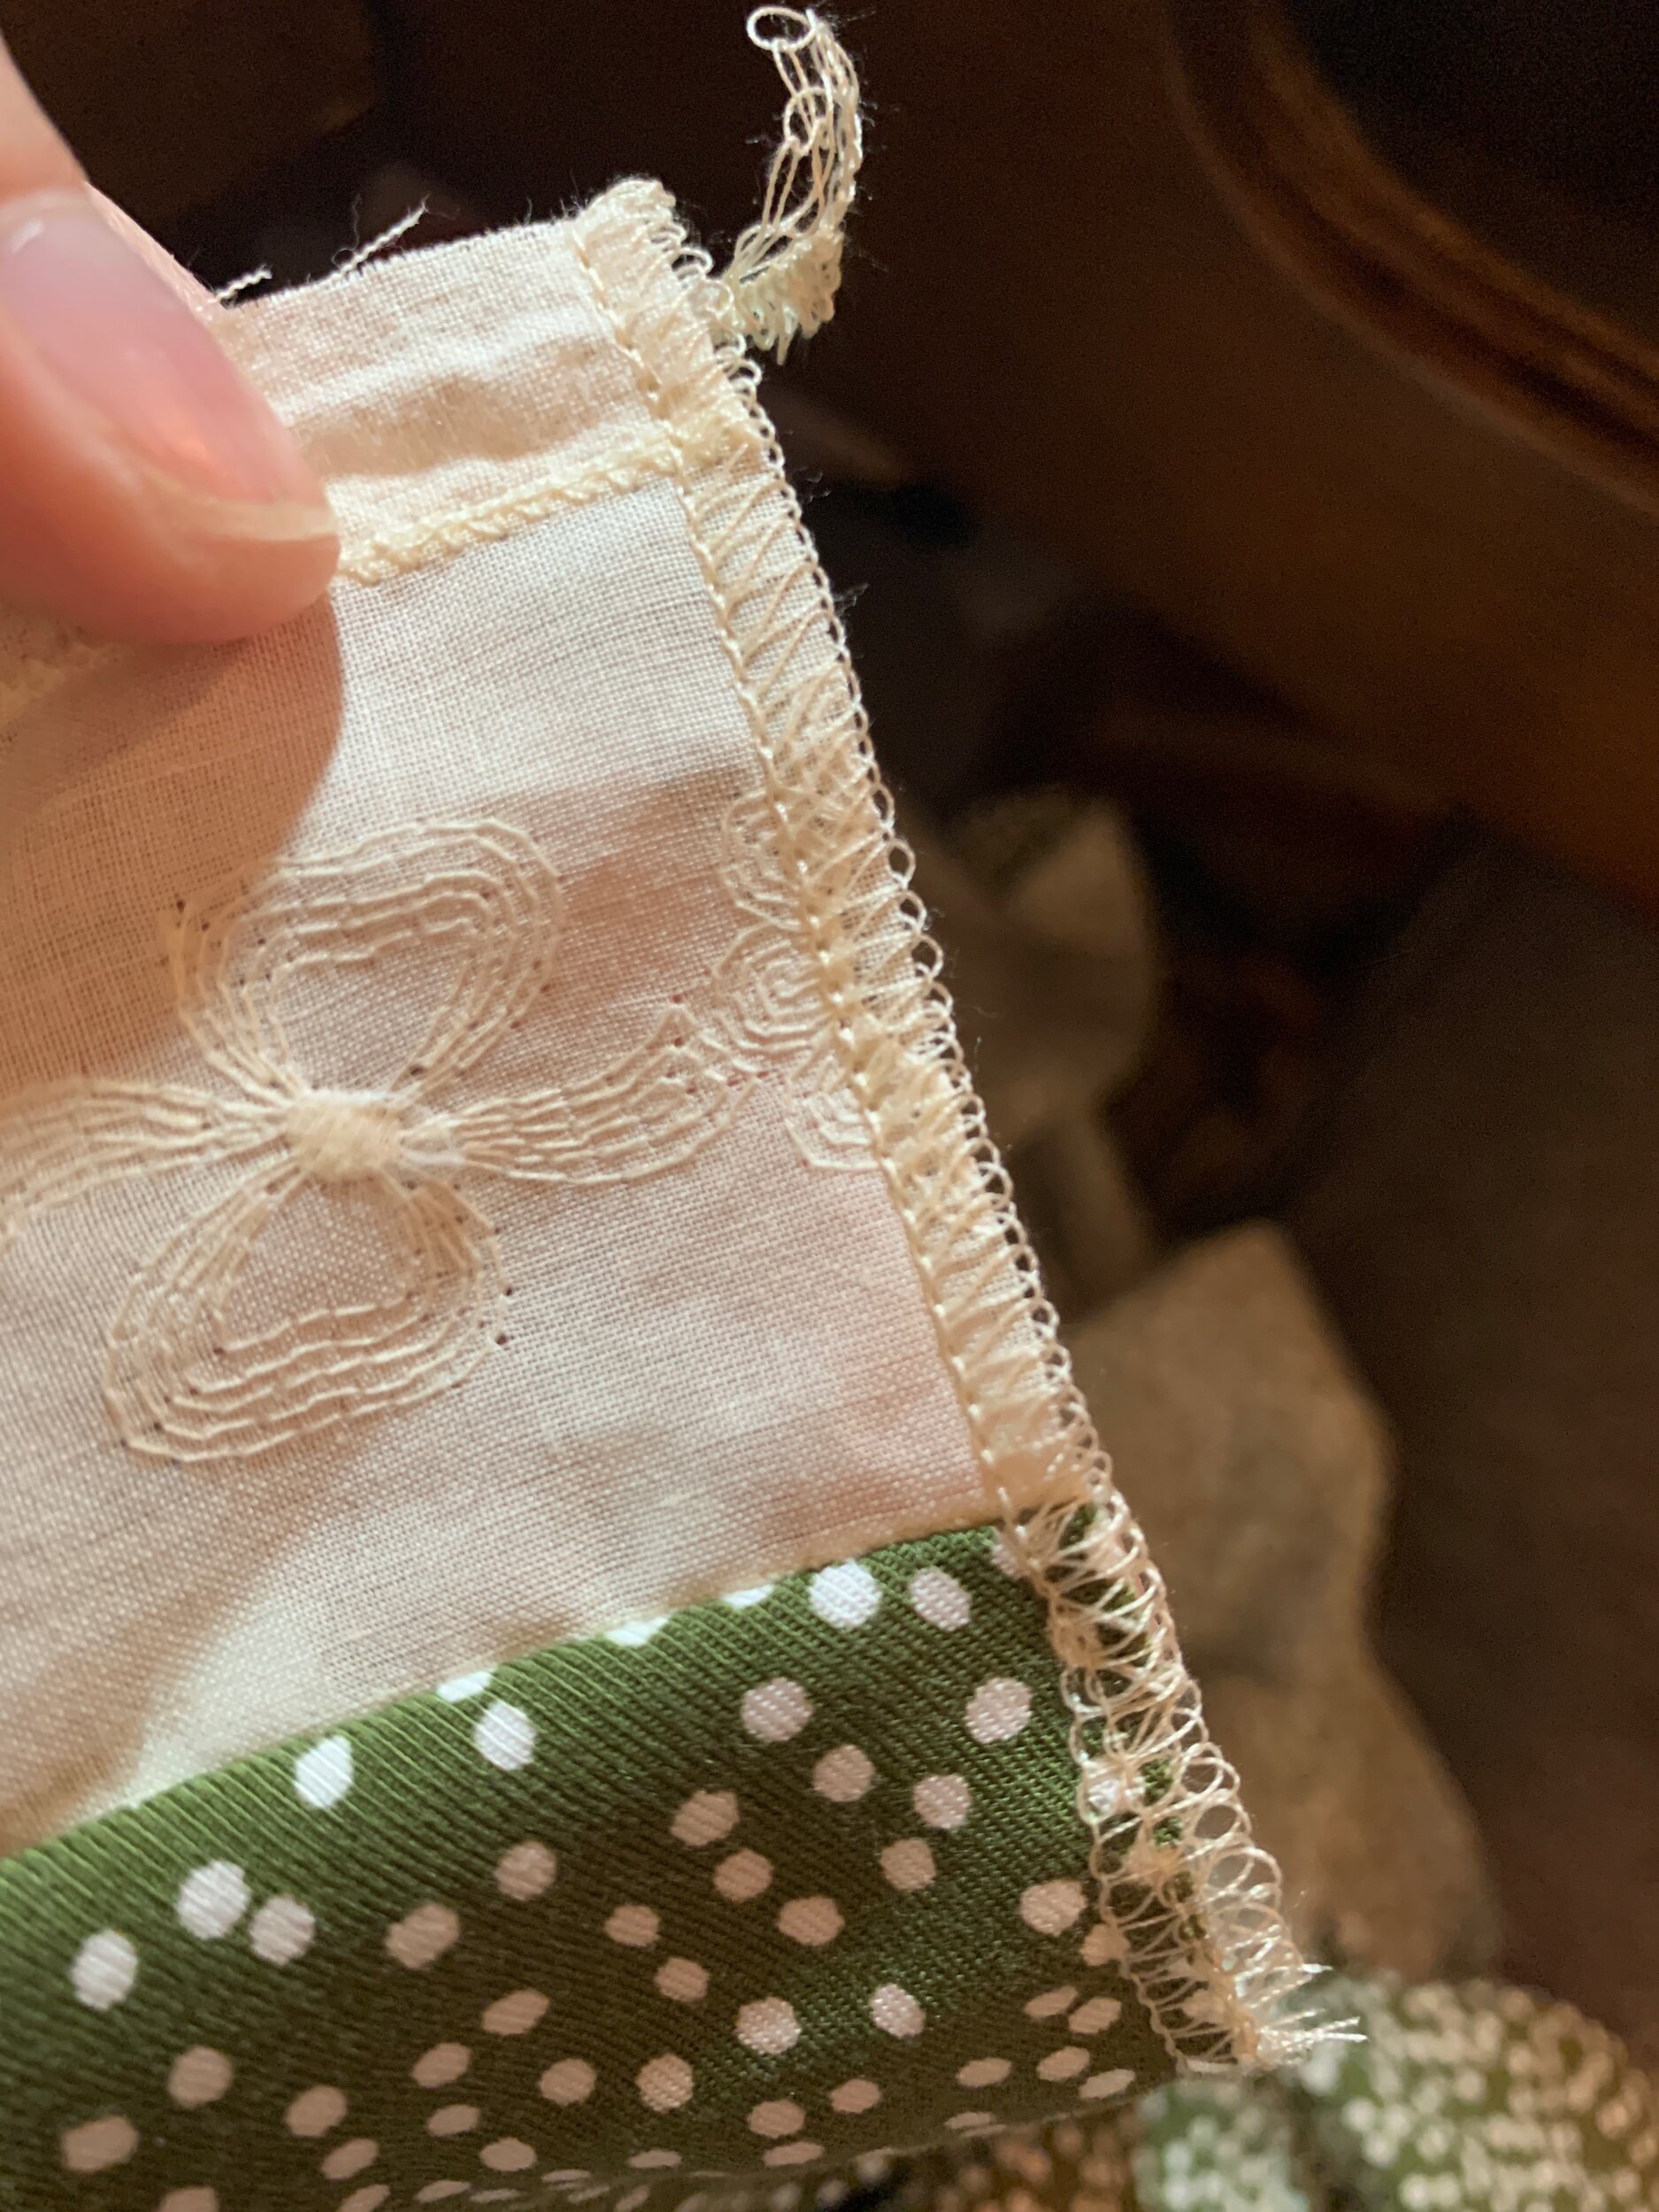
Now, you will attach the lace trim to the bottom of the first tier. I stitched up one side of the skirt and not the other. After attaching the lace, I serged the sides and then sewed the tier up. I pressed the seams open and voila! Now you can attach the bottom tier and gather it and sew it in the same manner as you did the top tier to the bodice! I finished the seams between the bodice and the first tier and between the first tier and the second with my serger!
OF NOTE: Then I pressed the seam away from the lace on both sides. Then I topstitched or edge stitched the seam allowances to the main fabric to make it look nice.
Now onto finishing touches and thread loops and tiny buttons!!!

I hope this was so helpful and now you have a beautiful garment with vintage lace built in! Isn’t it so lovely! I hope you enjoyed this blog and of course ask me any questions if you have any! Be careful because this dress may cause you to dance!!!