Ready to Sew Pekka Jacket

WOW!!! Where to start with Ready To Sew Patterns! Before I actually start, I have a YOU TUBE video all about these patterns! I have been making her patterns since the very beginning of my sewing journey. They are very beginner friendly. I think I own almost all of them! She has a new collection with 3 new patterns and I just love them! But what defines a great pattern?? I think ease and enjoyment while making the garment. This blog post is about the Pekka Jacket!! I was also given the Patsy overalls pattern which will be coming in another blog post soon! The patterns were given to me for free in exchange for my thoughts, but all of the opinions are my own!
The Pekka Jacket is a PDF pattern and comes in sizes 32-58 with two different cup sizes (B or D depending on your size range)! Her patterns come in a print at home format A4/US letter or AO copyshop version. The pattern instruction booklets come in French, English, and Spanish! There are two different views for this pattern!

One is more for the spring and summer with shorter sleeves and a thinner collar seen below.
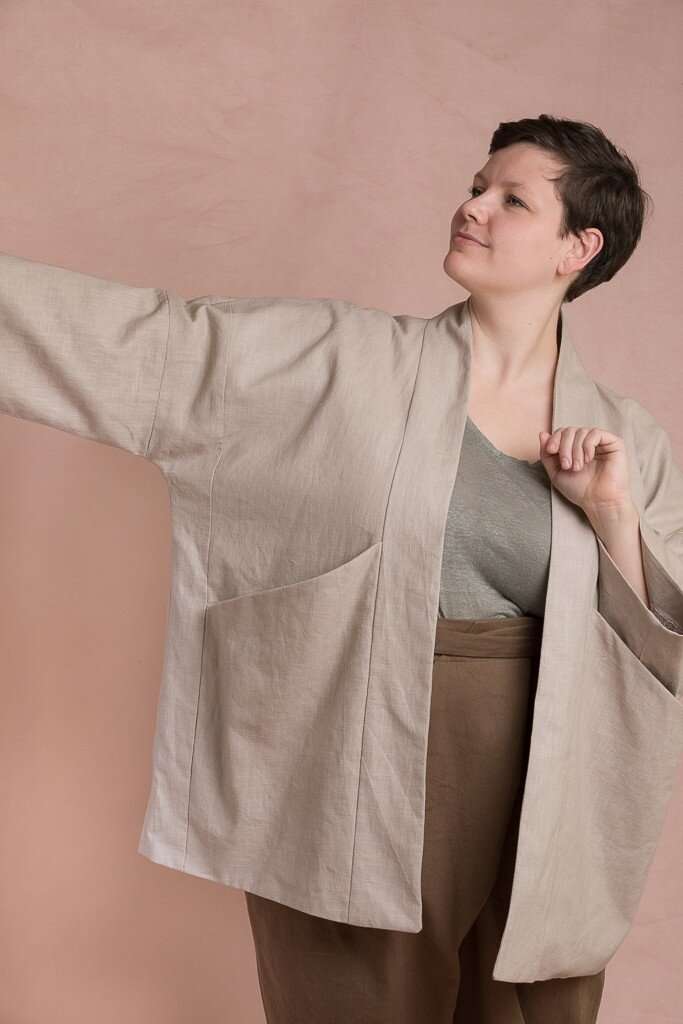
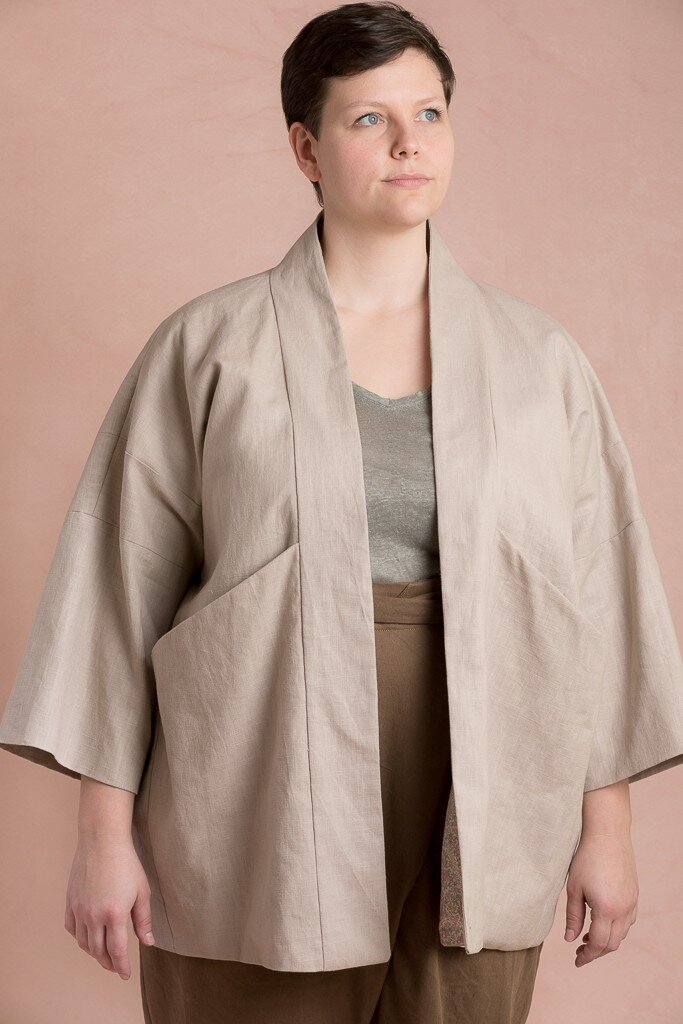
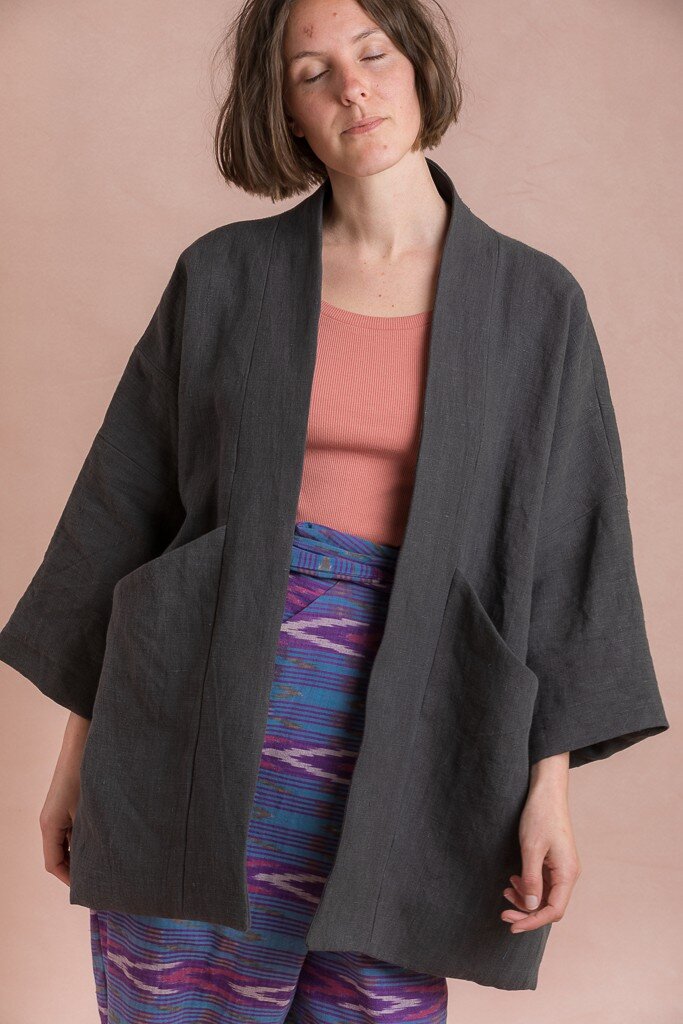
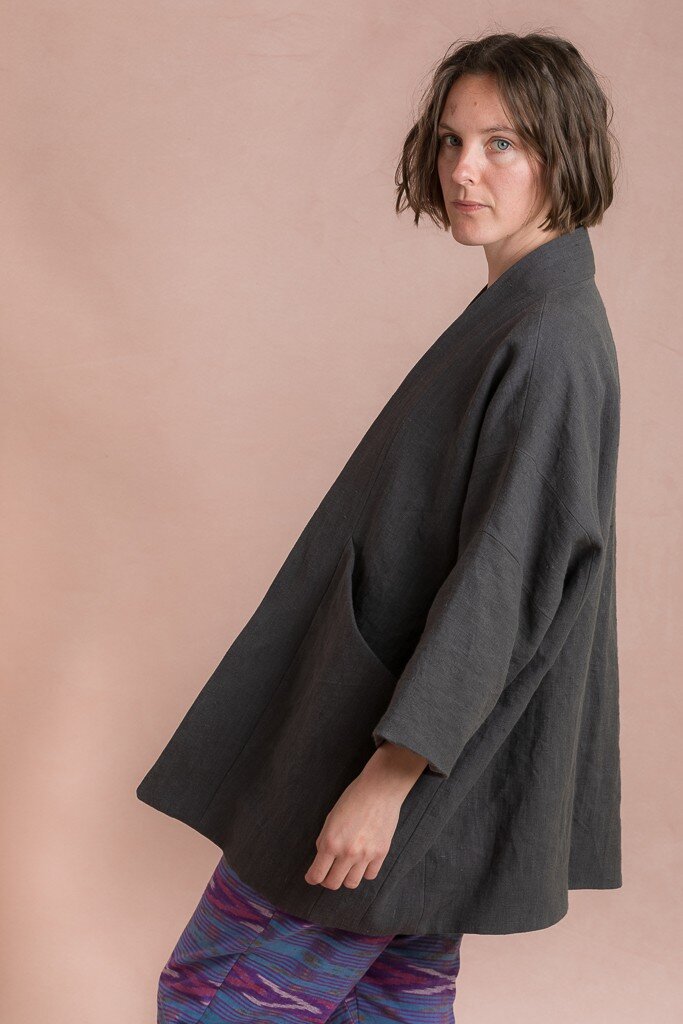
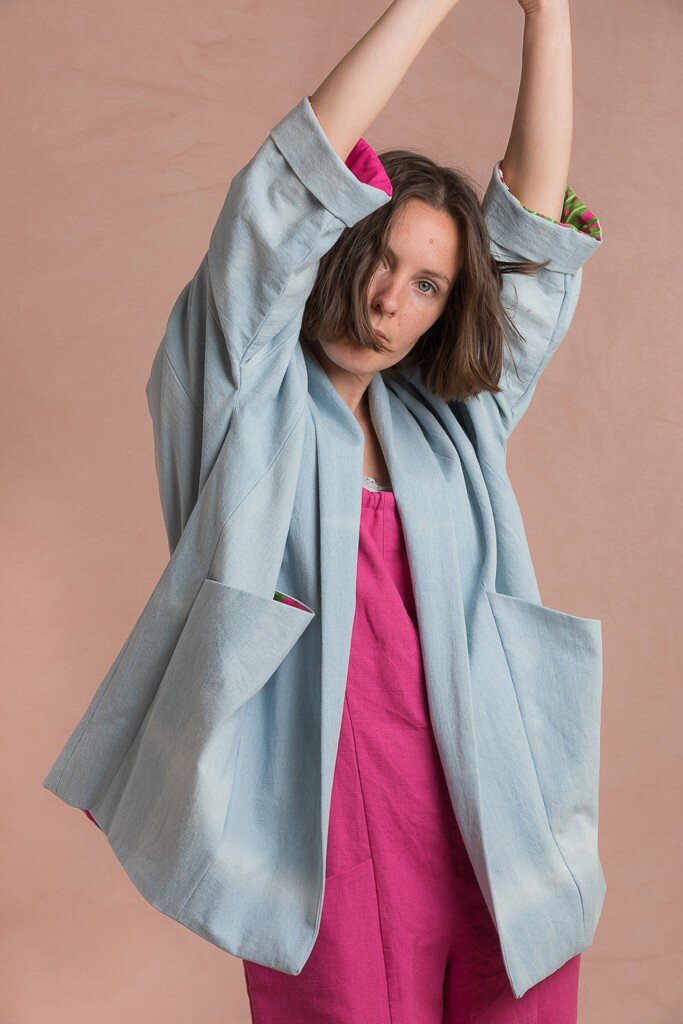
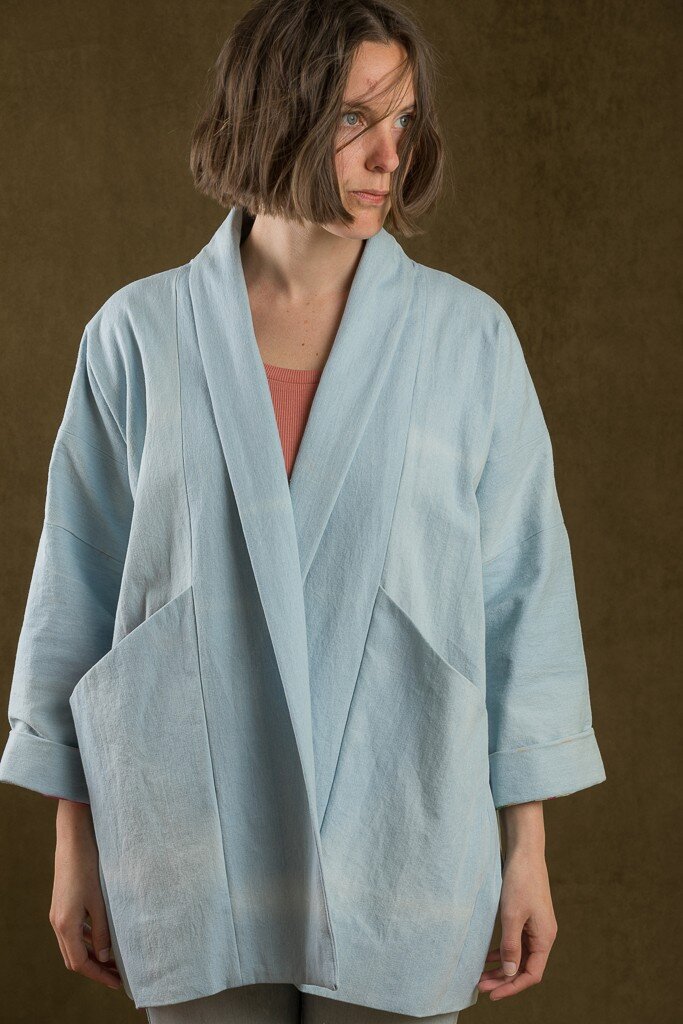
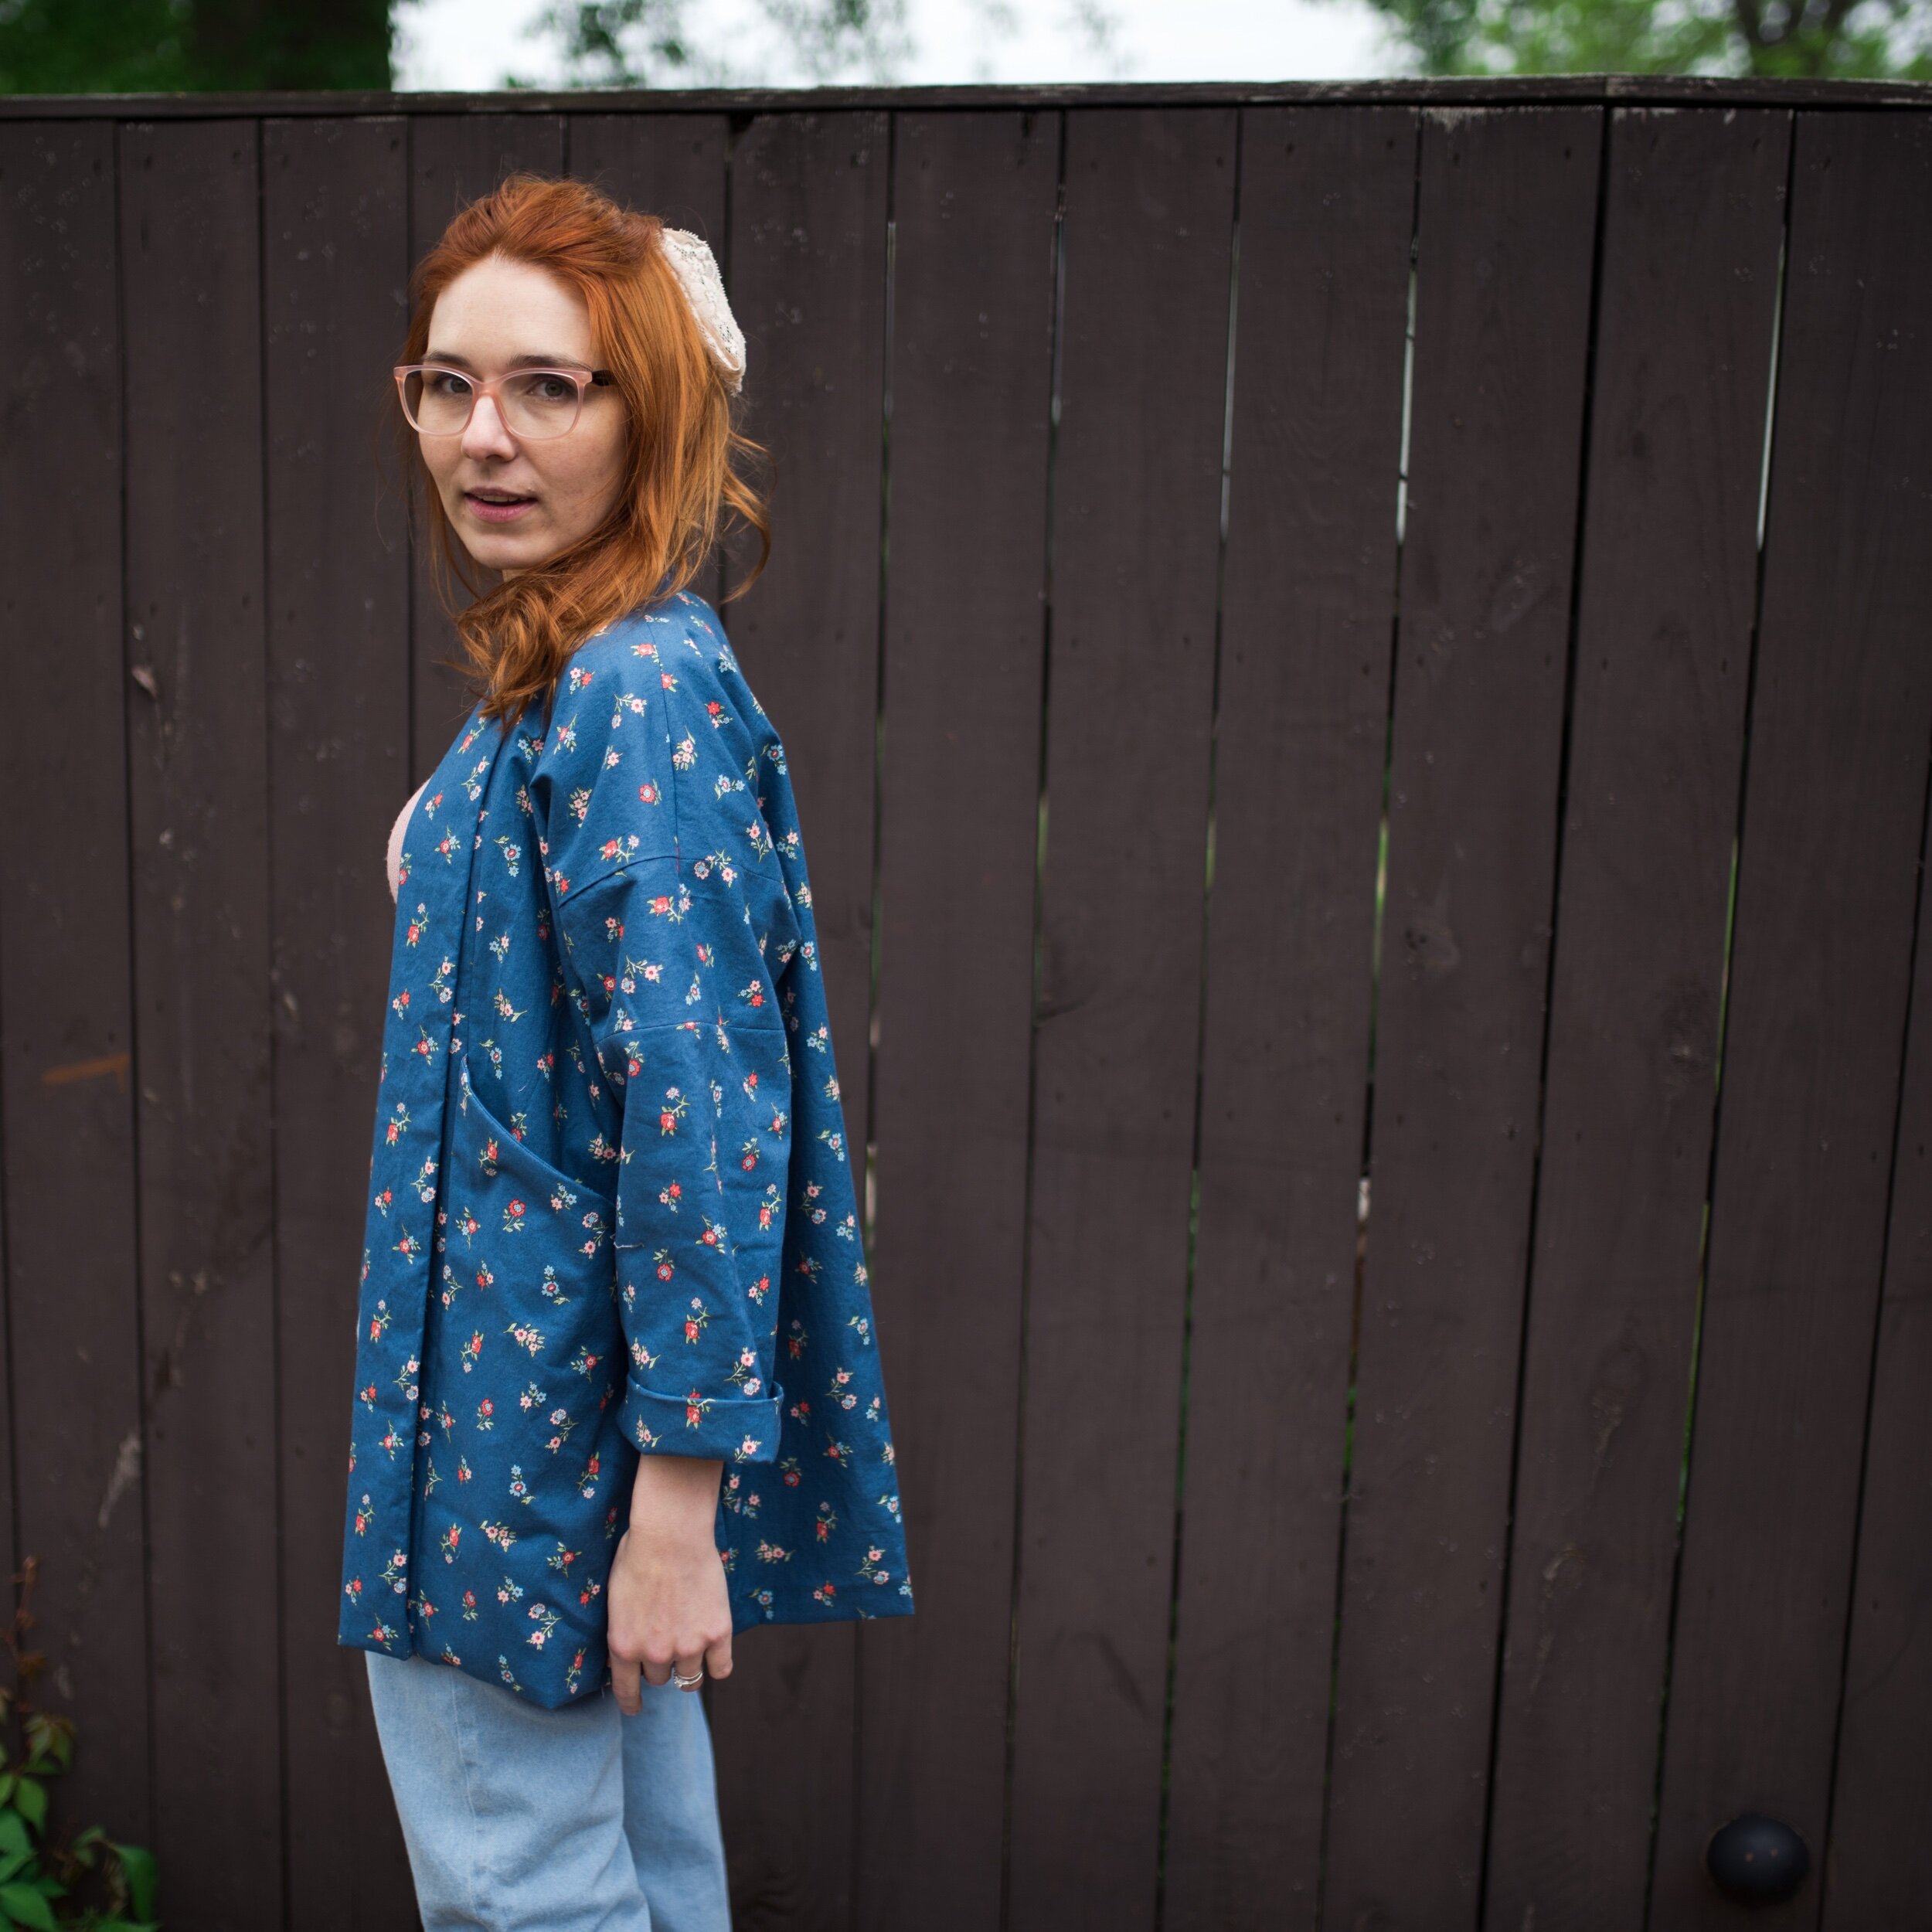
The other version has longer sleeves that can fold up and a collar that folds back onto itself.
I will go through my review of this pattern running through all of the qualities that I think are important to a great pattern! It will also be a very detailed review of her patterns in general.
I will quickly run through a review of:
The pattern files
Pattern layout
Fabric choice
Simplicity of the pattern
Construction
Bagging the lining
Fit
The pattern files: I know this may seem insignificant to talk about but you can tell these patterns are very well thought through! Typically, I have my patterns printed at a copy shop but lately, I have been printing them at home. Either way, the way the pieces are arranged on the AO or on the print at home file, is very efficient! By that, I mean that the pieces use the least amount of paper as possible while still providing all the necessary pieces of course. She will even overlap one piece to save you from needing a whole extra AO sheet. If this occurs, then all you have to do is trace the one piece that is overlapped and you can cut out the rest on the AO sheet. I mean the amount of thought and efficiency put into this part of the pattern making process is greatly appreciated! It not only saves money, but also time (eg less piecing together of extra paper) , money (not ordering extra sheets from copy shop), and the environment!

Pattern layout: For this project, the layout was quite simple! I didn’t have any problems and everything was very clear! You don’t even need any interfacing!!!
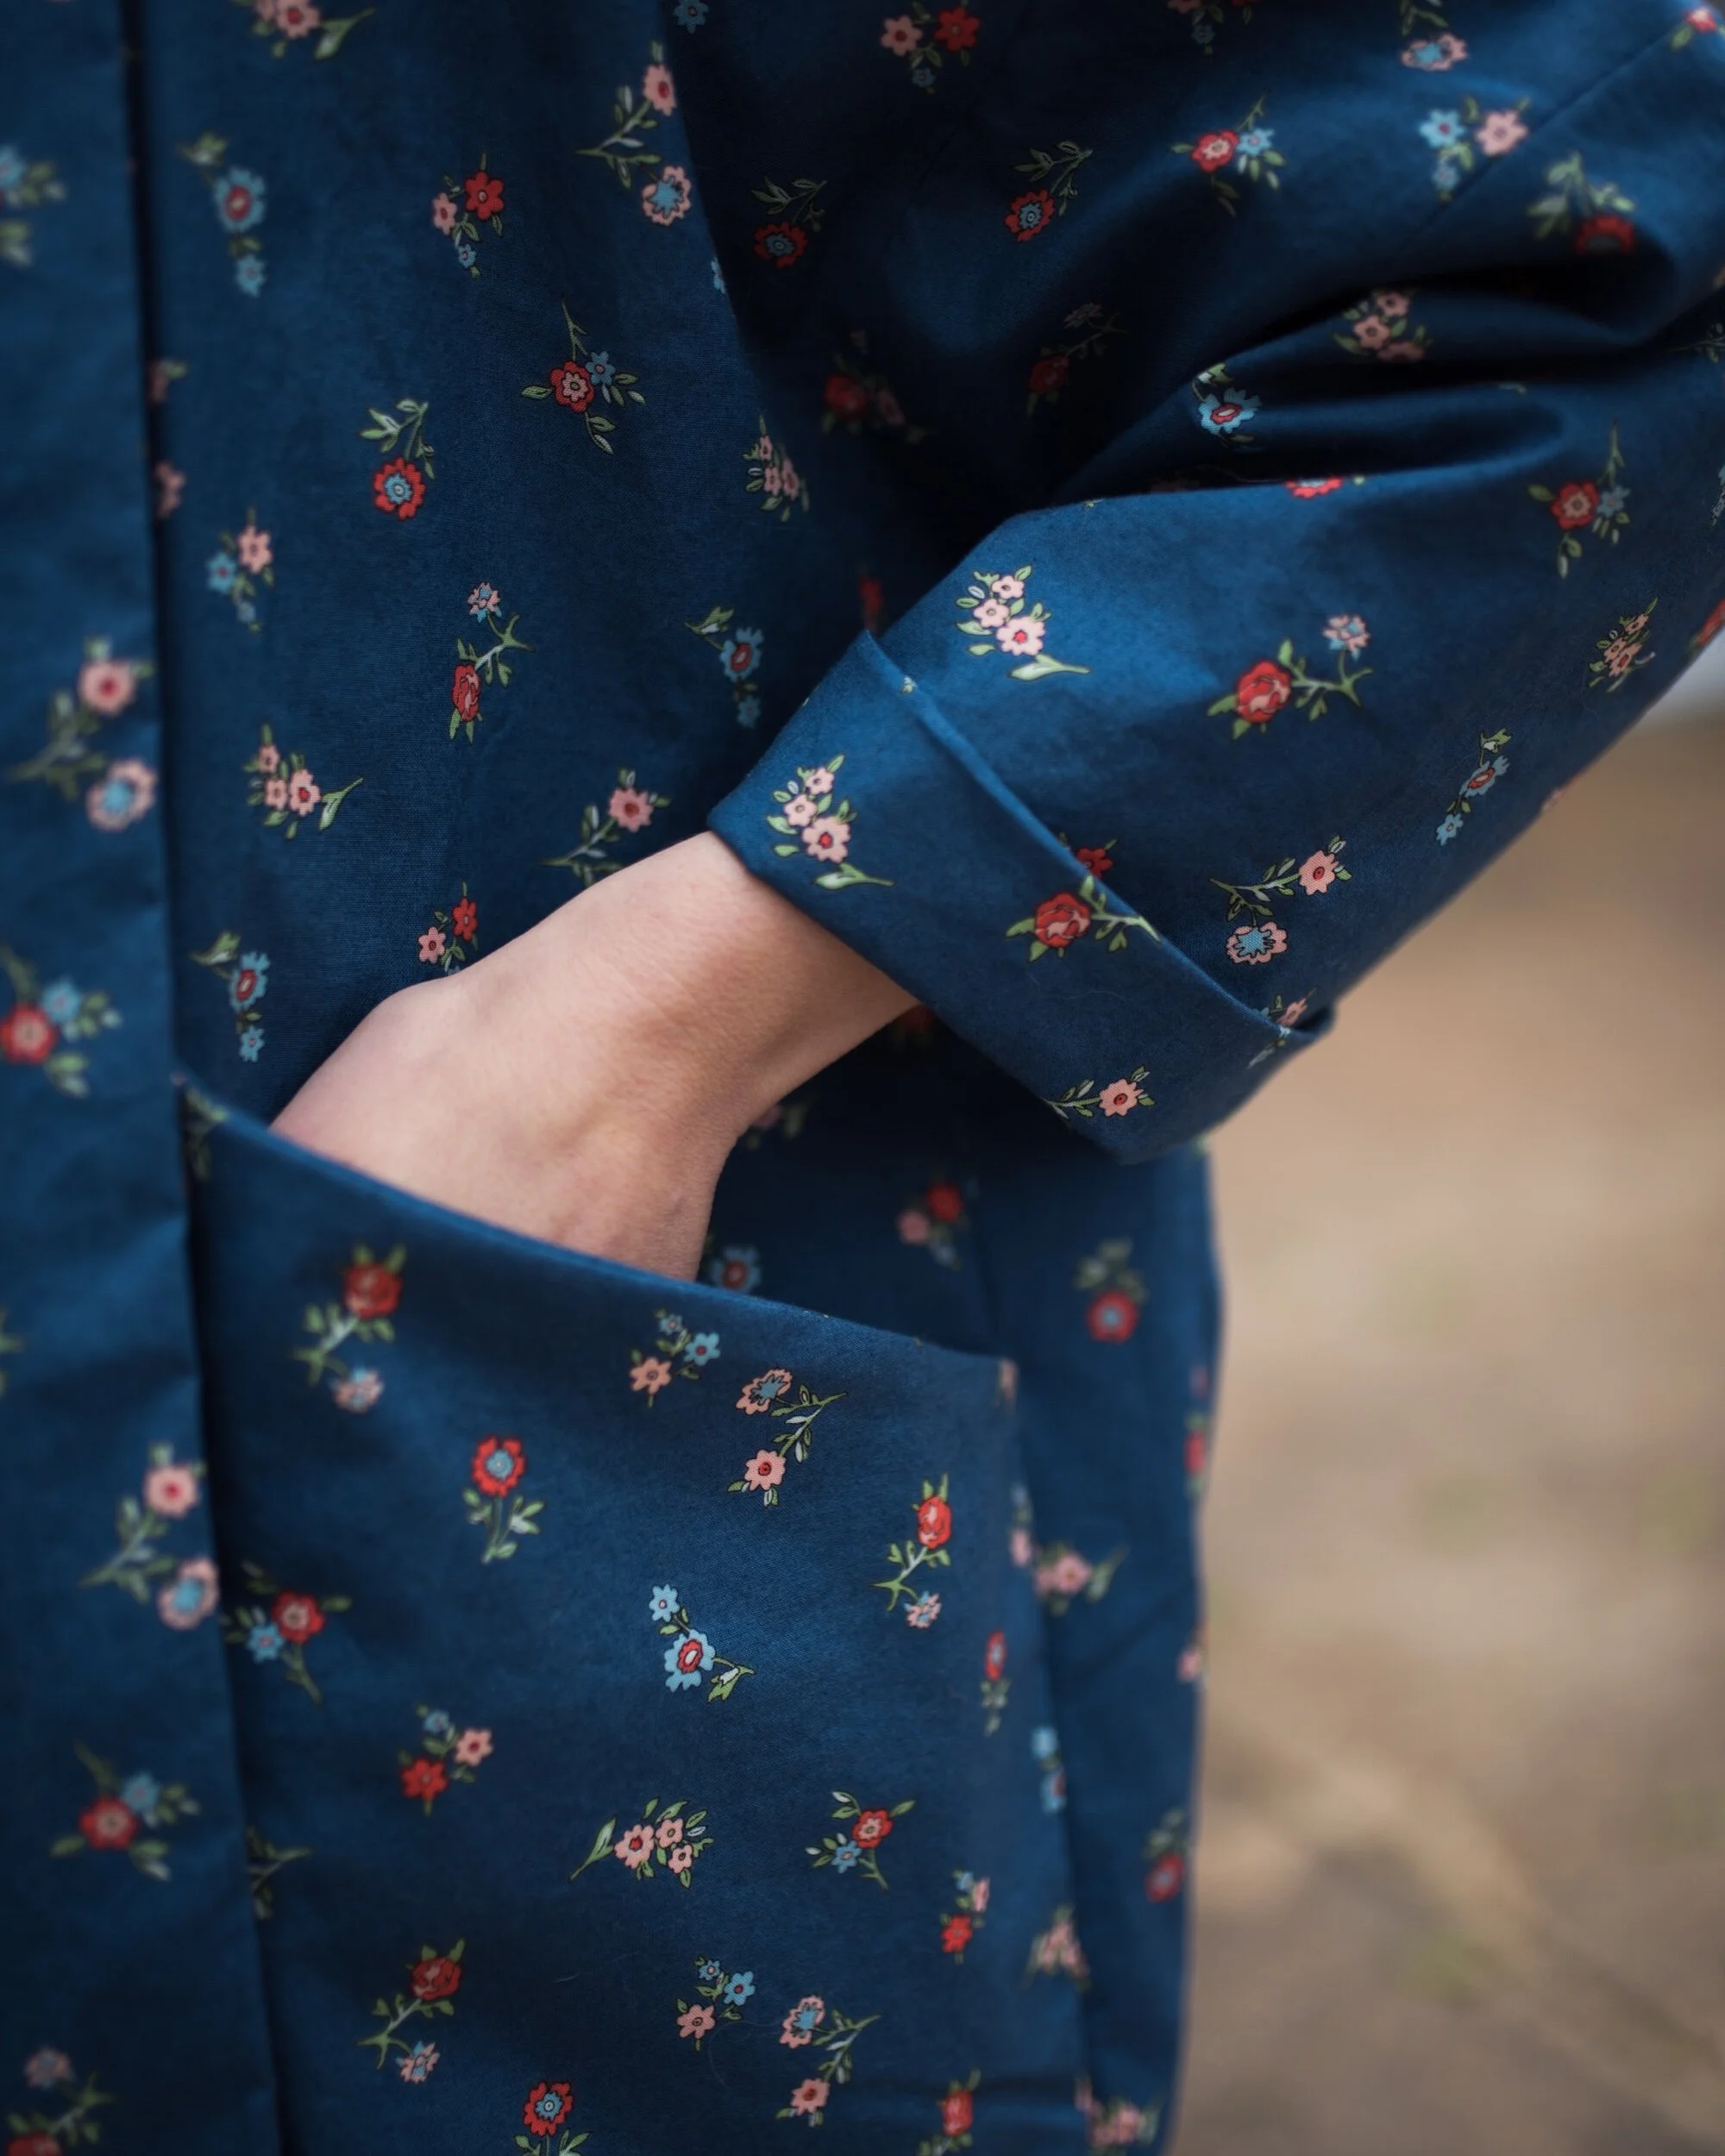
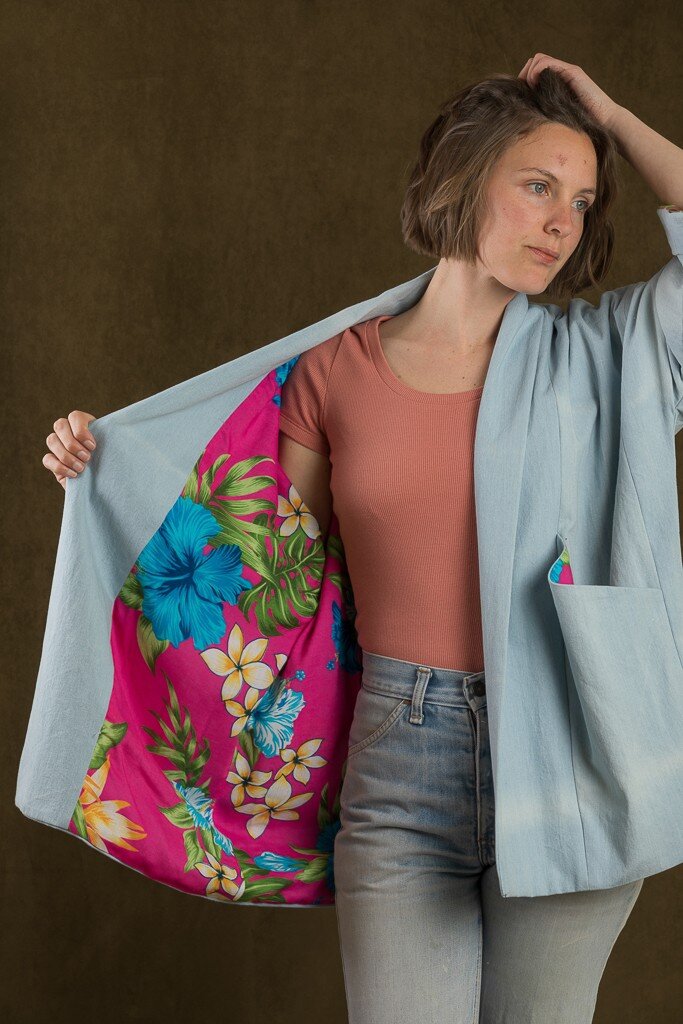
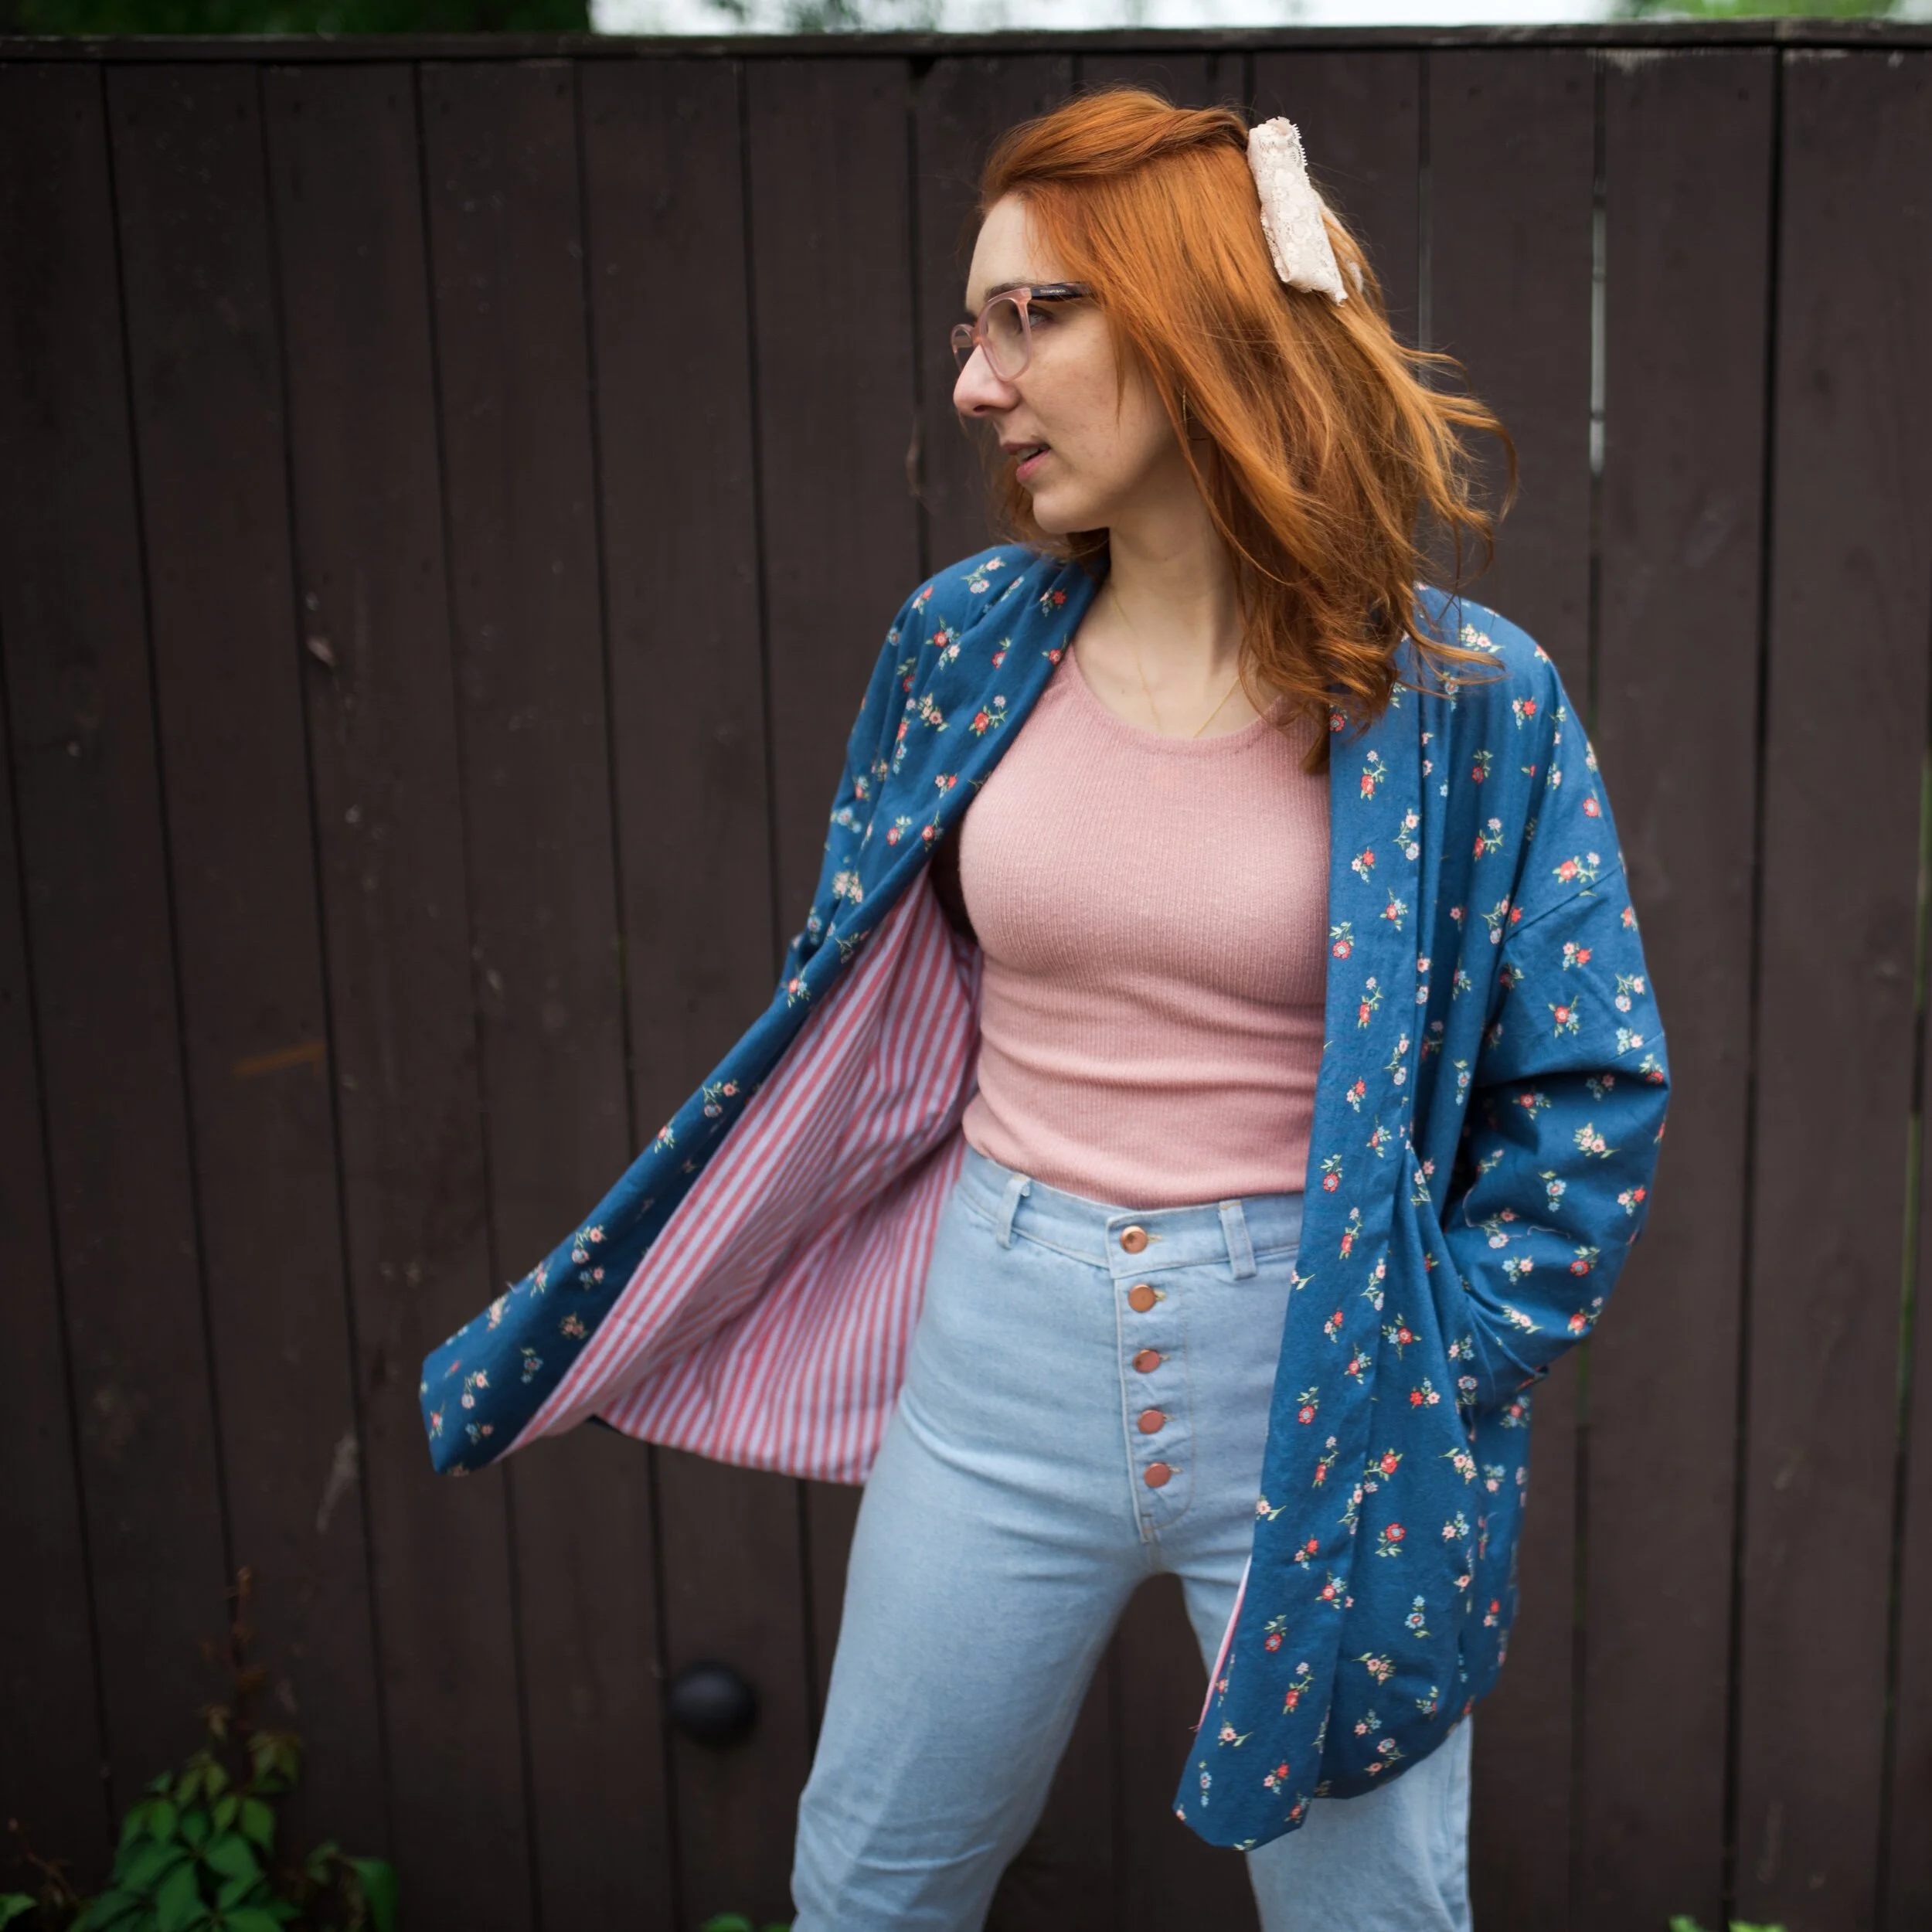
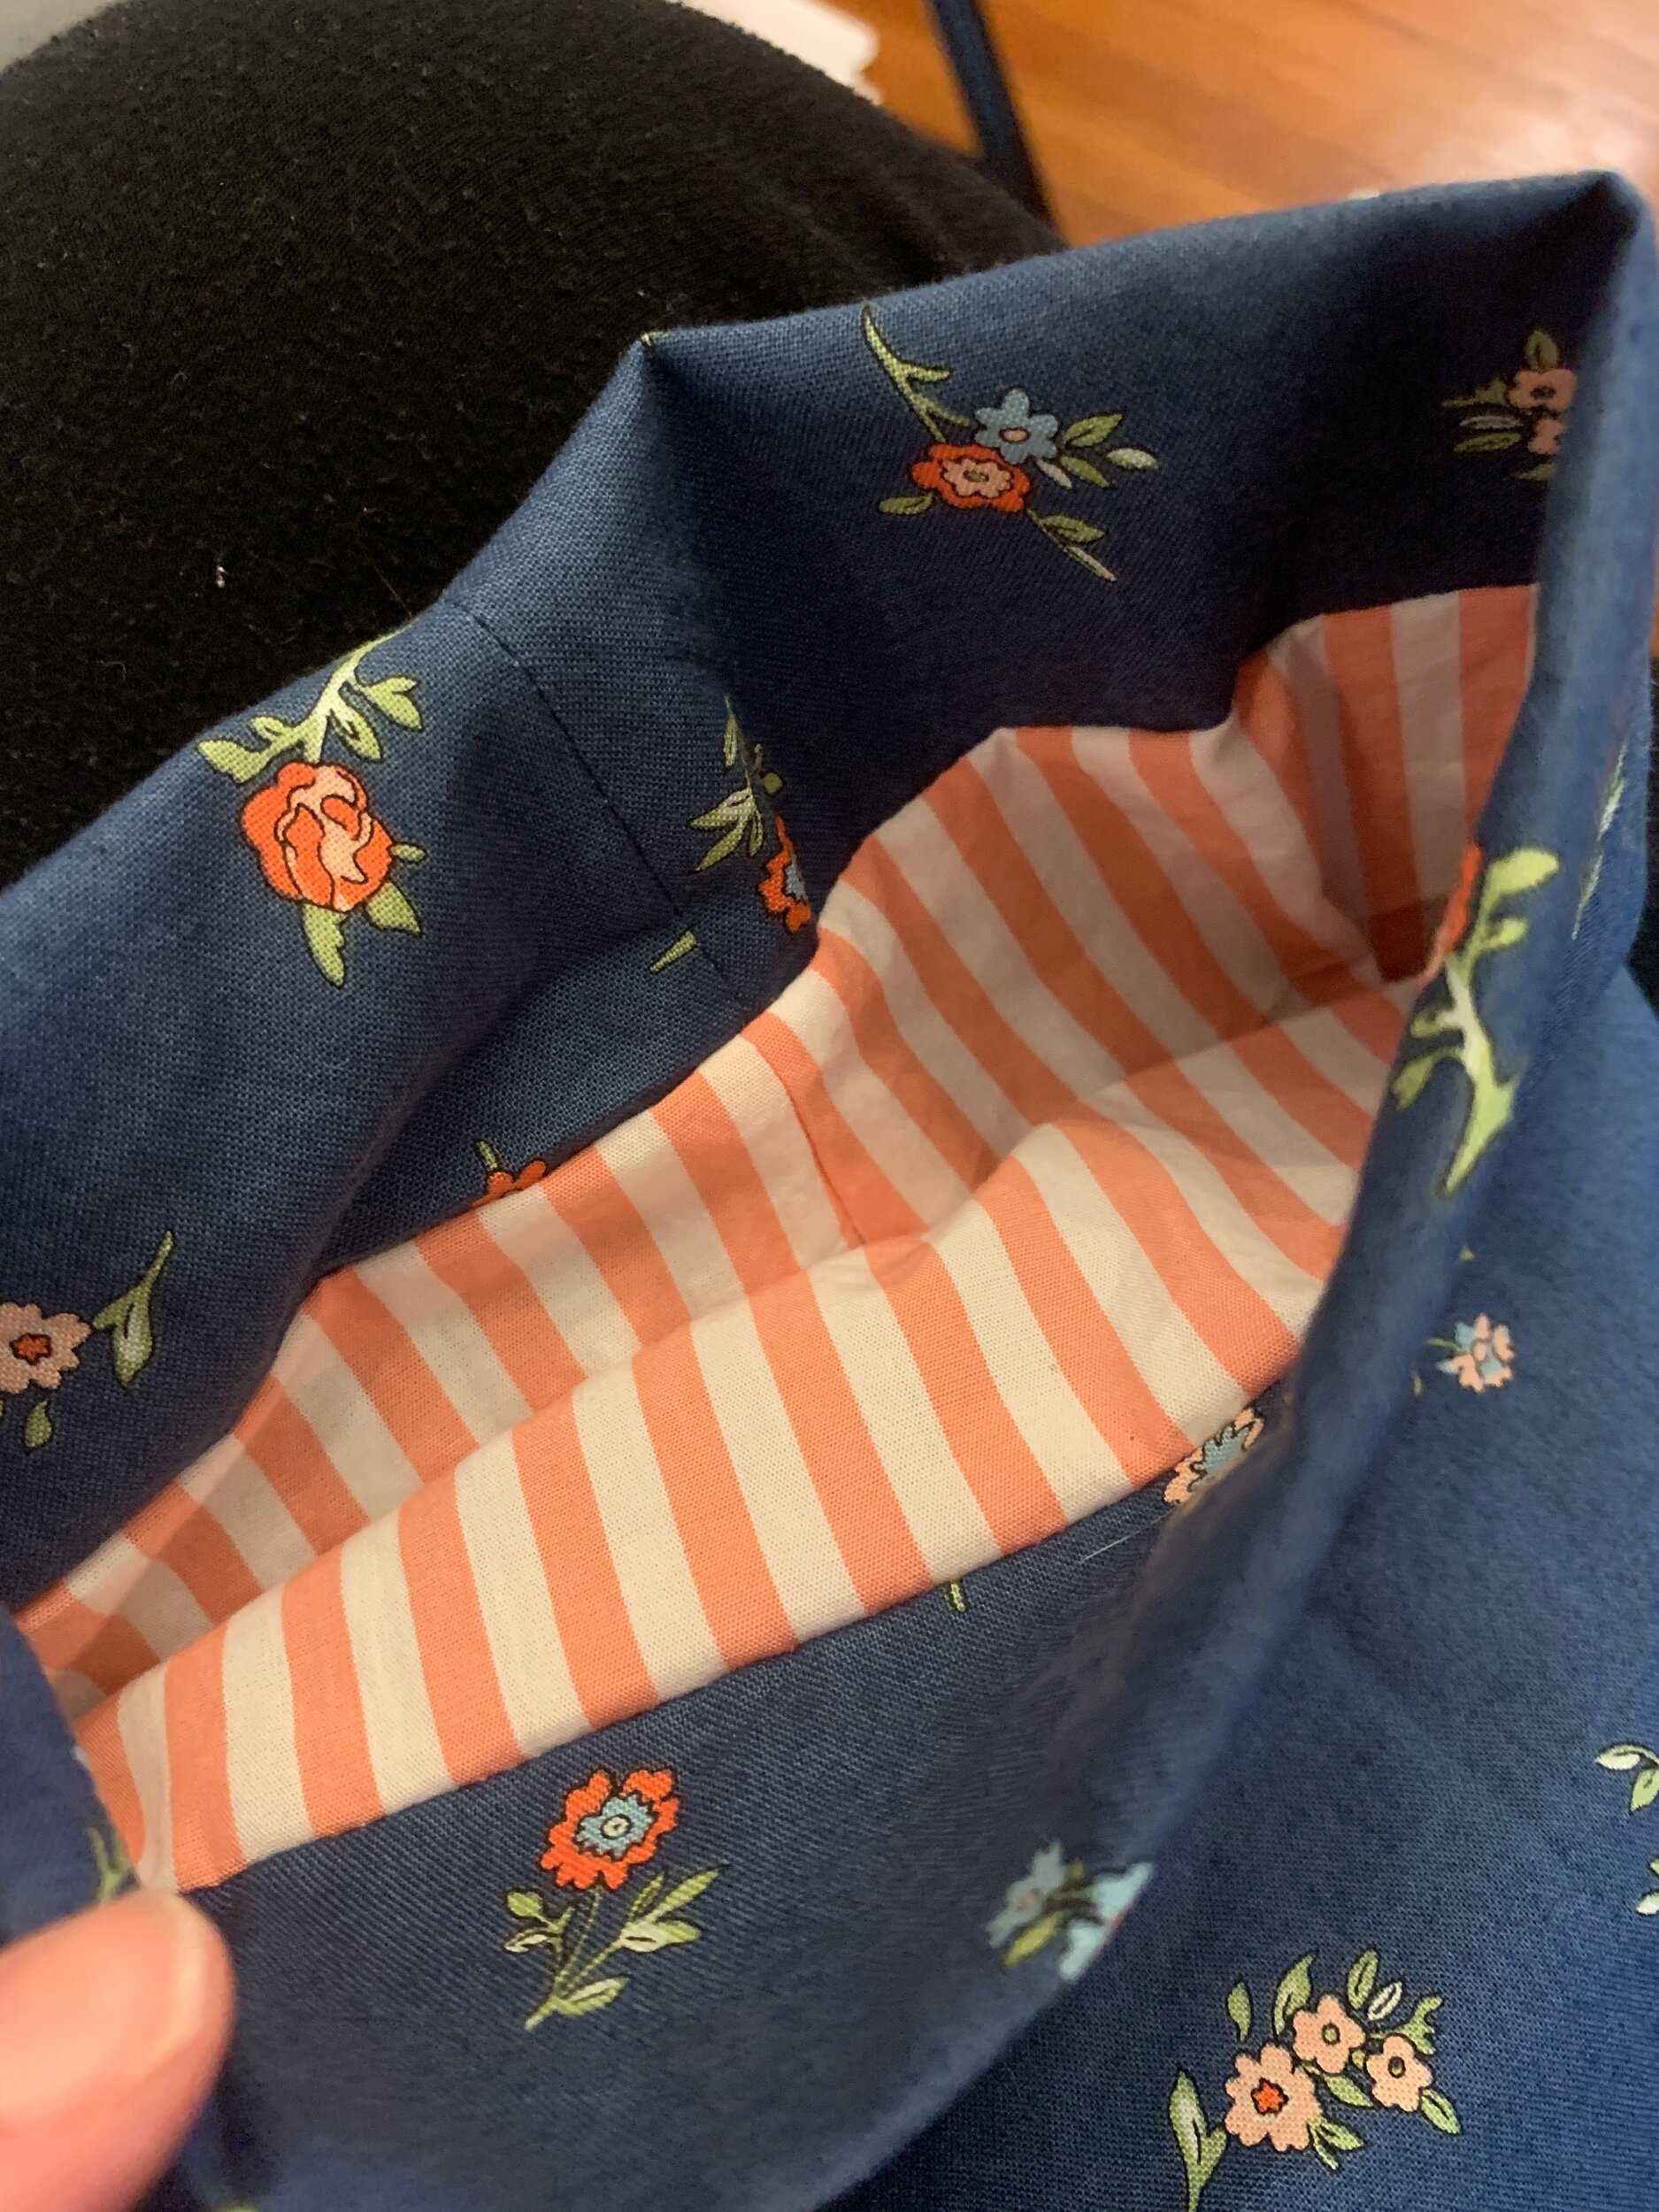
Fabric choice: I went ahead and chose some quilting cotton which is not mentioned in the fabric suggestions but I knew it would make a nice light exterior. It is actually Liberty of London purchased a while back from Guthrie and Ghani! The lining fabric is some cotton shirting from The Fabric Store Online. I made the second view of the pattern, even though it is more meant for the cooler temps, because I liked the folded over collar, length and rolled up sleeves. It’s still very lightweight and cool to wear indoors in the warmer months. I am always cold so this will be a good transitional piece! There are plenty of fabric suggestions for this jacket in her pattern! I think linen, denim, cotton twill, or anything from a natural Fibre would be just lovely!
Simplicity of the pattern: First of all, I love how these patterns have very attainable supplies, and limited notions. I think that sewing can be so simple. This is really bringing beautiful patterns to the beginner and I love it! I really appreciate the simple lining as well! For a nice jacket, I think that is more or less required. However, even the lining is so simple! I have made some jackets without it, but will admit that it is so much more lovely with a lining! Every piece that is included is purposeful and functional. The pattern pieces make sense and are not difficult to recognize or work with.
Construction: This coat took me just a few hours in one afternoon, start to finish!!! I couldn’t believe it! It is just such a smooth construction. One of my biggest pet peeves is when pattern makers do not tell you when and where to serge ahead of time or at the time it is needed. This makes the pattern a bit more stressful because you have to read ahead a lot more and really think about the finished edges. In all of her patterns, she tells you where to serge and when in the very beginning or when you need to know! For this pattern, I thought it was odd, we didn’t need to finish any seams right away but now I know why! It is because they are all pressed open beautifully and on the inside due to the lining, so there is no need! I mean making this jacket felt like butter! Every stitch is purposeful. I feel that there is no unnecessary stitching. By that, I mean the way things are put together is the most efficient way. One row of stitches can be made when other patterns would have you do two. I hope this makes some sense! For example, there is no need to understitch if you are going to be top stitching something down after it is folded to the right side. Just love it when unnecessary tedious steps are taken out. I just felt like the flow was fantastic. Also, when I switched my thread to do the lining, I never had to switch back to the original color! I mean that is a huge plus. The pattern instructions will be a breath of fresh air and this truly was an enjoyable make!

Bagging the lining: This is by far the most simple bagging of a lining I have ever done! The hem was not complicated at all. The sleeves folded beautifully to the inside with their pre-pressed fold and the lining sitting perfectly on the inside! The best part of this process is that there are no confusing pictures to follow, but an intricately detailed, super easy youtube video linked within the pattern! The only thing about this is that you cannot just print out the pattern and be done with it. I look at all of my pattern instructions on my iPad anyways because I don’t want the trouble of printing them on paper and then having to store the instructions somewhere. You can also look at instructions on your phone or a nearby computer. Or you can still print them and just go to the youtube video when you need to! Bagging the lining took about 30 minutes and I was done! It is very simple and just falls into place.
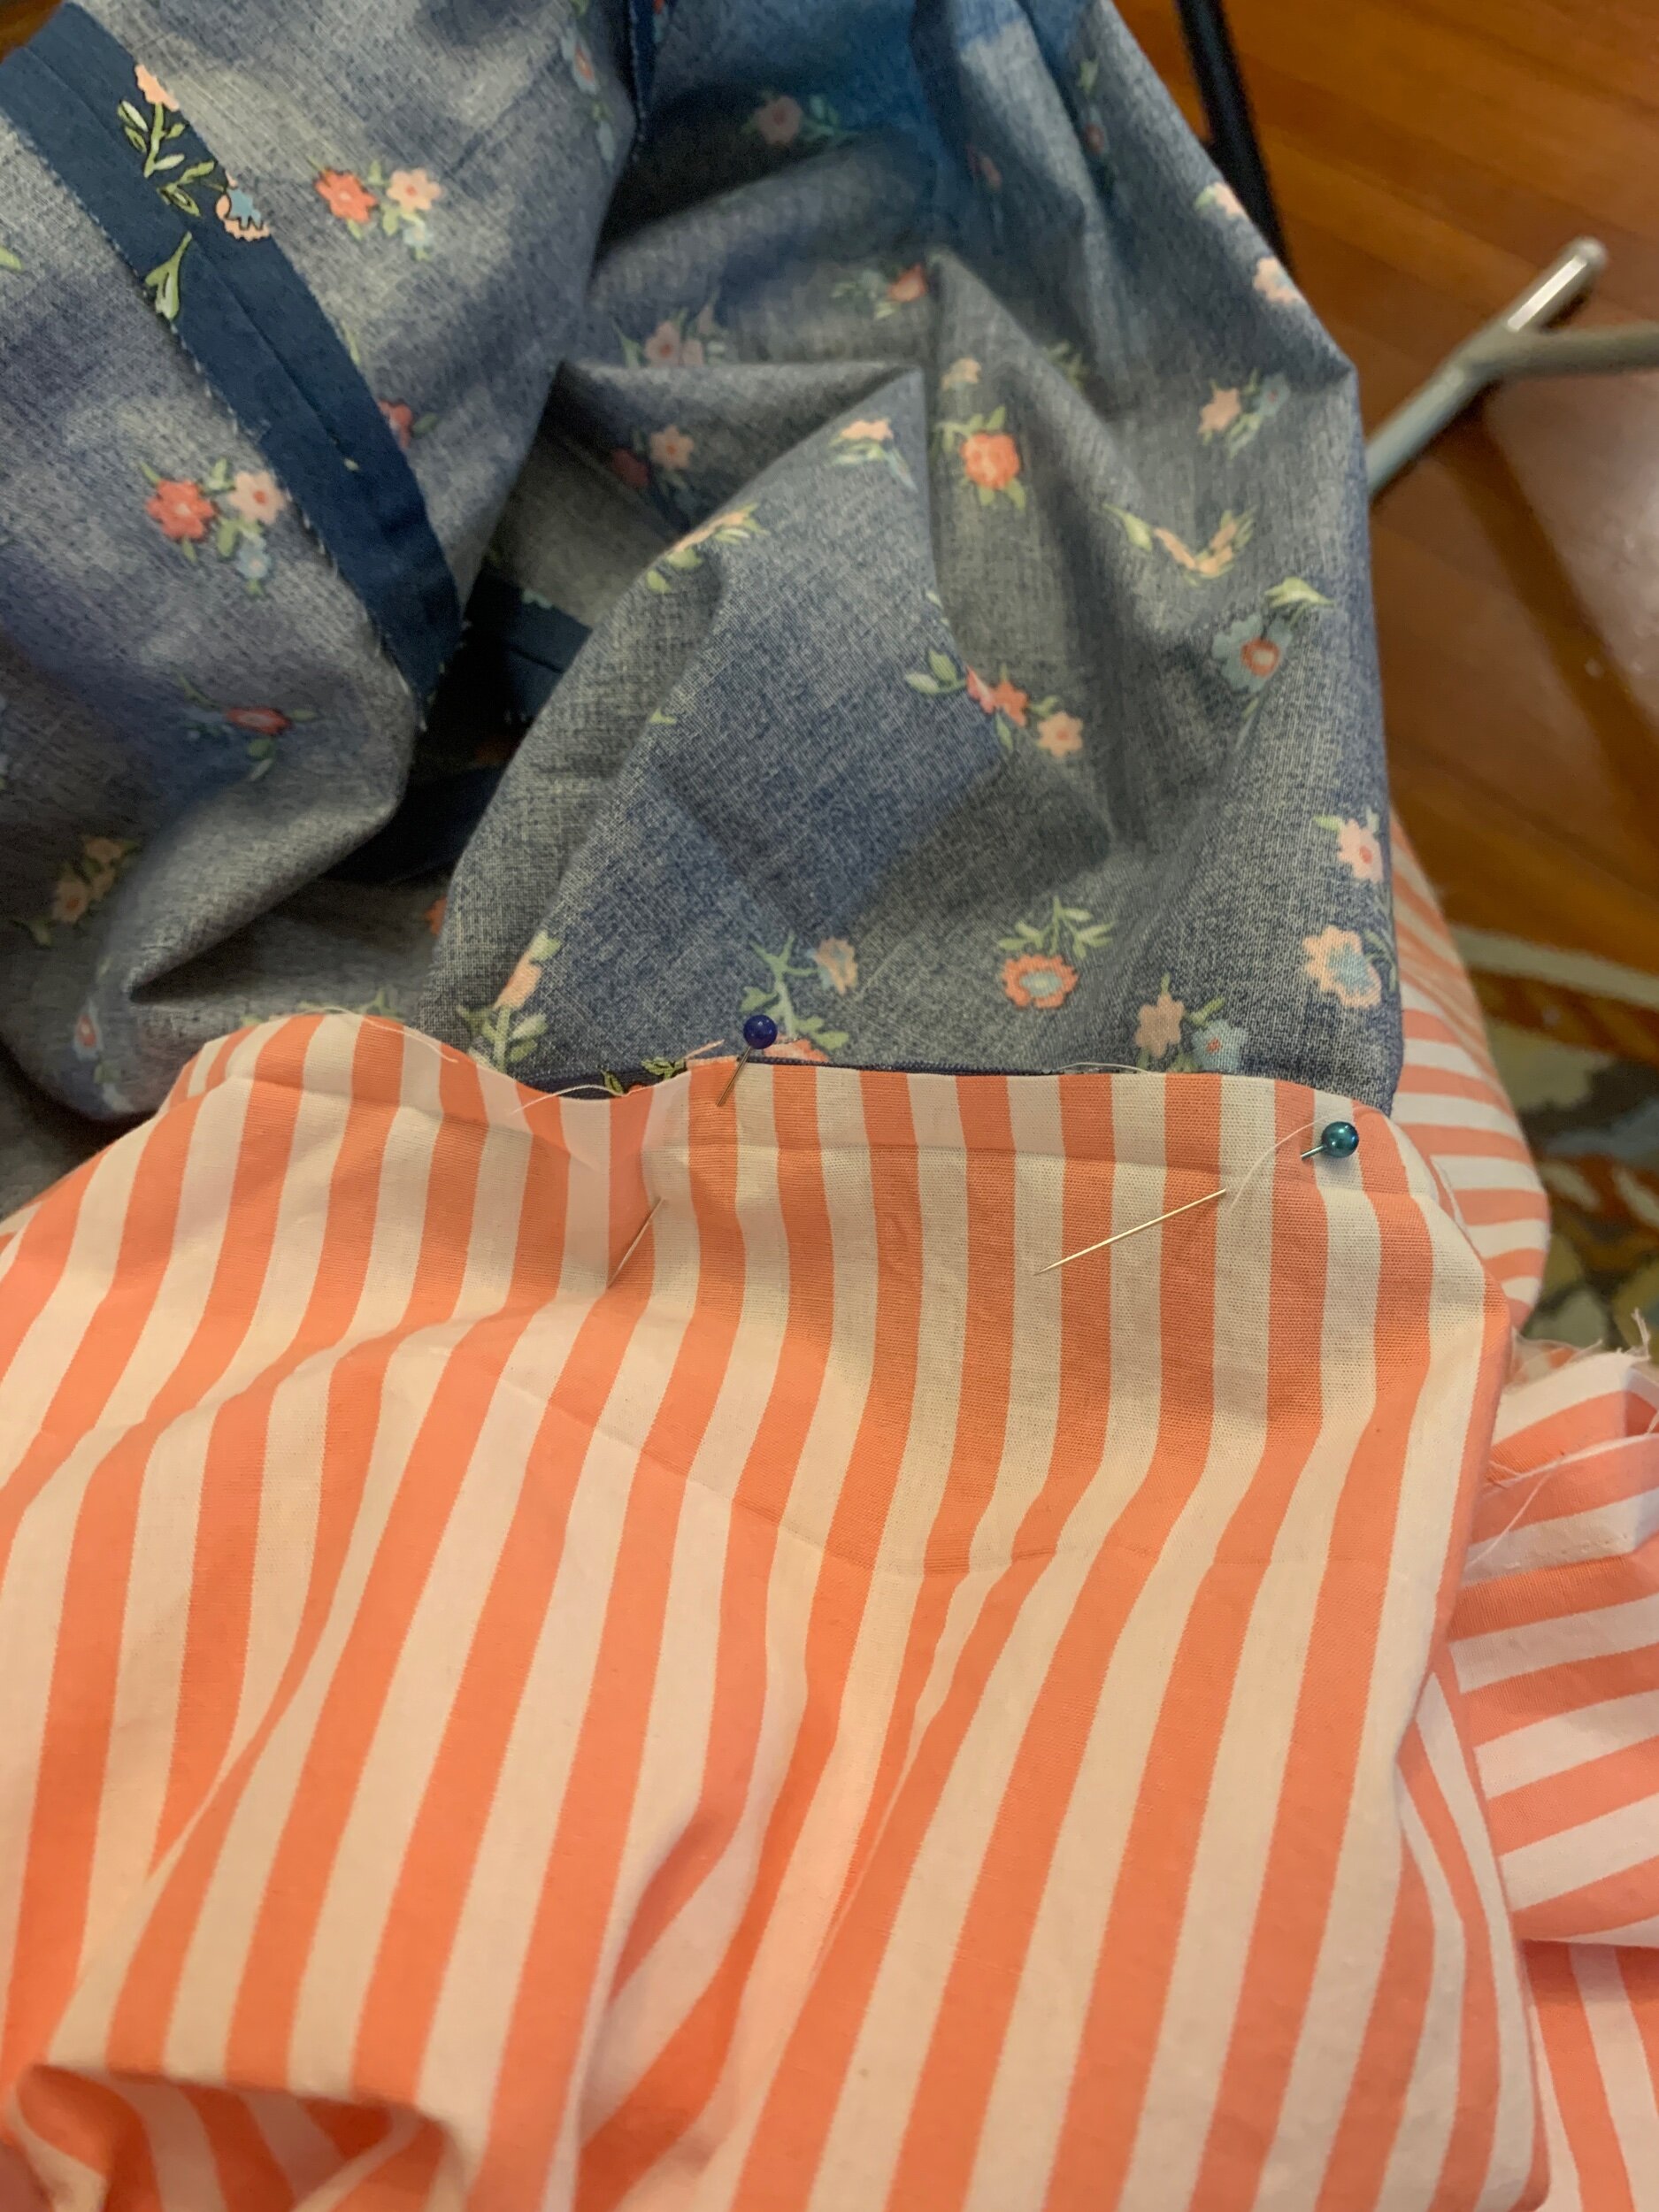
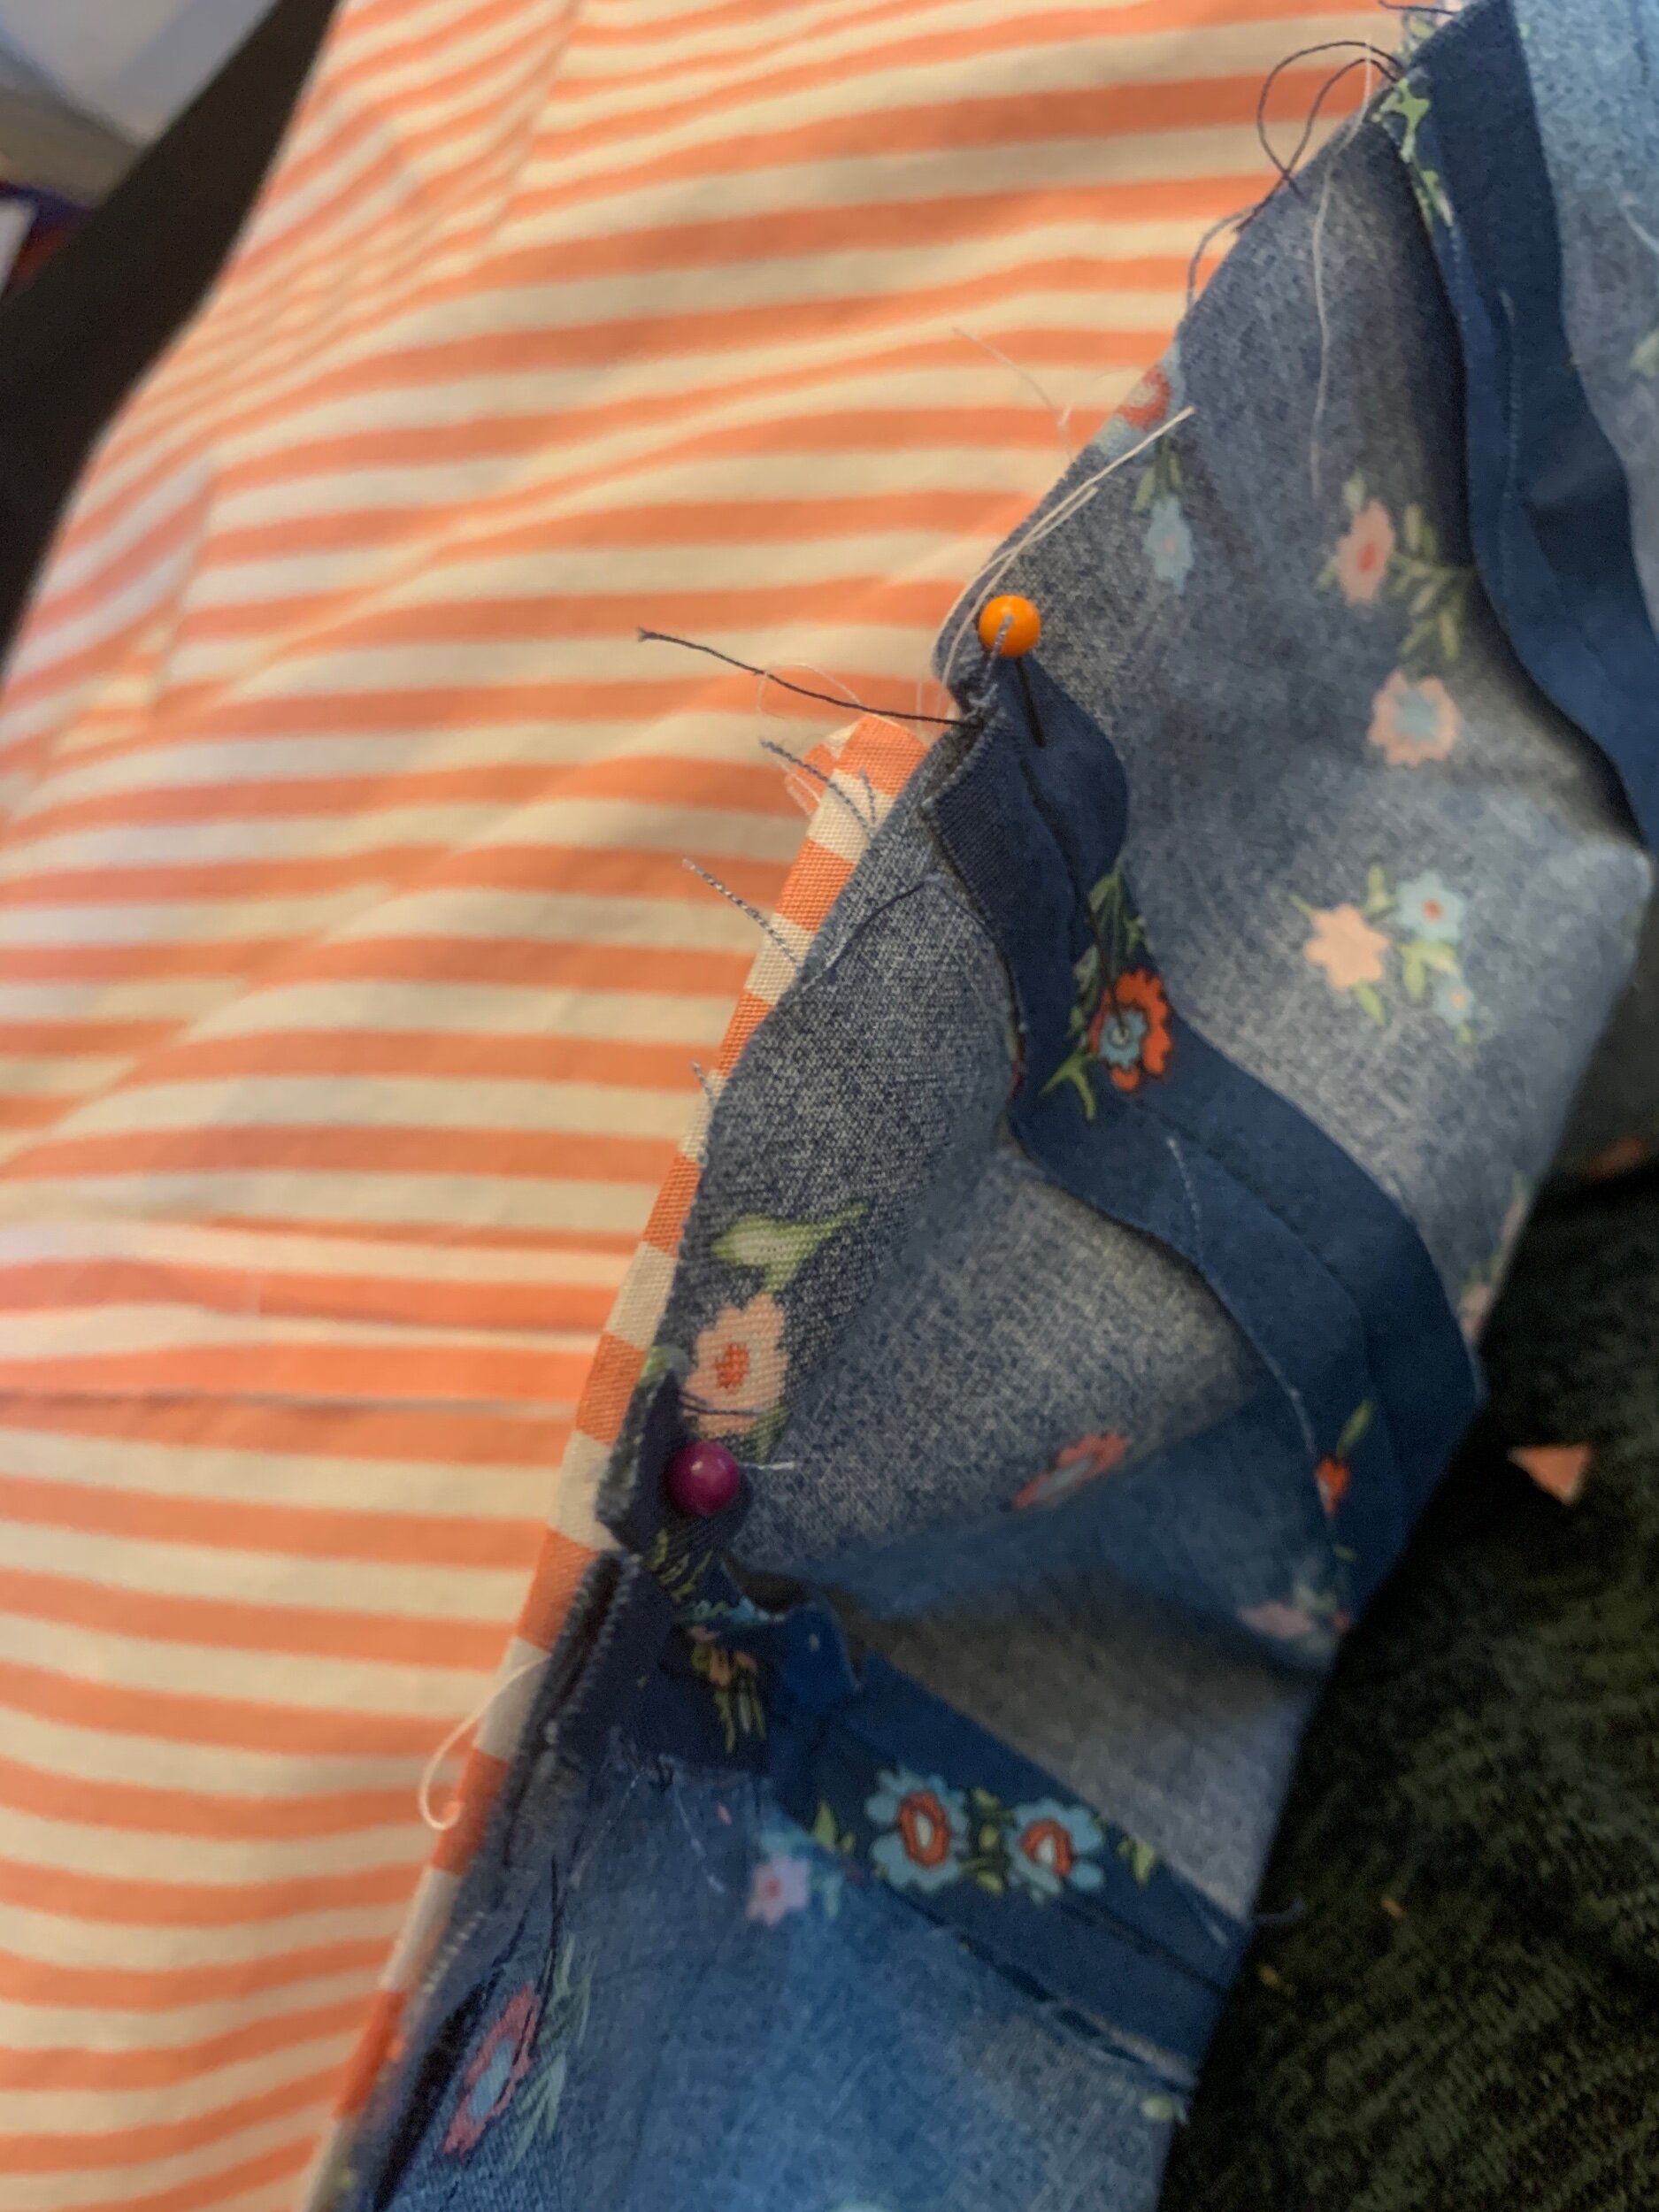
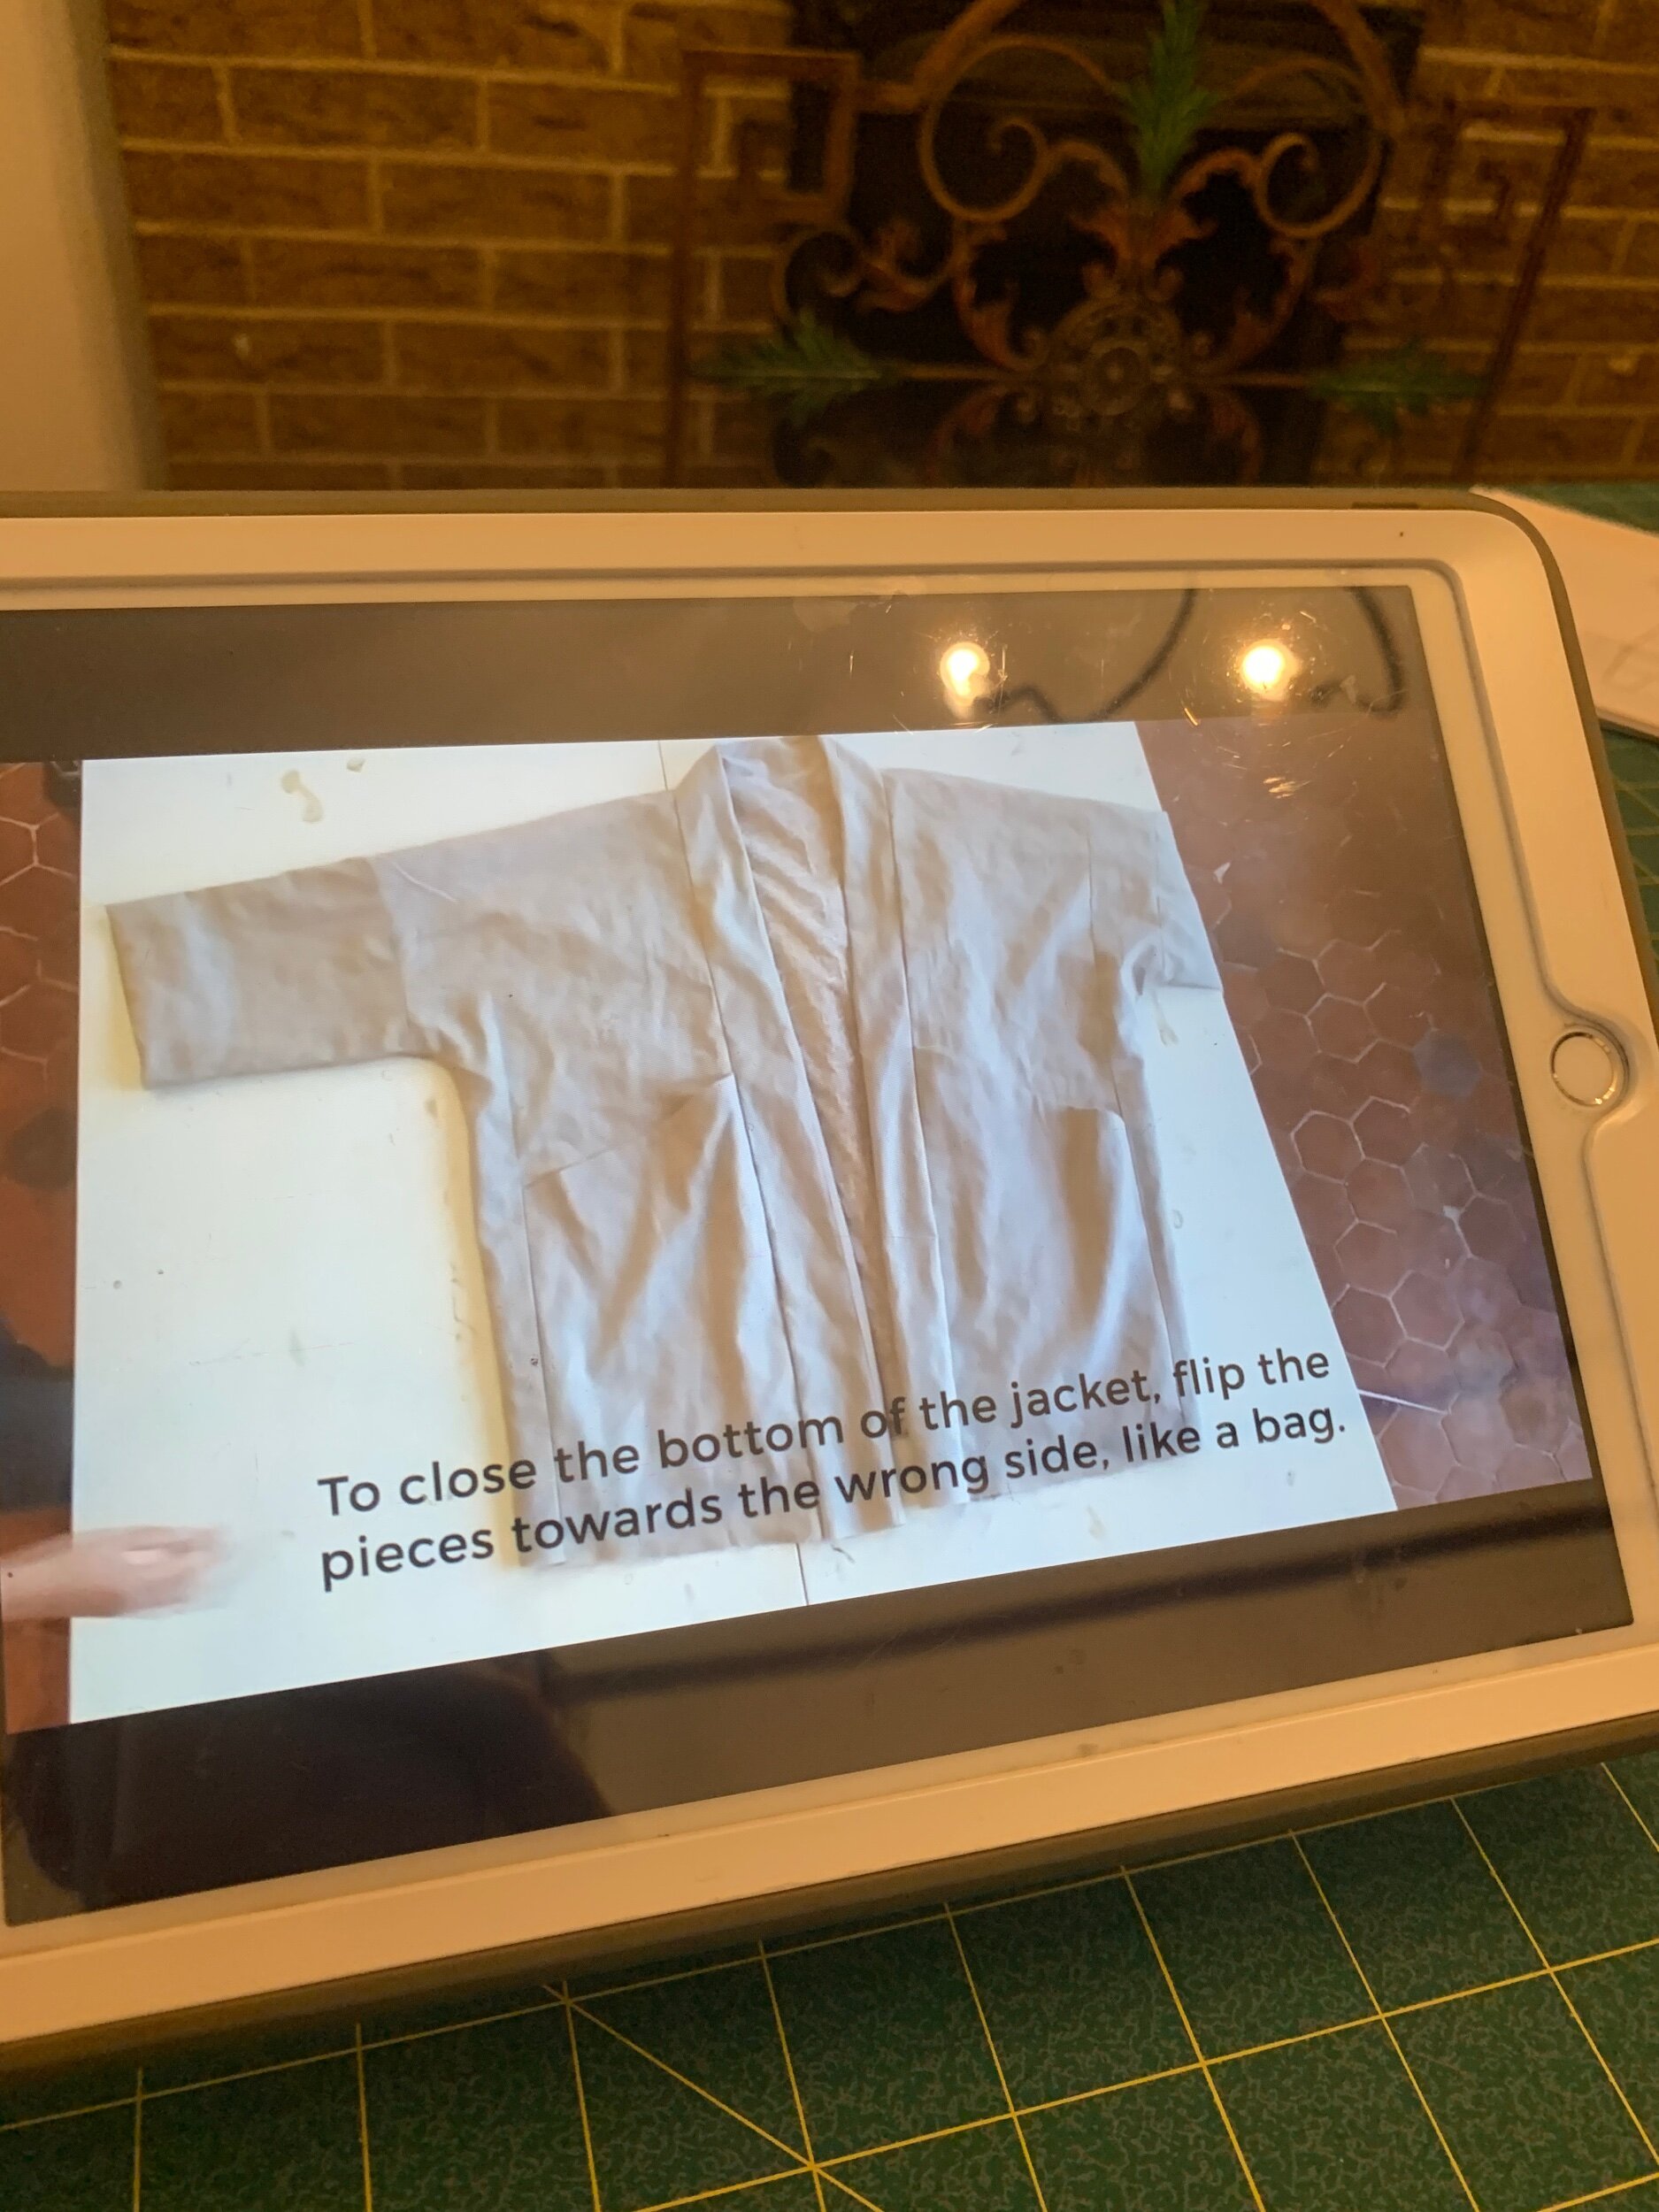
After this step, the jacket looks so neat and wonderful! You just have to hand stitch the opening that is left and then hand stitch on a nice little label and press! The pictures below show some of the steps included in attaching the lining. Of note, not shown here but in the video, you will be folding the facing back onto itself when you are putting together the bottom hems!
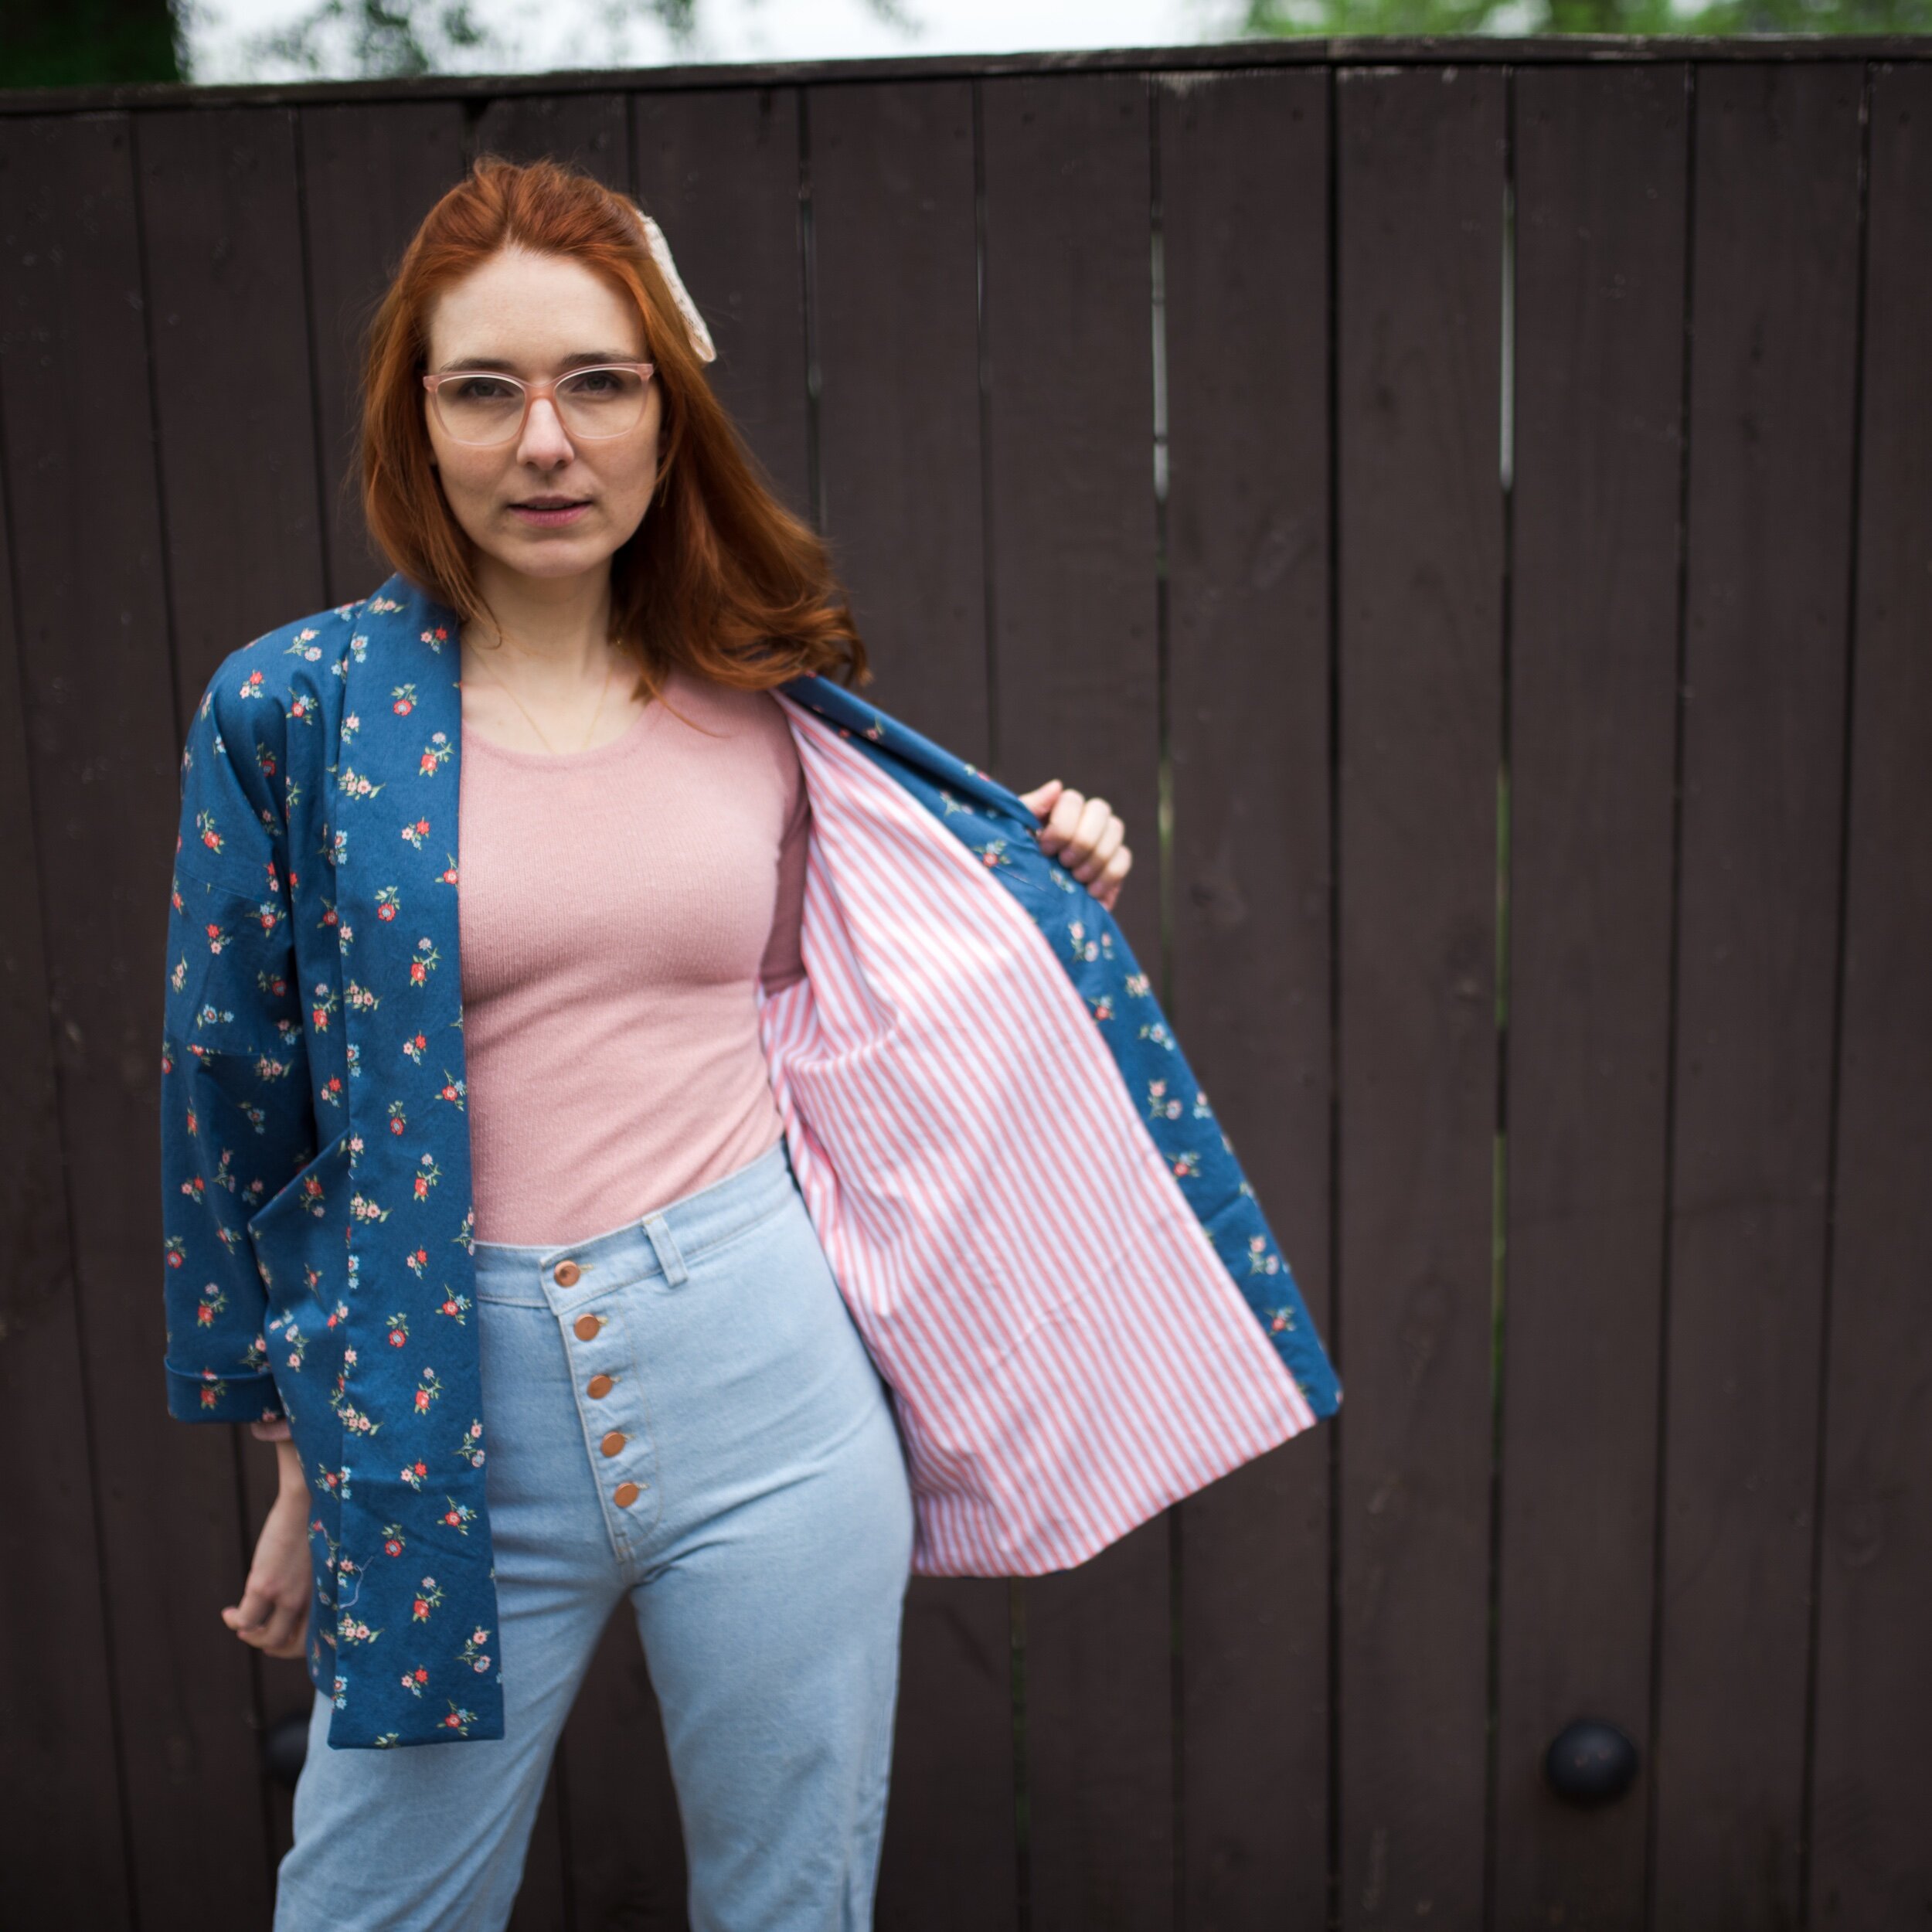
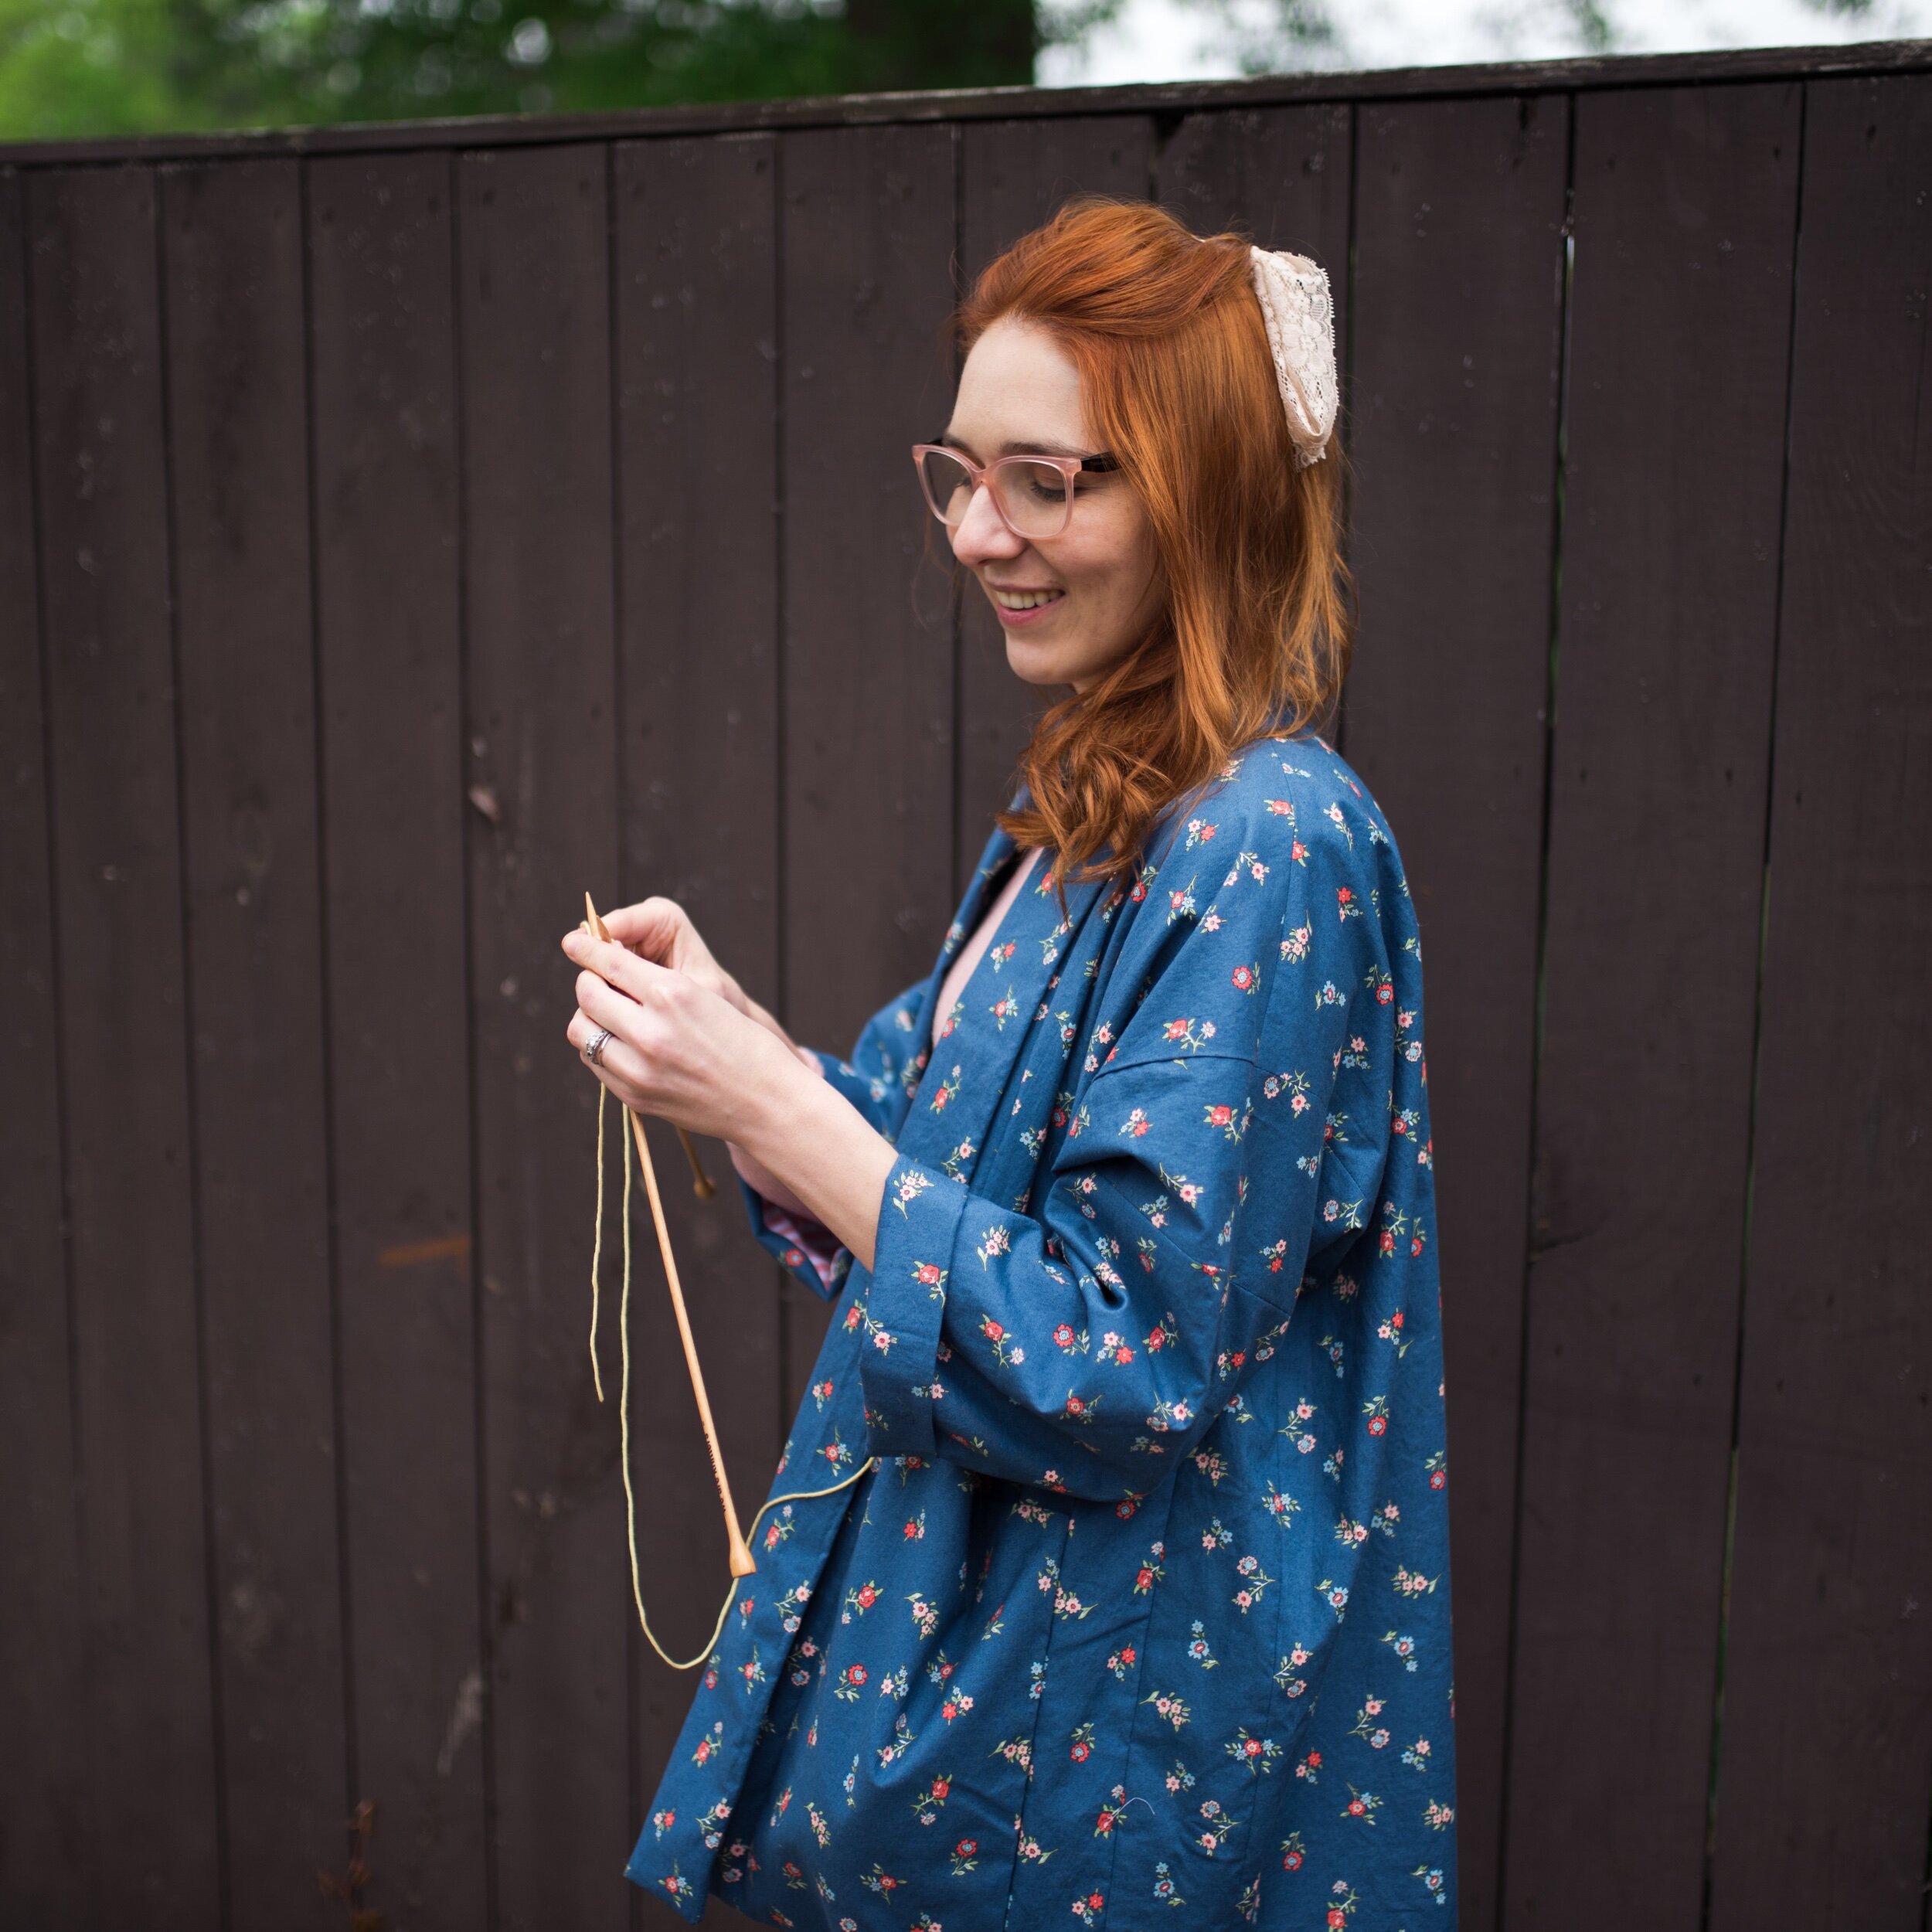
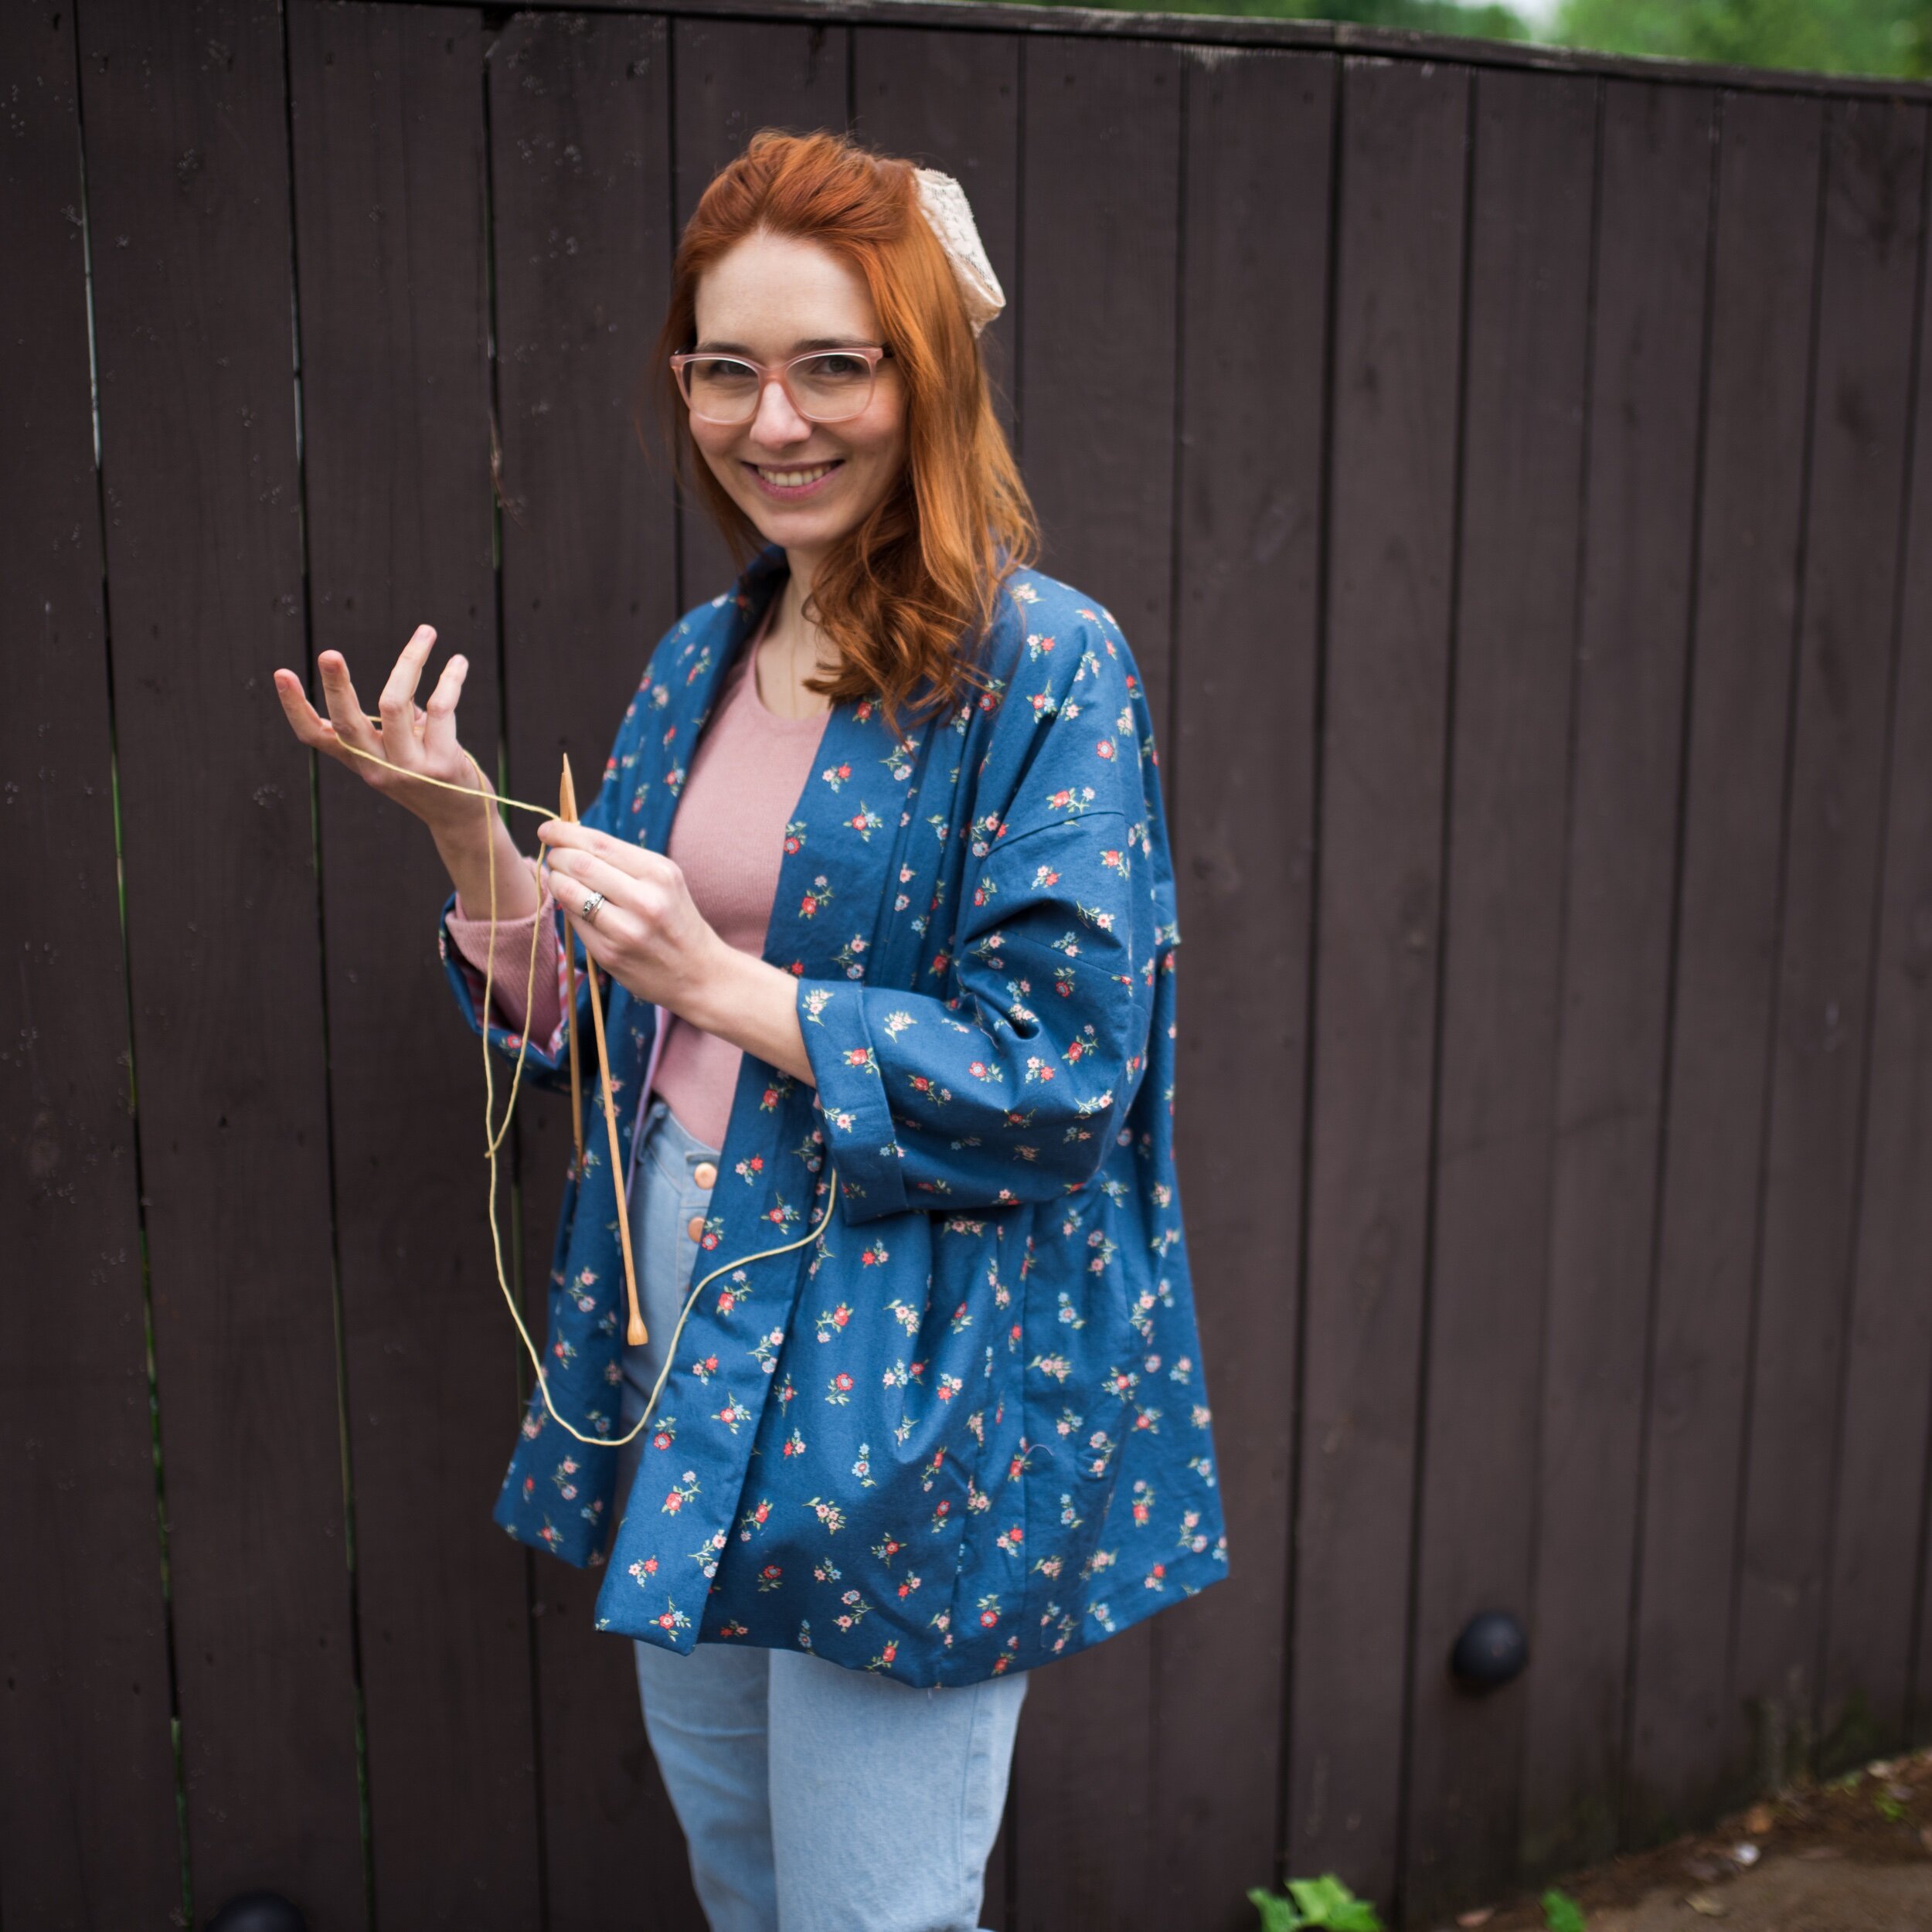
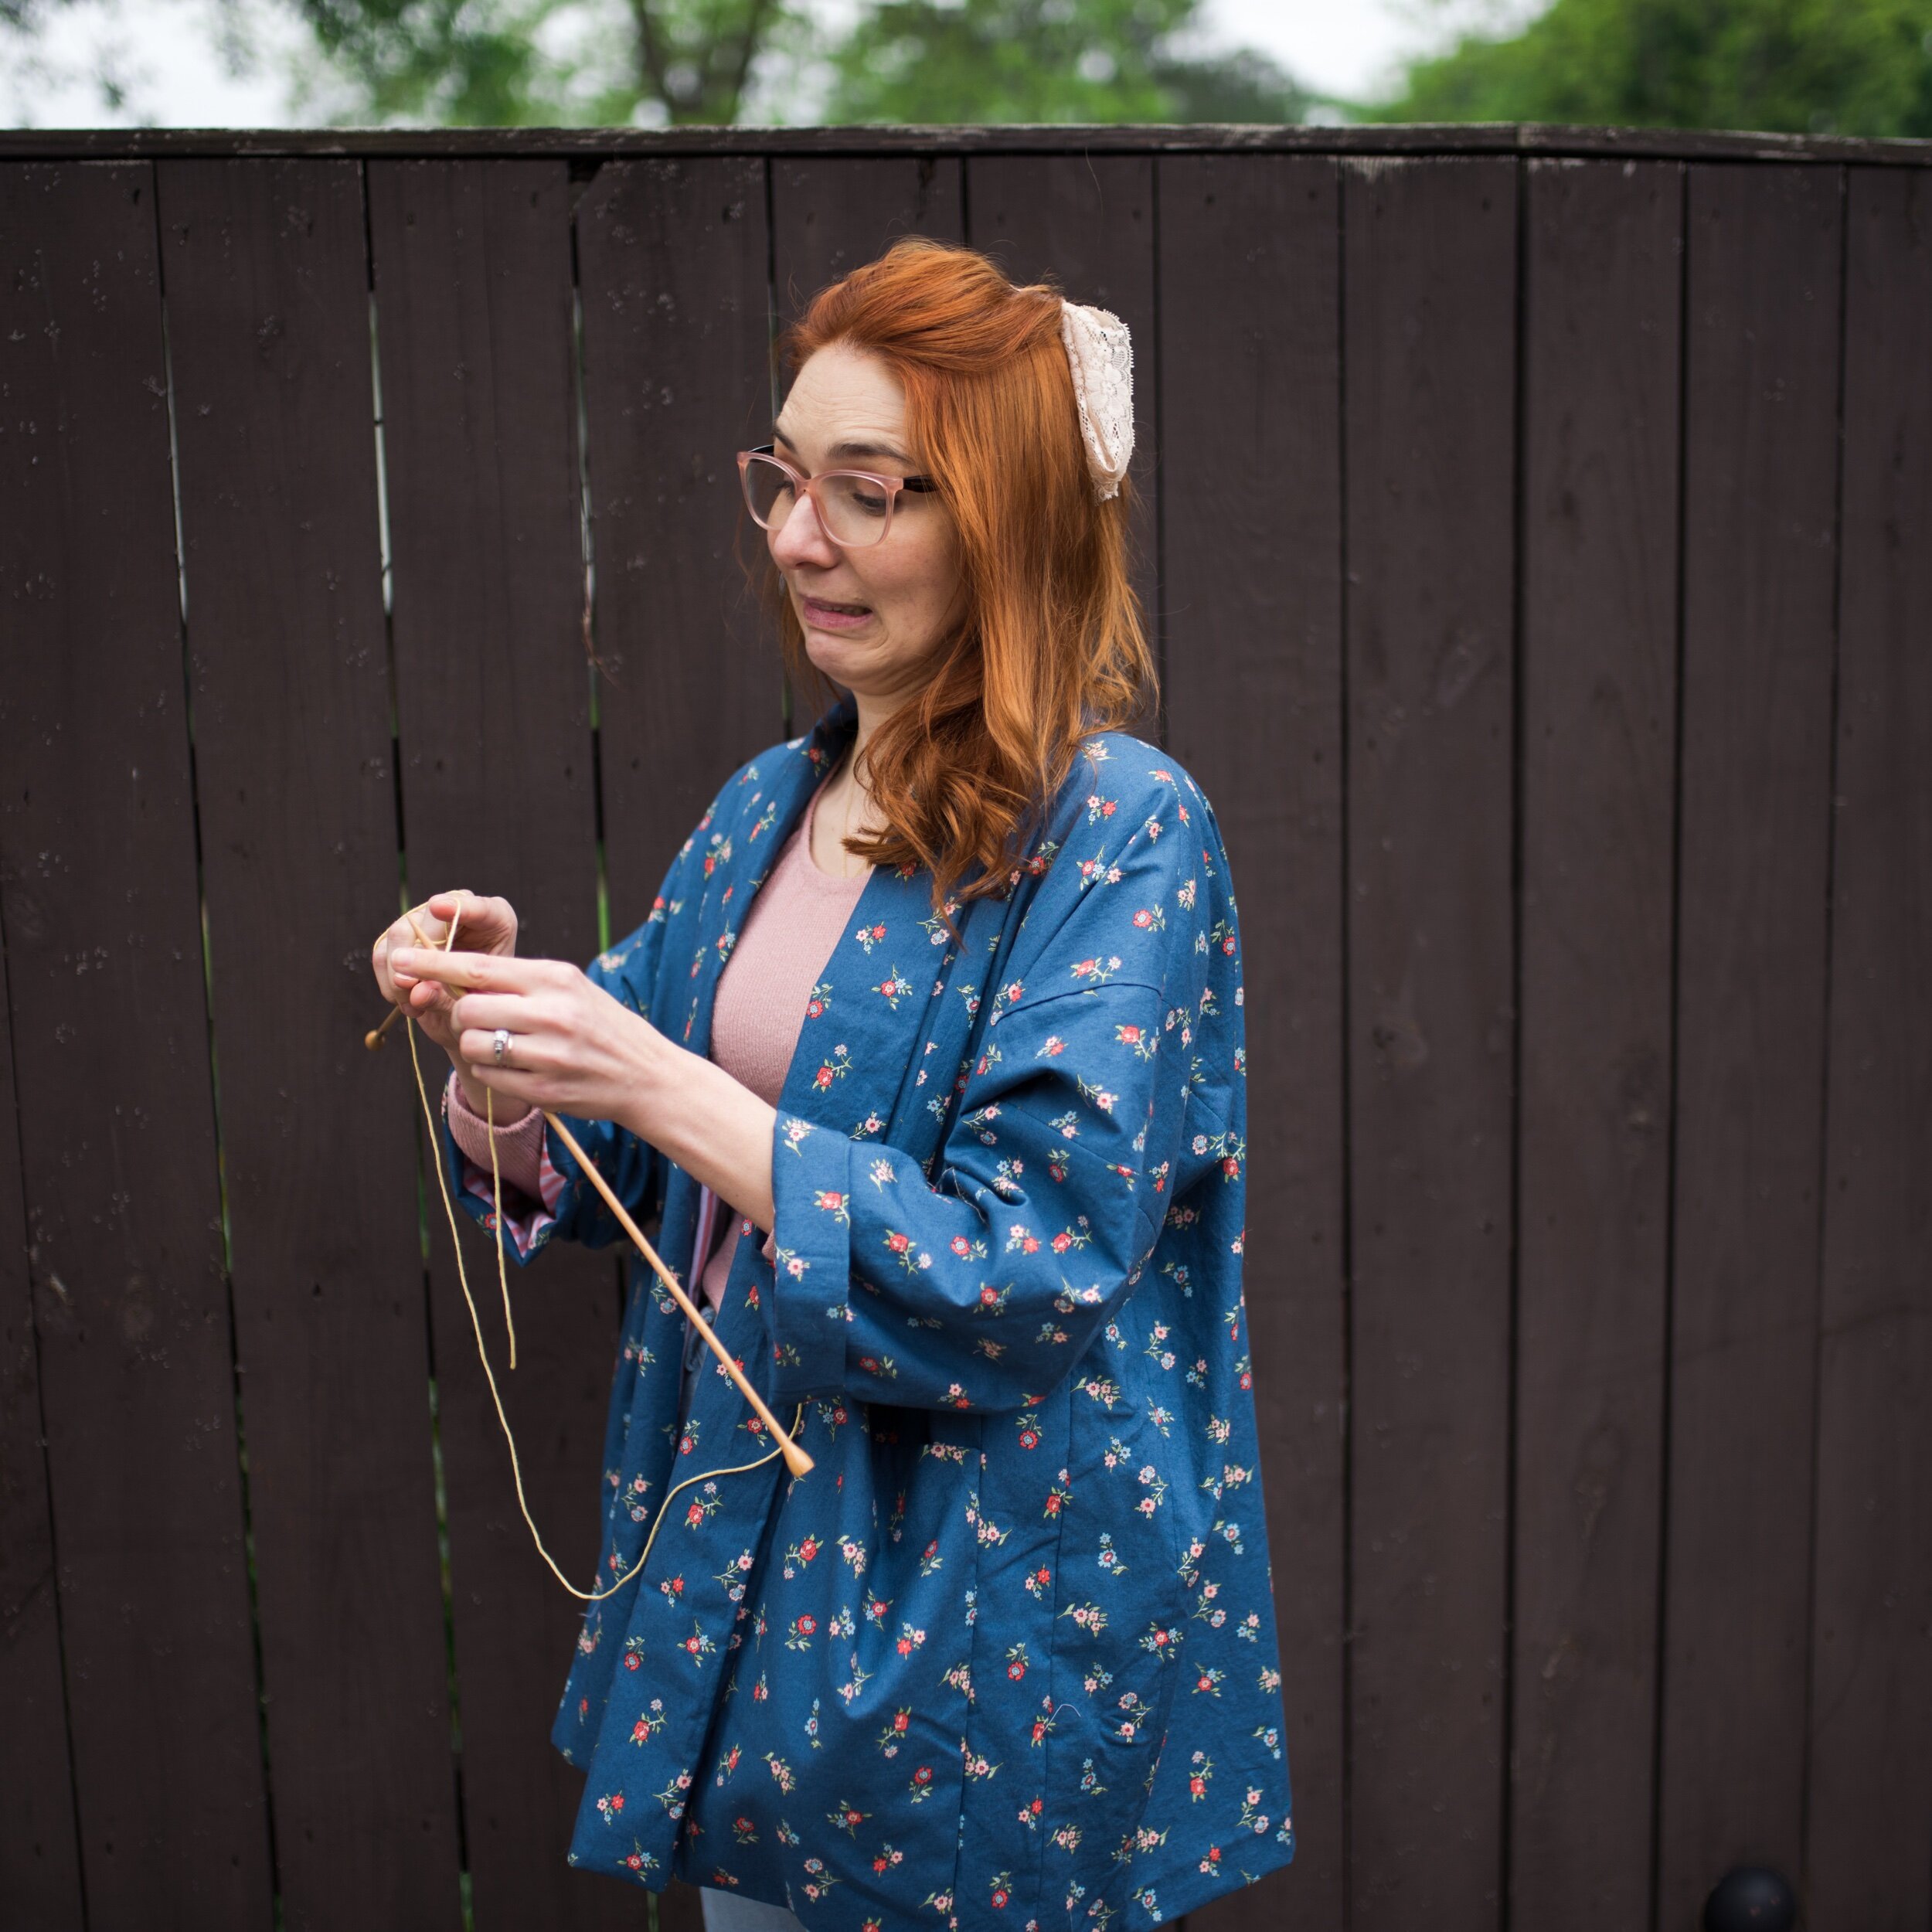
Fit: I love the fit!! I wanted it a bit oversized, so I sized up a tad because I was in between sizes. I think as long as you are near your size range, the fit should be perfect. For my version, I didn’t really need to worry about sleeve length as they are rolled up. The length of the actual jacket was pretty much perfect and the shoulders sit nicely in place. And can we talk about the awesome pockets! Perfect for holding anything, including eggs! She has an awesome video on her page showing how many eggs she can fit in one pocket!!!! Also, its fabulous for yarn as you see below when I start casting on a project!

I hope that you all enjoyed this review! Overall, it was a very good pattern and I really enjoyed it! It was very easy and if you attempt this pattern and have any questions, let me know! She has a sew along and the youtube video linked in the pattern to help you through the whole thing! Up next…reviewing the Patsy!!
